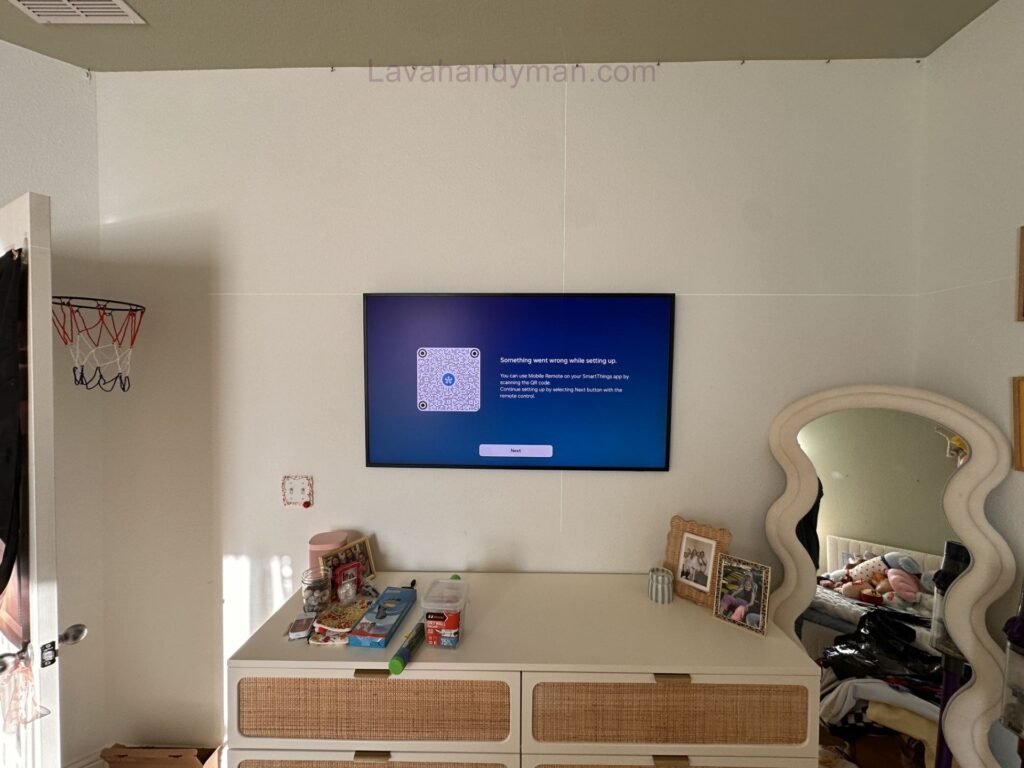
Professional TV Wall Mount Installation Using a Laser Level – Millimeter-Perfect Accuracy and a Flawless Finish
A professionally mounted TV can completely transform the look and feel of a room. Instead of sitting on a bulky cabinet, a wall-mounted television creates a clean, modern appearance while saving valuable floor space. However, professional TV wall mount installation requires more than simply drilling holes and attaching a bracket to the wall.
Accurate measurements, the correct TV wall mount, proper hardware, wall inspection, cable management, and precise alignment are all essential for a safe and professional result. One of the most effective tools for achieving accurate alignment is a laser level.
Using a laser level for TV mounting makes it much easier to position the wall bracket perfectly, maintain a straight horizontal reference, center the television, and achieve a clean finished appearance.
In this complete guide, we will explain how to mount a TV on the wall professionally using a laser level, how to choose the correct mounting bracket, how to measure the TV position, how to identify suitable mounting points, and which common mistakes you should avoid.
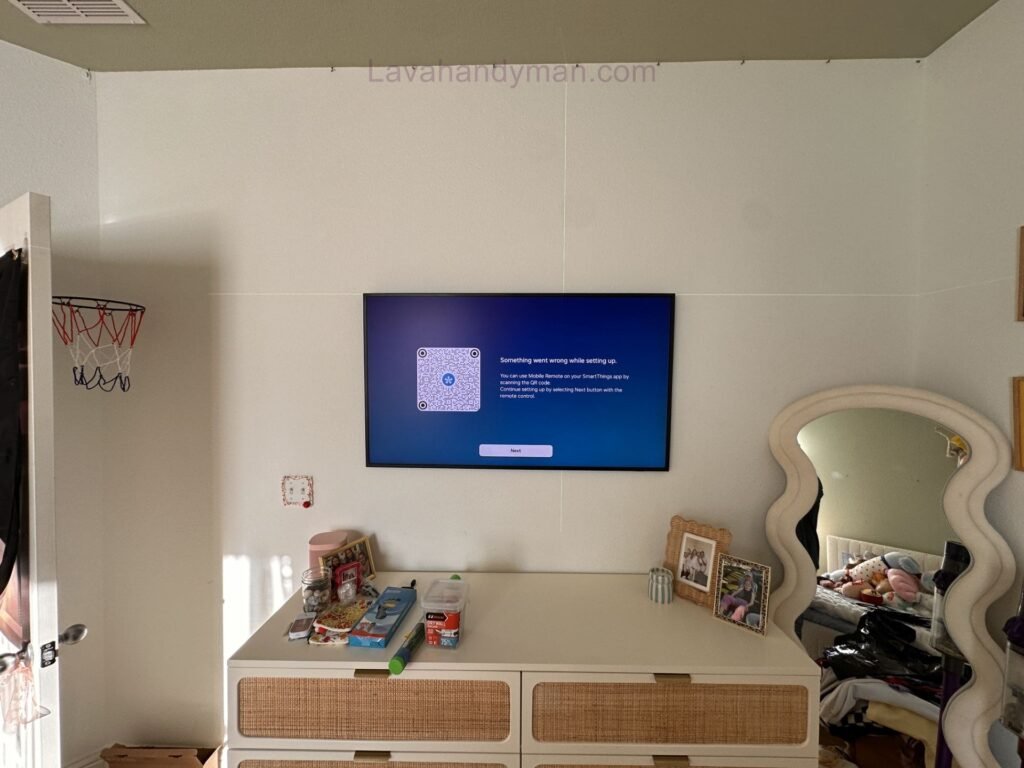
TV Wall Mount Installation Using a Laser Level
What Is Professional TV Wall Mount Installation?
TV wall mount installation is the process of securely attaching a television to a wall using a compatible mounting bracket and appropriate mounting hardware.
A professional installation focuses on more than simply getting the TV onto the wall. It should provide:
- Accurate horizontal alignment
- Correct TV height
- Proper centering
- Secure structural support
- Compatible mounting hardware
- Safe cable management
- Adequate ventilation
- Easy access to necessary connections
- A clean and finished appearance
A television that is securely attached but noticeably crooked cannot really be considered a professional installation.
This is why precise measurement and alignment are so important.
TV Wall Mount Installation Using a Laser Level
Why Use a Laser Level for TV Mounting?
A laser level for TV mounting provides a precise horizontal or vertical reference line across the wall.
Unlike a small spirit level, which only shows whether the bracket itself is level, a laser level can project a reference across a much larger area. This makes it especially useful when installing large televisions.
A laser level can help you:
- Position the TV wall mount accurately
- Create a perfectly horizontal reference line
- Center the TV on the wall
- Align the TV with furniture
- Position cable channels
- Reduce measurement errors
- Check the bracket after installation
- Achieve a professional-looking finish
TV Wall Mount Installation Using a Laser Level
Even a small angle can become noticeable when it is spread across a large television screen. A laser level helps reduce this problem.
However, a laser level is only an alignment tool. It does not determine whether a wall is structurally strong enough to support a TV. The wall construction, mounting hardware, bracket capacity, and TV specifications must also be evaluated.
Tools Needed for Professional TV Wall Mounting
Before starting your professional TV installation, prepare all the necessary tools.
Depending on the wall and mounting system, you may need:
- Laser level
- Stud finder
- Tape measure
- Pencil
- Drill
- Appropriate drill bits
- Screwdriver
- Socket or wrench set
- Appropriate wall anchors
- Mounting screws
- Spirit level
- Measuring ruler
- Cable management accessories
TV Wall Mount Installation Using a Laser Level
The exact tools depend on the type of wall, TV, and mounting bracket.
Do not select screws, anchors, or drill bits simply because they are available. The mounting hardware should be appropriate for the wall material and specified by the mounting system.
Step 1: Check Your TV Specifications
Before installing a TV wall mount, start with the television itself.
Check the manufacturer’s specifications for:
- TV weight
- Screen size
- VESA mounting pattern
- Required screw size
- Required screw depth
- Mounting location
- Ventilation requirements
- Cable connection locations
TV Wall Mount Installation Using a Laser Level
What Is a VESA Mounting Pattern?
The VESA mounting pattern refers to the distance between the mounting holes on the back of the television.
For example, a TV may have a VESA pattern of:
- 200 × 200 mm
- 300 × 300 mm
- 400 × 400 mm
- 600 × 400 mm
These are examples only. The exact VESA pattern must be confirmed for your particular TV model.
Do not choose a wall mount based only on screen size.
Two TVs with the same screen size may have different mounting patterns, weights, and screw requirements.
TV Wall Mount Installation Using a Laser Level
Step 2: Choose the Right TV Wall Mount
Choosing the correct TV wall mounting bracket is one of the most important parts of the installation.
There are three common types of TV wall mounts.
Fixed TV Wall Mount
A fixed wall mount keeps the television close to the wall.
It is ideal when:
TV Wall Mount Installation Using a Laser Level
- The TV is directly in front of the seating area
- You want a minimal appearance
- You do not need to adjust the viewing angle
Fixed mounts are often the cleanest option because they keep the TV close to the wall.
Tilting TV Wall Mount
A tilting mount allows the screen to angle up or down.
This can be useful when:
- The TV is mounted higher on the wall
- The TV is positioned above furniture
- The seating area is significantly below the TV
Tilting the screen can help improve the viewing angle in certain installations.
Full-Motion TV Wall Mount
A full-motion bracket allows the television to move away from the wall and swivel from side to side.
This is useful when:
- The TV needs to be viewed from multiple positions
- The room has several seating areas
- Easy access to the back of the TV is important
TV Wall Mount Installation Using a Laser Level
However, full-motion mounts can place additional leverage on the wall, particularly when the TV is extended away from the wall.
For this reason, proper structural support is especially important.
Step 3: Identify the Type of Wall
Before drilling any holes, determine what type of wall you are working with.
Common wall types include:
- Drywall
- Plasterboard
- Wood-stud walls
- Metal-stud walls
- Concrete
- Brick
- Stone
The correct mounting method depends heavily on the wall construction.
Mounting a TV on a Stud Wall
If the wall has wooden studs, the mounting bracket should be secured to suitable structural members according to the manufacturer’s instructions.
TV Wall Mount Installation Using a Laser Level
A stud finder can help locate the studs.
Do not assume that the drywall itself can safely support a heavy television.
Mounting a TV on a Concrete Wall
Concrete walls can provide strong support, but the correct masonry drill bit, anchors, and fasteners must be selected.
The type of concrete and mounting system should be considered before drilling.
Mounting a TV on Brick
Brick walls require appropriate masonry anchors and installation techniques.
The condition and type of brick matter.
Avoid drilling into areas that could damage the masonry or compromise the mounting system.
TV Wall Mount Installation Using a Laser Level
Mounting a TV on Drywall
Drywall requires particular attention.
For a heavy TV, simply using a basic drywall anchor may not provide adequate structural support.
The installation should follow the TV and bracket manufacturer’s requirements and take into account the structure behind the drywall.
If the wall construction is uncertain, professional assessment is recommended.
TV Wall Mount Installation Using a Laser Level
Step 4: Find the Best TV Viewing Height
The correct TV height depends on the room and viewing position.
A common approach is to position the center of the screen around the viewer’s seated eye level.
However, there is no single height that is perfect for every room.
Consider:
- Sofa height
- Seating position
- TV size
- Viewing distance
- Room layout
- Furniture underneath the TV
- Whether the bracket tilts
TV Wall Mount Installation Using a Laser Level
Sit in your normal viewing position and determine where the center of the TV should ideally be.
Do not determine the height only from the location of the mounting holes.
The mounting holes are on the back of the TV, while the actual screen extends above and below them.
Step 5: Use the Laser Level to Mark the Wall
Now it is time to use the laser level.
Place the laser level on a stable surface or mount it securely.
If your laser level has a self-leveling function, allow it to establish its level reference.
Project a horizontal laser line across the wall.
This line can serve as the primary reference for your TV wall mount installation.
The laser line can be used to compare the position of:
TV Wall Mount Installation Using a Laser Level
- The mounting bracket
- The TV center
- Furniture
- Cabinets
- Shelves
- Cable channels
- Other horizontal features
The goal is to establish a clear reference before drilling.
Step 6: Find the Center of the TV
A professional TV installation should be both level and centered.
Measure the width of the television and determine its center.
For example, if the TV is 1,600 mm wide, its horizontal center is approximately 800 mm from either side.
Transfer the center reference to the wall.
This is particularly important when the TV is being installed:
TV Wall Mount Installation Using a Laser Level
- Above a media console
- Between cabinets
- Above a fireplace
- In a recessed wall
- In the center of a feature wall
A TV can be perfectly level and still look wrong if it is not centered within the surrounding space.
Step 7: Measure the VESA Mounting Position
Once you know where the center and height of the TV should be, determine where the mounting bracket needs to be positioned.
The VESA mounting holes on the back of the TV determine how the bracket relates to the actual screen.
This is an important step because the center of the mounting pattern is not always positioned exactly at the visual center of the TV.
Check the manufacturer’s specifications or installation instructions.
Measure carefully before transferring the hole locations to the wall.
TV Wall Mount Installation Using a Laser Level
Step 8: Check for Electrical Wires and Pipes
Never drill into a wall without considering what may be behind it.
Electrical wiring, plumbing, and other hidden services may be located inside the wall.
Pay particular attention to areas around:
- Electrical outlets
- Light switches
- Existing cable connections
- Plumbing fixtures
- HVAC equipment
A stud finder or electronic detector may help identify some hidden objects, but no tool should be treated as a perfect guarantee.
If you suspect electrical wiring or plumbing is located behind the proposed mounting area, stop and obtain professional advice before drilling.
TV Wall Mount Installation Using a Laser Level
Step 9: Mark the Mounting Holes
After confirming the wall structure and TV position, place the bracket against the wall.
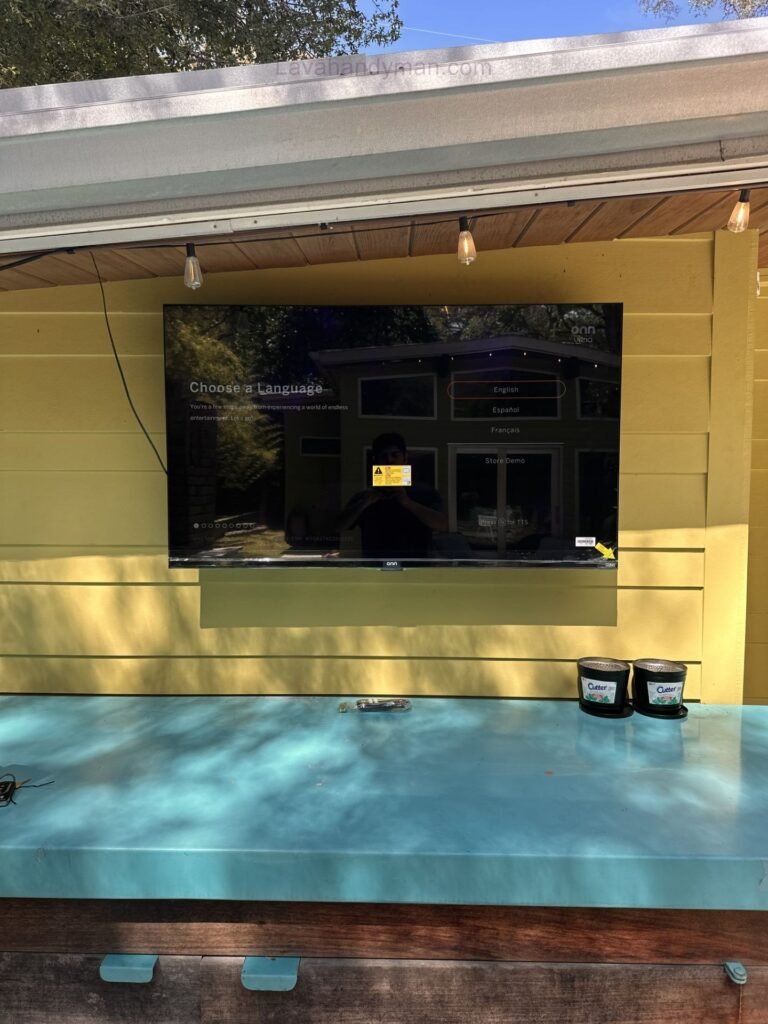
Use the laser level to ensure the bracket is aligned with the intended horizontal reference.
Mark the mounting holes carefully.
Before drilling, perform a final check of:
TV Wall Mount Installation Using a Laser Level
- Horizontal alignment
- TV center
- TV height
- Stud or structural support locations
- Mounting-hole spacing
- Cable access
- Potential hidden services
Taking a few extra minutes to verify the measurements can prevent significant problems later.
TV Wall Mount Installation Using a Laser Level
Step 10: Drill the Wall Correctly
The drilling method depends on the wall material.
Use the appropriate drill bit for the wall.
For example:
- Masonry walls require masonry drill bits.
- Wood requires suitable wood-drilling methods.
- Metal structures require appropriate fastening techniques.
- Drywall requires suitable anchors or structural reinforcement where appropriate.
The hole size should match the specified anchor or fastening system.
TV Wall Mount Installation Using a Laser Level
Do not make the holes unnecessarily large.
Do not use random anchors simply because they fit the hole.
The fasteners must be rated and suitable for the specific wall and TV mounting system.
Step 11: Install the TV Wall Mount
TV Wall Mount Installation Using a Laser Level
Position the TV bracket against the wall and align it with the laser reference.
Install the required fasteners.
Before completely tightening the bracket, check its position.
Make sure:
- The bracket is level
- The bracket is centered
- The mounting points are secure
- The fasteners are appropriate
- The wall can support the installation
TV Wall Mount Installation Using a Laser Level
Once the position has been confirmed, tighten the fasteners according to the manufacturer’s instructions.
Avoid excessive force.
Over-tightening can damage certain materials or hardware.
Step 12: Perform a Second Laser-Level Check
This is one of the most important steps in professional TV wall mounting.
After the bracket has been tightened, check it again with the laser level.
TV Wall Mount Installation Using a Laser Level
Why?
Because the bracket can shift slightly during tightening.
A professional installer should never assume that the bracket is still perfectly aligned simply because it was level before tightening.
Check both sides of the bracket.
If necessary, correct the position before mounting the TV.
Step 13: Attach the Mounting Hardware to the TV
Before lifting the television, install the required mounting components on the back of the TV.
Follow the instructions supplied with the TV and wall mount.
TV Wall Mount Installation Using a Laser Level
Pay particular attention to screw length.
A screw that is too short may not securely attach the TV.
A screw that is too long can potentially damage internal components.
Never replace the manufacturer’s recommended hardware with random screws simply because they appear to fit.
Step 14: Mount the TV Safely
Large televisions can be heavy and difficult to handle.
Whenever possible, have another person assist with lifting and mounting the TV.
Before lifting the television:
TV Wall Mount Installation Using a Laser Level
- Make sure the wall bracket is secure.
- Confirm the mounting mechanism is ready.
- Organize the cables.
- Clear the area.
- Determine where each person will hold the TV.
Lift the television carefully and attach it to the bracket according to the manufacturer’s instructions.
Do not release the TV until the locking mechanism has been fully engaged.
Step 15: Check the TV Alignment
Once the television is mounted, perform another alignment check.
Look at the TV from several positions in the room.
Then use the laser level or another appropriate leveling tool to verify the installation.
TV Wall Mount Installation Using a Laser Level
Check:
- Is the TV horizontal?
- Is it centered?
- Is the bracket secure?
- Is the TV fully attached?
- Are the locking mechanisms engaged?
If the TV has adjustment features built into the bracket, use them to make small final corrections.
Professional TV Cable Management
A professionally mounted television should also have professionally managed cables.
Visible cables can make an otherwise excellent TV installation look unfinished.
TV Wall Mount Installation Using a Laser Level
Depending on the room and installation requirements, cable management options may include:
- Cable clips
- Cable sleeves
- Surface raceways
- Decorative cable covers
- Concealed cable channels
- Properly installed in-wall cable solutions
If cables are being routed inside a wall, use products specifically approved for in-wall installation and follow applicable electrical and building requirements.
Do not simply place an ordinary extension cord inside the wall.
Cable management should also prevent excessive bending or pulling on HDMI, power, Ethernet, and other connections.
TV Ventilation and Wall Clearance
TV Wall Mount Installation Using a Laser Level
Installing a TV close to the wall can create a sleek appearance, but ventilation should never be ignored.
Modern televisions generate heat and require appropriate airflow according to their design.
Always follow the manufacturer’s recommended clearance requirements.
Avoid blocking ventilation openings.
This is particularly important with ultra-slim and low-profile TV wall mounts.
The closest possible mounting position is not necessarily the best installation position.
Common TV Wall Mounting Mistakes
Even a simple installation can go wrong if basic steps are skipped.
TV Wall Mount Installation Using a Laser Level
Mounting Without Checking the Wall
A wall may look strong but still require specific anchors or structural support.
Always identify the wall construction first.
Using the Wrong TV Mount
A bracket that supports the correct screen size may not necessarily support the correct VESA pattern or weight.
Check all specifications.
Installing Without a Laser Level
TV Wall Mount Installation Using a Laser Level
A spirit level can work, but a laser level provides a more useful reference for large installations.
Guessing the TV Height
Mounting the TV too high can create an uncomfortable viewing position.
Plan the height before drilling.
Using the Wrong Screws
The wrong screw length can create safety and equipment risks.
Always follow the manufacturer’s specifications.
Mounting Only to Drywall
TV Wall Mount Installation Using a Laser Level
For heavy televisions, drywall alone may not provide sufficient structural support.
Identify suitable structural mounting points.
Forgetting Cable Access
Make sure HDMI, power, Ethernet, antenna, and other required connections can reach their intended locations.
Skipping the Final Alignment Check
Always check the installation again after tightening the bracket and mounting the TV.
TV Wall Mount Installation Using a Laser Level
How to Mount a TV on the Wall Without It Looking Crooked
If you want a perfectly straight TV installation, follow this basic process:
- Determine the ideal viewing height.
- Find the horizontal center of the wall.
- Find the horizontal center of the TV.
- Confirm the TV’s VESA pattern.
- Identify the wall’s structural mounting points.
- Position the laser level.
- Create a horizontal reference line.
- Align the wall bracket with the laser.
- Mark the mounting holes accurately.
- Drill using the correct method for the wall.
- Secure the bracket.
- Check the bracket again with the laser level.
- Attach the mounting hardware to the TV.
- Mount the television safely.
- Perform a final level and center check.
TV Wall Mount Installation Using a Laser Level
This process helps reduce errors and produces a much cleaner result.
Professional TV Installation vs. DIY TV Mounting
DIY TV mounting can be possible when the wall construction is straightforward and the installer has the appropriate tools and experience.
However, professional installation can be a better choice when:
- The TV is very large
- The TV is particularly heavy
- The wall is made of unusual materials
- The wall contains uncertain wiring
- The installation requires cable concealment
- The TV is being mounted very high
- A full-motion bracket is being used
- Structural reinforcement may be necessary
- You are unsure which anchors to use
TV Wall Mount Installation Using a Laser Level
The most important consideration is safety.
A perfectly level TV is not a successful installation if the mounting system is not securely attached to the wall.
How Long Does TV Wall Mount Installation Take?
The installation time varies depending on the project.
A straightforward TV installation on a suitable wall may be relatively quick.
More complicated projects can take longer because they may involve:
TV Wall Mount Installation Using a Laser Level
- Finding structural supports
- Measuring the TV position
- Installing specialized anchors
- Reinforcing the wall
- Routing cables
- Installing cable management systems
- Adjusting the bracket
- Performing multiple alignment checks
A professional installer should prioritize accuracy and safety rather than simply trying to finish as quickly as possible.
Professional TV Wall Mount Installation Checklist
Before completing the project, use this checklist.
TV
- Confirm TV model
- Confirm TV weight
- Confirm VESA pattern
- Confirm screw requirements
- Confirm ventilation requirements
TV Wall Mount Installation Using a Laser Level
Wall
- Identify wall construction
- Locate studs or structural support
- Check for hidden wiring and plumbing
- Select appropriate anchors
- Confirm wall strength
Measurements
- Determine ideal viewing height
- Find wall center
- Find TV center
- Confirm VESA measurements
- Position laser level
- Mark mounting points
TV Wall Mount Installation Using a Laser Level
Installation
- Drill correctly
- Install appropriate anchors
- Secure the bracket
- Check the bracket with the laser level
- Attach TV mounting hardware
- Mount the TV safely
- Engage all locking mechanisms
Final Inspection
- Confirm the TV is level
- Confirm the TV is centered
- Check bracket security
- Check cable connections
- Check cable management
- Confirm ventilation
- Perform a final visual inspection
TV Wall Mount Installation Using a Laser Level
Frequently Asked Questions About TV Wall Mount Installation
Can I use a laser level to mount a TV?
Yes. A laser level is an excellent tool for establishing a precise horizontal reference when installing a TV wall mount. It can help align the mounting bracket and achieve a professional-looking result.
What is the best laser level for TV mounting?
A self-leveling cross-line laser can be particularly useful because it can provide both horizontal and vertical reference lines. The specific model you choose should depend on the size of the project and the working environment.
How high should a TV be mounted on the wall?
TV Wall Mount Installation Using a Laser Level
The ideal height depends on seating position, TV size, viewing distance, and room layout. A useful starting point is to consider the viewer’s seated eye level and position the center of the screen accordingly.
How do I know if my TV wall mount is compatible?
Check the TV’s weight, VESA mounting pattern, screw requirements, and the mounting bracket’s specifications. All of these should be compatible.
Can a TV be mounted directly to drywall?
It depends on the TV, wall, mounting system, and structural support. Heavy TVs should not automatically be mounted to drywall alone. Suitable structural support and appropriate fastening methods are essential.
Why does my wall-mounted TV look crooked?
TV Wall Mount Installation Using a Laser Level
The problem may come from an incorrectly aligned bracket, uneven wall surface, inaccurate measurements, or the TV not being properly seated on the mounting mechanism. A laser level can help identify and correct horizontal alignment problems.
Should I use a spirit level or laser level for TV mounting?
A spirit level can be useful, but a laser level provides a longer reference line and can make it easier to align large brackets and TVs with the surrounding room.
How many people are needed to mount a large TV?
The number depends on the TV’s size and weight. Large televisions are generally easier and safer to install with at least two people, and exceptionally large screens may require additional assistance.
Final Thoughts on Professional TV Wall Mounting
A professional TV wall mount installation is a combination of accurate measurements, proper equipment, structural support, careful installation, and final inspection.
TV Wall Mount Installation Using a Laser Level
Using a laser level for TV mounting can make a major difference in the accuracy and appearance of the finished installation. It provides a reliable reference line that helps position the wall bracket, align the TV, and create a clean visual relationship with the rest of the room.
However, accurate alignment is only one part of the process.
The TV wall mount must also be compatible with the television, the mounting hardware must be appropriate for the wall, and the wall must be capable of supporting the combined load.
The best approach is to start by checking the TV specifications, identifying the VESA pattern, evaluating the wall structure, determining the ideal viewing height, and carefully planning the cable connections.
Once the measurements are confirmed, the laser level can be used to establish a precise reference for the bracket. After installation, a second alignment check should be performed before considering the project complete.
The result should be more than a TV that is simply attached to the wall.
It should be secure, level, centered, clean, functional, and professionally finished.
Whether you are installing a compact television in a bedroom or a large-screen TV in a modern living room, careful planning and accurate laser leveling can help you achieve the professional appearance you are looking for.
A flawless TV wall mount installation starts with accurate measurements, the right mounting hardware, and precise alignment with a laser level.
📞 Need Help?
Let us take care of the hard work while you sit back and relax.
📍 Serving: Austin, Round Rock, Cedar Park & more
📱 Call or Text: (737) 420-6992
🌐 Visit: https://lavahandyman.com