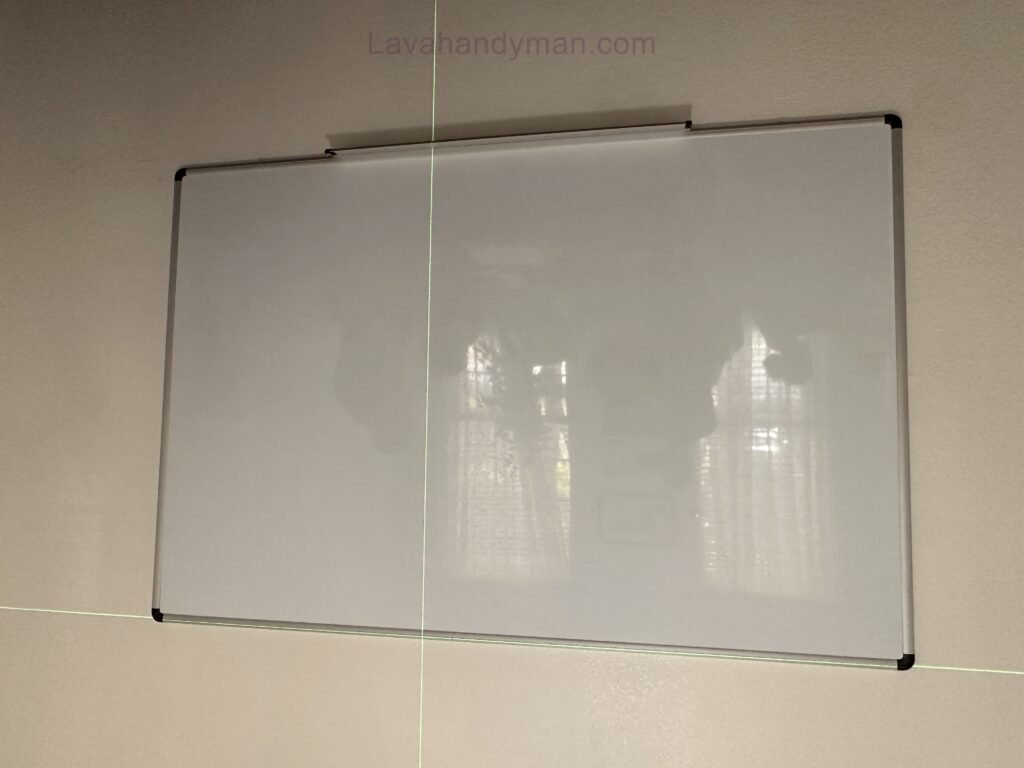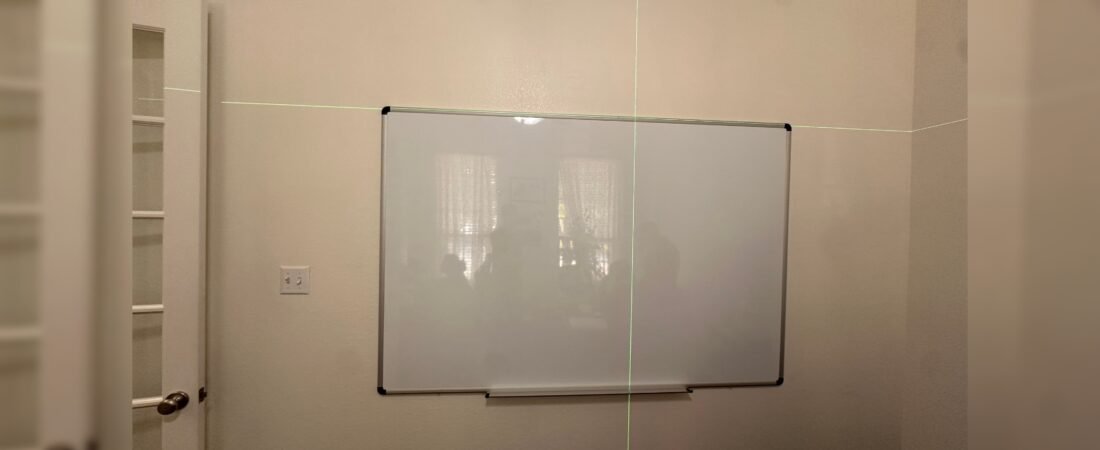
Complete Guide to Installing a Whiteboard on the Wall: Installation Steps, Required Tools, and Important Tips
Installing a whiteboard on the wall may look like a simple DIY project, but choosing the right mounting hardware, installation height, and wall anchors is essential for a safe and secure result. Whether you are installing a whiteboard in an office, classroom, conference room, home office, or training center, the correct installation method depends largely on the type of wall and the size and weight of the board.
In this complete guide, you will learn how to install a whiteboard on the wall step by step. We will cover the tools you need, how to choose the right location and height, how to mount a whiteboard on drywall, concrete, brick, and wood, and the most common installation mistakes to avoid.
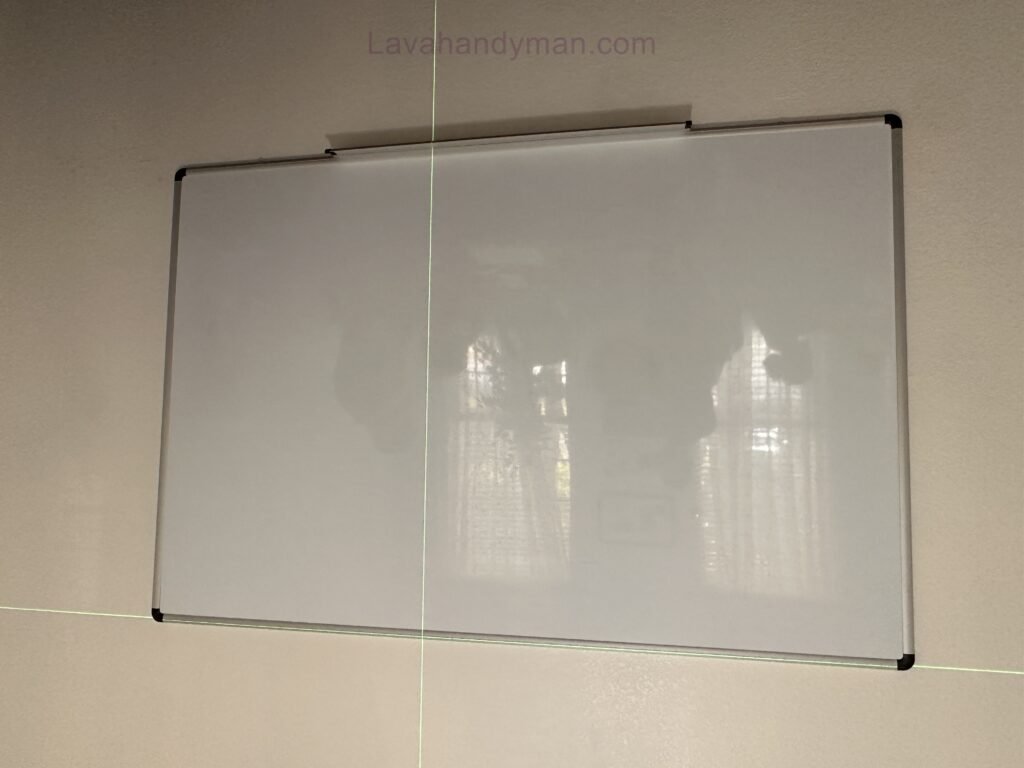
Quick Answer: How Do You Install a Whiteboard on the Wall?
To install a whiteboard on the wall, first determine the wall type and choose suitable mounting hardware. Measure and mark the desired position, use a level to ensure accurate alignment, drill the required holes, install the appropriate wall anchors or screws, and attach the mounting brackets. Finally, secure the whiteboard to the brackets and check that it is level and stable.
For large or heavy whiteboards, especially glass or porcelain models, having two or more people assist with installation is recommended.
Installing a Whiteboard on the Wall
What You Need to Install a Whiteboard
Before you begin the whiteboard installation process, prepare all the necessary tools and mounting hardware. Having everything ready can make the installation faster and help prevent measurement or mounting errors.
Tools for Whiteboard Installation
Depending on your wall type and whiteboard model, you may need:
- Measuring tape
- Spirit level
- Pencil
- Stud finder
- Power drill
- Appropriate drill bits
- Screwdriver
- Hammer or rubber mallet
- Step ladder or stable step stool
- Safety glasses
- Work gloves
Whiteboard Mounting Hardware
The required mounting hardware depends on the wall material and the manufacturer’s design. Common components include:
Installing a Whiteboard on the Wall
- Mounting brackets
- Mounting rails
- Screws
- Wall plugs
- Drywall anchors
- Masonry anchors
- Washers
- Heavy-duty wall anchors
Do not assume that one type of screw or wall anchor will work for every wall. The mounting hardware must be appropriate for both the wall material and the weight of the whiteboard.
Step 1: Check the Whiteboard and Mounting Kit
Before drilling any holes, inspect the whiteboard and all of its components.
Make sure you have the:
- Whiteboard
- Mounting brackets or rail
- Screws
- Wall anchors
- Marker tray, if included
- Installation template, if supplied
- Manufacturer’s installation instructions
Installing a Whiteboard on the Wall
Check the board for damage, particularly around the frame, corners, writing surface, and mounting points.
Different whiteboards use different mounting systems. Some boards attach directly to brackets, while others hang from a horizontal rail or use a combination of upper and lower supports.
For this reason, do not drill holes based only on the dimensions of the whiteboard. Always identify the actual mounting points specified by the manufacturer.
Step 2: Identify Your Wall Type
The wall material determines which mounting method and anchors you should use.
Before installing a wall-mounted whiteboard, determine whether your wall is made from:
Installing a Whiteboard on the Wall
- Drywall or gypsum board
- Wood studs
- Metal studs
- Concrete
- Brick
- Concrete block
- Plaster
- Another structural material
Each surface has different load-bearing characteristics.
Installing a Whiteboard on Drywall
Drywall alone may not provide enough support for a heavy whiteboard. Whenever possible, attach the mounting hardware directly to wall studs.
If the desired mounting location does not align with a stud, you may need suitable drywall anchors rated for the application.
The correct anchor depends on the type and thickness of the drywall, the construction behind it, and the weight of the whiteboard.
For large or heavy boards, relying only on ordinary plastic wall plugs is generally not appropriate unless the manufacturer specifically approves them for the installation.
Installing a Whiteboard on the Wall
Installing a Whiteboard on Wood Studs
Wood studs provide a strong mounting point when the appropriate fasteners are used.
Use a stud finder to locate the studs behind the wall surface. Mark their locations before positioning the mounting brackets.
Whenever possible, place the primary mounting screws directly into the structural studs rather than relying only on the drywall.
Installing a Whiteboard on Concrete
Concrete can provide a strong mounting surface, but it requires the correct masonry drill bit and suitable concrete anchors.
Installing a Whiteboard on the Wall
The installation process typically involves:
- Marking the mounting locations.
- Drilling holes with the correct masonry bit.
- Cleaning the holes if required.
- Installing the appropriate anchors.
- Attaching the mounting brackets.
- Securing the whiteboard.
Always follow the anchor manufacturer’s instructions regarding hole diameter and depth.
Installing a Whiteboard on Brick
Installing a Whiteboard on the Wall
Brick walls require suitable masonry anchors and drilling techniques.
Avoid assuming that every location in a brick wall has the same structural strength. The condition of the brick, mortar joints, wall construction, and selected anchors can all affect the stability of the installation.
If you are unsure about the wall structure, consult a qualified installer.
Step 3: Choose the Best Location for the Whiteboard
Choosing the right location is just as important as choosing the right mounting hardware.
Consider the following factors before drilling.
Visibility
Installing a Whiteboard on the Wall
Everyone who will use the whiteboard should be able to see the writing surface clearly.
For classrooms and conference rooms, consider the viewing angle from different areas of the room.
Accessibility
The board should be positioned at a comfortable height for its intended users.
A whiteboard designed for children may need to be installed lower than one intended for adults.
Lighting and Glare
Avoid placing a whiteboard directly opposite a bright window or strong light source if it creates glare.
Excessive reflection can make writing difficult to read, especially from the back of a classroom or meeting room.
Installing a Whiteboard on the Wall
Available Wall Space
Make sure there is enough space around the whiteboard for:
- Writing
- Erasing
- Opening nearby doors
- Using the marker tray
- Moving around the room
Also check that furniture, cabinets, screens, or other wall-mounted equipment will not interfere with the board.
Step 4: Check for Electrical Wires and Plumbing
Before drilling into any wall, determine whether electrical cables, plumbing, gas lines, or other hidden services may be located behind the mounting area.
Installing a Whiteboard on the Wall
This is particularly important when drilling into drywall or other finished wall surfaces.
Never drill blindly if you are unsure what is behind the wall.
If you do not have the appropriate tools or experience to identify hidden services, consider hiring a qualified professional.
Step 5: Determine the Correct Whiteboard Height
One of the most common questions about whiteboard installation is:
How high should a whiteboard be mounted?
There is no single height that works for every situation.
The ideal mounting height depends on:
Installing a Whiteboard on the Wall
- User height
- Age of the users
- Whiteboard dimensions
- Classroom or office layout
- Whether people write while standing or sitting
- Accessibility requirements
- Position of the marker tray
Instead of focusing only on the top edge of the board, consider the height of the main writing area.
For adult offices and conference rooms, the board should generally be positioned so that most users can comfortably reach the writing surface while standing.
For children, a lower installation height may be more appropriate.
The best approach is to follow the manufacturer’s recommendations and adjust the installation to the needs of the people who will actually use the whiteboard.
Step 6: Measure and Mark the Wall
Installing a Whiteboard on the Wall
Accurate measurements are essential for a professional-looking installation.
Start by determining the desired center position of the whiteboard.
Then:
- Measure the width and height of the board.
- Identify the mounting points.
- Mark the desired position on the wall.
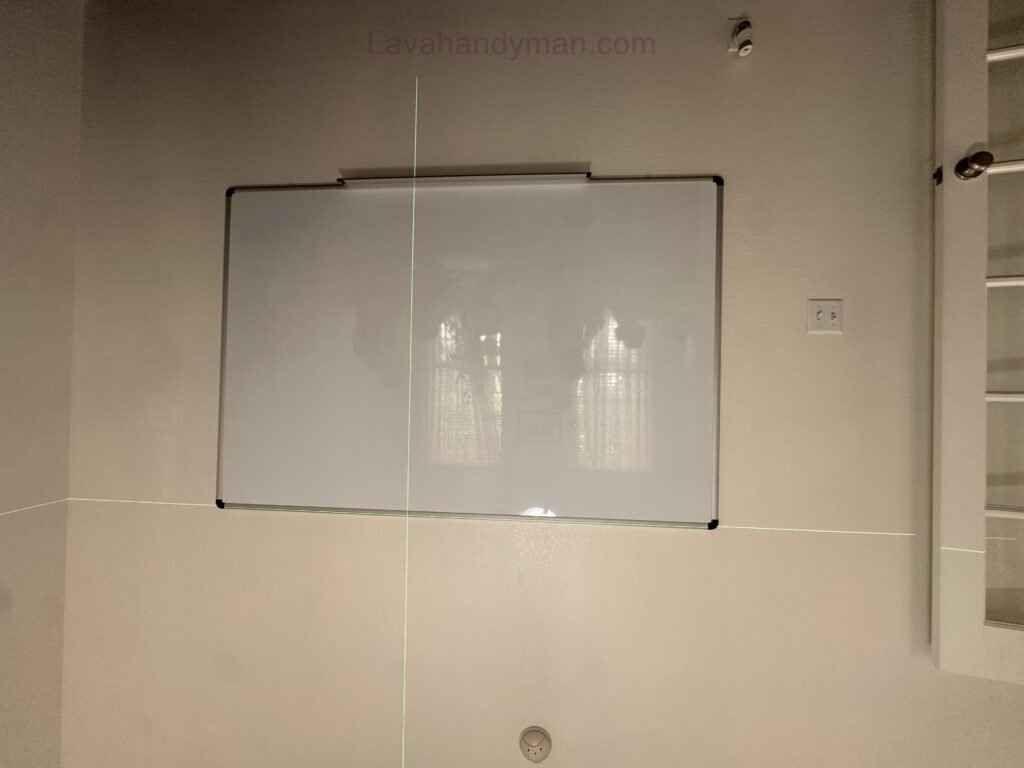
- Use a level to establish a horizontal reference line.
- Mark the exact drilling points.
- Double-check all measurements before drilling.
Do not rely on the ceiling or floor as your only reference because they may not be perfectly level.
Why a Spirit Level Is Important
Installing a Whiteboard on the Wall
A spirit level helps ensure that the mounting brackets and finished whiteboard are horizontal.
Even a small error can be noticeable on a large whiteboard.
Taking an extra minute to check the level before drilling can save significant time later.
Step 7: Drill the Mounting Holes
Once you have confirmed the measurements and checked the wall, drill the required mounting holes.
The drill bit must be appropriate for the wall material and the selected anchor.
Installing a Whiteboard on the Wall
For example:
- Use the appropriate bit for drywall when required.
- Use a masonry bit for concrete and brick.
- Use an appropriate pilot hole when installing into wood.
- Follow the anchor manufacturer’s specified hole diameter and depth.
Do not guess the required hole size.
A hole that is too large may prevent an anchor from gripping correctly, while a hole that is too small can make installation difficult or damage the mounting hardware.
Step 8: Install the Wall Anchors
After drilling, install the appropriate wall anchors or fasteners.
For drywall, use anchors specifically designed for the application.
For concrete and masonry, use suitable masonry anchors.
For wood studs, use appropriate structural screws or other approved fasteners.
Installing a Whiteboard on the Wall
The mounting bracket should sit firmly against the wall.
Avoid overtightening the screws. Excessive force can damage drywall, deform brackets, strip screw heads, or damage the whiteboard frame.
The objective is a secure connection—not simply maximum tightening force.
Step 9: Attach the Whiteboard Mounting Brackets
With the anchors installed, attach the mounting brackets or rail to the wall.
Depending on the design, your whiteboard may use:
- Upper brackets
- Lower support brackets
- Side brackets
- Horizontal mounting rails
- Clips
- Hooks
Installing a Whiteboard on the Wall
Make sure every bracket is installed in the correct orientation.
Before mounting the board, check the brackets for movement.
They should not wobble, rotate, or pull away from the wall.
Step 10: Mount the Whiteboard
Large whiteboards should generally be installed with assistance.
Glass, porcelain, and large framed whiteboards can be heavy and difficult to control safely.
Carefully lift the board and position it onto the mounting brackets or rail.
If the board uses hooks or a rail system, make sure the hooks are completely engaged.
If it uses brackets attached directly to the frame, ensure that every connection is properly aligned.
Do not assume the board is secure simply because it appears to be hanging correctly.
Installing a Whiteboard on the Wall
Step 11: Secure the Whiteboard to the Mounting System
After positioning the board, install any remaining screws, clips, or fasteners required to secure it to the mounting brackets.
Check every mounting point.
The board should not:
- Rock from side to side
- Slide horizontally
- Pull away from the wall
- Lift out of the brackets
- Make unusual noises when gently touched
Follow the manufacturer’s instructions for tightening and adjustment.
Installing a Whiteboard on the Wall
Step 12: Check That the Whiteboard Is Level
Place a spirit level along the top edge of the whiteboard.
Check the board from left to right.
If the board is not level, adjust the mounting brackets according to the manufacturer’s instructions.
A level whiteboard not only looks more professional but also ensures that the mounting system is correctly aligned.
Installing a Whiteboard on the Wall
Step 13: Install the Marker Tray
If your whiteboard includes a marker tray, install it after the board has been securely mounted.
Depending on the model, the tray may attach using:
- Screws
- Clips
- Brackets
- Sliding rails
Make sure the tray is firmly attached and does not interfere with the mounting hardware.
Installing a Whiteboard on the Wall
Step 14: Remove the Protective Film
New whiteboards may have a protective film covering the writing surface or frame.
Once the board is securely installed, remove the film according to the manufacturer’s instructions.
Avoid using sharp tools directly on the writing surface because they can cause permanent scratches.
Whiteboard Installation on Different Wall Types
Installing a Whiteboard on the Wall
How to Mount a Whiteboard on Drywall
For drywall installation, locate studs whenever possible and attach the mounting hardware directly to the structural framing.
If studs cannot be used, select an appropriate drywall anchor based on the board’s weight and mounting requirements.
For heavy boards, professional installation may be preferable.
How to Mount a Whiteboard on Concrete
Use a masonry drill bit and anchors designed for concrete.
Installing a Whiteboard on the Wall
Follow the anchor manufacturer’s requirements for:
- Hole diameter
- Hole depth
- Anchor type
- Screw size
- Installation procedure
How to Mount a Whiteboard on Brick
Use suitable masonry anchors and avoid drilling into weak or damaged areas.
If possible, determine whether the mounting points should be located in the brick or another structural part of the wall based on the manufacturer’s recommendations.
How to Mount a Whiteboard on a Wood Stud Wall
Locate the studs and position the mounting brackets so that the main fasteners enter the structural wood.
This can provide a strong and stable mounting solution when correctly installed.
Installing a Whiteboard on the Wall
Common Whiteboard Installation Mistakes
Even a relatively simple mounting project can go wrong if a few basic steps are skipped.
1. Using the Wrong Anchors
Using an anchor simply because it fits the screw is a common mistake.
The anchor must be designed for the wall material and appropriate for the expected load.
2. Ignoring Wall Studs
When a suitable stud is available, using it can provide a stronger connection than relying entirely on drywall anchors.
Installing a Whiteboard on the Wall
3. Installing the Board Without a Level
A crooked whiteboard is immediately noticeable.
Always check the level before and after mounting the board.
4. Installing the Whiteboard Too High
The board may look neat when mounted high, but users may struggle to reach the upper or lower portions of the writing surface.
Consider the height of the intended users before installation.
5. Drilling Without Checking the Wall
Electrical wiring and plumbing may be hidden behind finished walls.
Always take appropriate precautions before drilling.
6. Installing a Large Board Alone
Large boards can be awkward and heavy.
Use additional people when necessary.
7. Overtightening Fasteners
Too much tightening force can damage the wall, fasteners, brackets, or frame.
Installing a Whiteboard on the Wall
Whiteboard Installation Safety Tips
Safety should be a priority throughout the entire installation process.
Wear Protective Equipment
Use safety glasses when drilling and appropriate gloves when handling large boards.
Use a Stable Ladder
Never stand on chairs or unstable furniture to reach high mounting points.
Get Help With Large Whiteboards
Large glass and porcelain boards should be handled by multiple people when necessary.
Check the Wall Before Drilling
Make sure you understand what is behind the wall before drilling.
Use Manufacturer-Approved Hardware
Whenever possible, use the mounting system and hardware recommended for the specific whiteboard model.
Inspect the Installation
After installation, periodically inspect the brackets, screws, anchors, and wall surface for signs of loosening or damage.
How to Test a Newly Installed Whiteboard
After mounting the board, perform a basic stability check.
Confirm that:
- The whiteboard is level.
- The mounting brackets are secure.
- All screws are properly installed.
- The anchors are firmly seated.
- The board does not move excessively.
- The marker tray is secure.
- The board is installed at a comfortable height.
- There is sufficient space around the board.
If the board moves significantly when lightly touched, do not continue using it until the mounting problem has been corrected.
How to Maintain a Wall-Mounted Whiteboard
Correct maintenance helps preserve the writing surface and mounting system.
Clean the board regularly using cleaning products recommended by the manufacturer.
Avoid abrasive materials and aggressive chemicals unless they are specifically approved for the whiteboard surface.
You should also inspect the mounting hardware periodically.
Look for:
- Loose screws
- Damaged brackets
- Cracked areas around mounting points
- Loose anchors
- Movement of the board
- Damaged frame components
- Loose marker trays
If you notice a structural problem, stop using the board until it has been properly inspected and repaired.
When Should You Hire a Professional Installer?
Although many whiteboards can be installed as a DIY project, professional installation is recommended in certain situations.
Consider hiring a professional if:
- The wall construction is unknown.
- The whiteboard is very large or heavy.
- You are installing a large glass whiteboard.
- The wall is damaged or unusually constructed.
- The installation requires complex masonry work.
- Electrical wiring or plumbing may be behind the wall.
- You are unsure which anchors to use.
- The board will be installed in a public or high-traffic environment.
Professional installation can be particularly valuable for expensive glass or porcelain whiteboards because incorrect drilling or mounting can damage both the wall and the board.
Whiteboard Installation Checklist
Use this checklist before considering your installation complete.
Before Installation
- Read the manufacturer’s instructions.
- Check the whiteboard and mounting hardware.
- Identify the wall type.
- Locate wall studs if applicable.
- Check for hidden electrical wiring and plumbing.
- Choose the installation location.
- Determine the appropriate height.
During Installation
- Measure the mounting points.
- Mark the wall accurately.
- Use a spirit level.
- Drill the correct holes.
- Install the appropriate anchors.
- Secure the mounting brackets.
- Use additional help for large boards.
- Mount and secure the whiteboard.
After Installation
- Check that the board is level.
- Check all mounting points.
- Make sure the board is stable.
- Install the marker tray.
- Remove the protective film.
- Clean the writing surface.
- Inspect the mounting system periodically.
Frequently Asked Questions About Whiteboard Installation
How do you install a whiteboard on the wall?
To install a whiteboard, identify the wall type, choose the correct mounting hardware, measure and mark the mounting points, drill the required holes, install the appropriate anchors, attach the mounting brackets, and secure the whiteboard. Always follow the manufacturer’s instructions for your specific model.
Can you mount a whiteboard on drywall?
Yes. A whiteboard can be mounted on drywall using appropriate anchors or by fastening the mounting hardware directly to wall studs. The correct method depends on the size and weight of the board and the wall construction.
What is the best height for a whiteboard?
The ideal height depends on the intended users and the board’s dimensions. Adult offices, classrooms, children’s spaces, and accessible environments may require different installation heights.
Can a whiteboard be mounted directly into concrete?
Yes. Concrete can provide a strong mounting surface when suitable masonry anchors and drilling techniques are used.
Do I need a stud finder to install a whiteboard?
A stud finder is useful when installing a whiteboard on drywall or framed walls because it can help locate structural studs. Using studs can provide a stronger mounting point for the board.
How many people are needed to install a large whiteboard?
The number depends on the size, weight, and design of the whiteboard. Large glass and porcelain boards may require two or more people for safe handling.
What screws should I use to mount a whiteboard?
There is no single screw that works for every installation. The appropriate screw depends on the wall material, anchor type, whiteboard weight, and manufacturer’s mounting requirements.
How can I make sure my whiteboard is securely mounted?
Make sure all brackets and fasteners are correctly installed, the anchors are appropriate for the wall, and the board does not move excessively when gently tested. For large or heavy boards, follow the manufacturer’s installation requirements or hire a professional.
Final Thoughts
Learning how to install a whiteboard on the wall is relatively straightforward when you approach the project systematically. The most important considerations are the type of wall, the weight and dimensions of the whiteboard, the correct mounting hardware, the installation height, and the safety of the mounting location.
Start by reading the manufacturer’s instructions and identifying the wall construction. Locate studs whenever possible, choose anchors designed for the specific wall material, measure carefully, and use a spirit level to ensure a professional finish.
For large, heavy, or glass whiteboards, do not underestimate the importance of safe handling and secure mounting. If you are uncertain about the wall structure, hidden utilities, or appropriate mounting hardware, professional installation is the safest option.
With the right preparation and installation method, a wall-mounted whiteboard can provide a stable, practical, and professional writing surface for offices, classrooms, conference rooms, training centers, and home workspaces.
📞 Need Help?
Let us take care of the hard work while you sit back and relax.
📍 Serving: Austin, Round Rock, Cedar Park & more
📱 Call or Text: (737) 420-6992
🌐 Visit: https://lavahandyman.com