How to Install Antique Wall Art Like a Professional (Step-by-Step Guide)
Introduction
Antique wall art and vintage frames bring elegance, depth, and character to any interior space. Their timeless charm makes them a popular choice for classic and luxury home décor.
However, proper antique wall art installation is crucial. Incorrect installation can damage both the wall and the artwork — or worse, cause the frame to fall.
In this complete guide, you’ll learn how to install antique paintings and frames professionally, from choosing the right tools to safety precautions and aesthetic tips.
Why Proper Antique Wall Art Installation Matters
Hanging an antique frame isn’t just about putting a nail in the wall. Each piece has a different weight, frame style, and value. A professional installation ensures:
Install Antique Wall Art
- Strong and lasting support
- A balanced, visually appealing composition
- No damage to the wall or frame
- Enhanced aesthetic value
- Long-term safety and stability
If you want your antique art to truly shine, professional installation is the best way to protect both its beauty and its value.
Types of Antique Wall Art and Their Installation Methods
1. Wooden Antique Frames
Often handcrafted and heavy, wooden antique frames require durable screws and wall anchors to hold them securely.
2. Metal or Brass Frames
Install Antique Wall Art
Common in vintage and industrial-style interiors, these frames need sturdy wall plugs and precise drilling.
3. Hand-Painted Antique Artworks
Valuable paintings should be mounted carefully without direct contact with the wall to prevent damage from moisture or dirt.
4. Multi-Panel or Gallery Sets
A collection of smaller antique pieces can be arranged together for a modern, artistic look — symmetry and alignment are key here.
Tools and Materials Needed for Professional Installation
Before starting, make sure you have the right tools for the job. Using proper materials ensures safety and precision.
Essential tools:
- Measuring tape and ruler
- Laser or bubble level
- Power drill with appropriate bits
- Screws and wall plugs (anchors)
- Metal or hidden wall hooks
- Pencil for marking
- Hammer
- Safety gloves and goggles
Install Antique Wall Art
Preparing the Wall
1. Choose the Right Spot
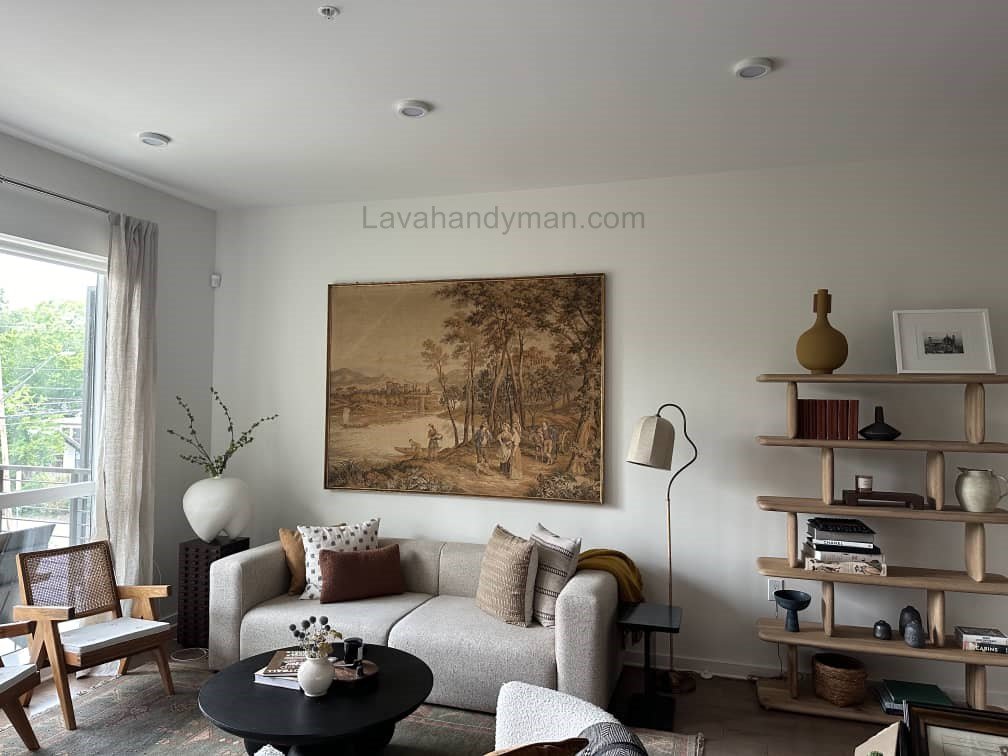
Antique artwork looks best when placed on walls that draw attention, such as:
- Above a sofa or console table
- In the hallway or entryway
- Above a fireplace
- Between two mirrors or wall sconces
Avoid damp or cracked walls, and ensure the surface is dry and clean.
2. Determine the Correct Height
The center of the artwork should generally be about 160 cm (63 inches) from the floor — roughly at eye level.
3. Mark the Installation Points
Use a pencil and a level to mark where you’ll drill. Always double-check alignment before making holes.
Install Antique Wall Art
Installation Methods for Different Wall Types
Drywall (Gypsum Board)
Use toggle bolts or butterfly anchors to spread the load and prevent cracking.
Concrete or Cement Walls
Use a hammer drill and heavy-duty plastic or metal wall plugs.
Brick Walls
Use a masonry bit and corrosion-resistant screws.
Wooden Walls
You can screw directly into the wall for lightweight frames, but use hidden brackets for heavier pieces.
Install Antique Wall Art
Step-by-Step Antique Frame Installation
Step 1: Measure the Weight
Estimate the frame’s weight. Anything above 5 kg (11 lbs) requires anchors and screws for safety.
Step 2: Choose the Right Hook
Light frames → simple picture hooks.
Heavy frames → double metal hooks or hidden wall brackets.
Step 3: Drill and Mount Anchors
Drill holes carefully according to your wall type, insert wall plugs, and partially screw in hooks or screws.
Step 4: Hang and Adjust
Hang the frame and check its level with a laser or bubble level. Adjust until it’s perfectly horizontal.
Step 5: Secure and Test
Tap gently on the frame to ensure it’s firmly attached and stable.
Install Antique Wall Art
Aesthetic Tips for Antique Wall Art Installation
- Create a Gallery Layout
Arrange multiple antique frames on the floor first to visualize balance before mounting. - Add Accent Lighting
A small wall light or spotlight above the frame highlights textures and carvings beautifully. - Match Frame Colors
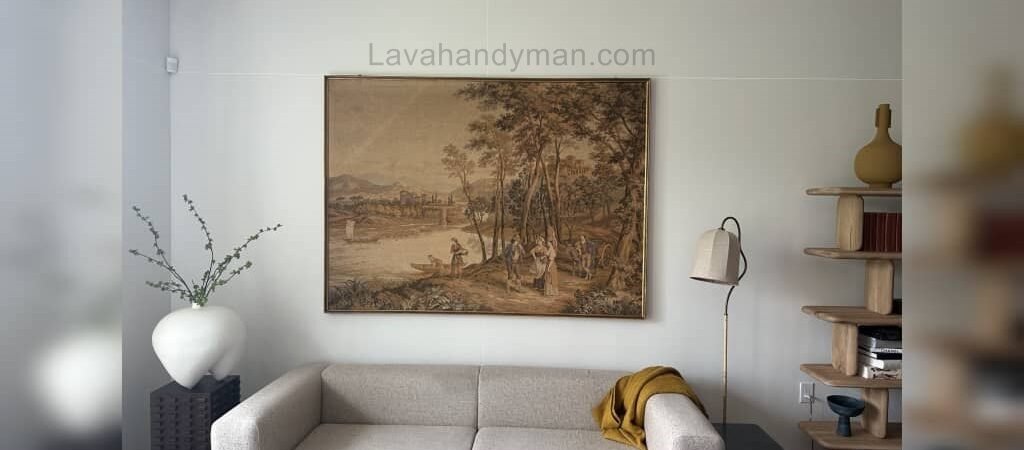
Choose frame tones (gold, bronze, or wood) that complement furniture and curtains. - Mind the Height Above Furniture
Leave a 20–30 cm (8–12 inch) gap between the top of a sofa and the bottom of the artwork. - Use Hidden Mounting Systems
For luxury antique pieces, hidden hanging systems give a clean, museum-quality look.
Install Antique Wall Art
Common Mistakes to Avoid
- Hanging without measuring or leveling
- Using regular nails for heavy frames
- Choosing the wrong wall anchor
- Ignoring light, height, or symmetry
- Installing on damp or weak walls
A professional picture installer can prevent these issues and ensure flawless results.
Safety Tips During Installation
- Check for electrical wiring before drilling.
- Use a sturdy ladder and ask someone to assist with heavy frames.
- Always wear safety glasses and gloves.
- Avoid installing artwork at night or in poor lighting conditions.
Install Antique Wall Art
How to Care for Antique Art After Installation
To preserve your antique frames and paintings:
- Dust gently every two weeks with a soft, dry cloth.
- Keep artwork away from direct sunlight.
- Avoid using sprays or harsh cleaners on frames.
- Tighten loose screws or hooks periodically.
- Treat wooden frames annually with protective oil or wax.
Why Hire a Professional Antique Art Installer?
Although hanging a frame seems simple, antique pieces require precision and care.
A professional art installer:
- Chooses the correct tools and wall anchors
- Ensures perfect alignment and visual balance
- Protects your walls and artwork from damage
- Delivers quick, clean, and long-lasting results
If your antique art is valuable, professional installation is a wise investment for safety and aesthetics.
Install Antique Wall Art
🖼️ Step-by-Step Guide to Installing a Painting on the Wall (Professional and Safe)
Installing a painting on the wall the right way can completely transform your interior design, adding elegance and personality to your home or office. In this complete guide, you’ll learn all the professional steps for hanging a painting — from selecting the best spot to using the right tools and ensuring perfect alignment.
🔧 Tools You Need for Wall Art Installation
Before you start hanging your painting, make sure you have the proper tools ready for a clean and precise installation:
- Measuring tape and level (manual or laser)
- Pencil for marking
- Drill and the correct bit for your wall type
- Wall plugs (anchors) and screws
- Picture hooks
- Screwdriver or wrench
- Hammer
- Safety gloves and goggles
- Hanging wire or D-ring hooks
- Stud finder and live-wire detector (for safety)
Install Antique Wall Art
🎯 Step 1 – Check the Wall Type and Painting Weight
The weight of the painting and the type of wall determine the best mounting method.
- Lightweight paintings (up to 3 kg / 6 lb): regular nail or small picture hook
- Medium weight (3 – 8 kg / 6–17 lb): plastic wall plug with screw
- Heavy artworks (8 kg +): metal anchor, toggle bolt, or French cleat
Recommended anchors by wall type:
- Drywall → toggle bolt or molly bolt
- Concrete → heavy-duty plastic/metal anchor
- Wood → screw directly into the stud
Install Antique Wall Art
📐 Step 2 – Measure and Determine the Correct Height
One of the most important parts of hanging a painting properly is choosing the right height.
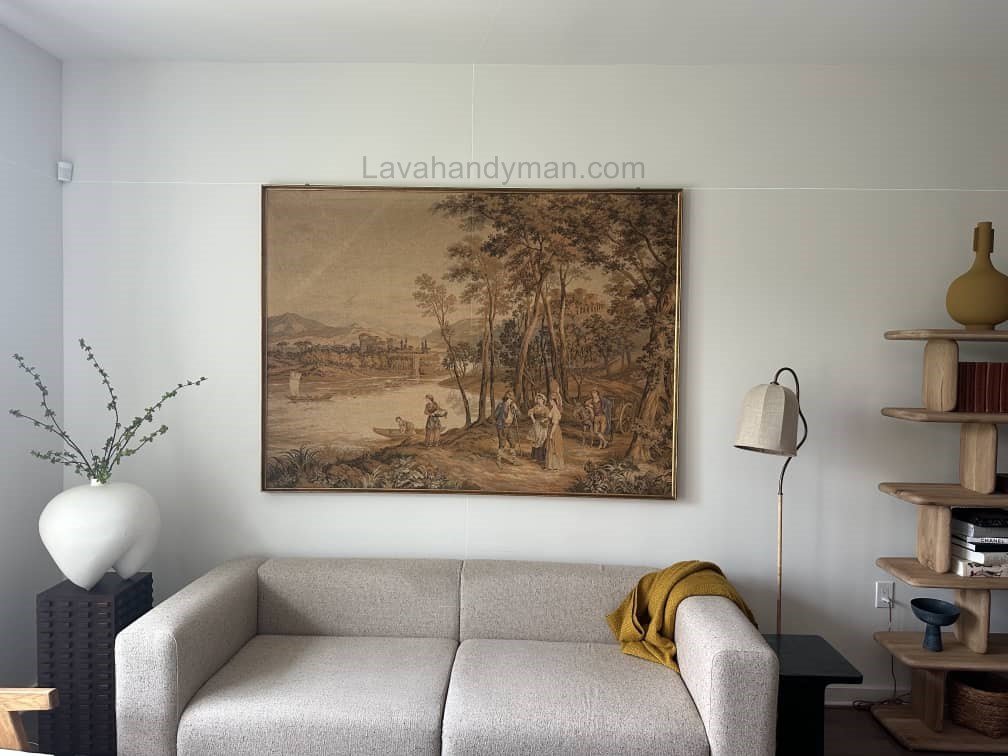
- Standard rule: the center of the artwork should be around 160 cm (63 in) from the floor — at average eye level.
- If the painting is above a sofa or console table, leave 20–30 cm (8–12 in) between the bottom of the frame and the furniture.
Height formula:
Hook height = Desired center height + distance from top of frame to hanging wire
Example: if the painting’s center should be at 160 cm and the wire sits 8 cm below the top edge, the hook should be placed at 128 cm from the floor.
Install Antique Wall Art
🪛 Step 3 – Mark and Drill the Wall
Use a pencil to mark the hook location, then drill a hole slightly smaller than the wall plug. Insert the plug, screw in the hook or screw, and leave a small gap so the hanging wire can rest securely.
🔸 For heavy or large paintings, always use two hooks to keep it level and stable.
🖼️ Step 4 – Hang and Adjust the Painting
Carefully hang the painting and check its alignment using a level.
If it’s uneven, slightly adjust the wire or screw depth until the frame sits perfectly straight.
Install Antique Wall Art
🧱 Step 5 – Choose the Proper Mounting Method for Each Wall Type
| Wall Type | Recommended Mounting Method |
|---|---|
| Drywall | Toggle or molly bolt |
| Concrete / Cement | Plastic or metal anchor with screw |
| Brick | Masonry bit + wall plug |
| Wooden wall or stud | Screw directly into stud |
🧰 Professional Mounting Options (for Heavy or Valuable Art)
For heavy or valuable paintings, consider the French cleat method.
This system uses two interlocking angled pieces — one fixed to the wall and the other attached to the back of the frame — ensuring secure, perfectly level hanging with even weight distribution.
Install Antique Wall Art
⚠️ Safety Tips for Wall Art Installation
- Always check for electrical wires or pipes before drilling.
- Use a stable ladder, never a chair or sofa.
- Wear safety glasses and gloves when drilling.
- For large or heavy pieces, work with a partner.
🎨 Design & Aesthetic Tips
- For minimalist interiors, choose one large painting with a simple frame.
- When hanging multiple artworks, keep 5–10 cm (2–4 in) between frames.
- Avoid glare on glass-covered frames by adjusting ceiling or spotlight angles.
- For gallery walls, arrange your layout on the floor first, then mark positions on the wall with paper templates before drilling.
🧩 Common Hanging Problems & Quick Fixes
Loose frame: switch to a stronger anchor or add small rubber bumpers behind the corners for stability.
Crooked frame: use two hooks or shorten the hanging wire.
Frame tilts away from the wall: screws may be too long or the frame is warped.
🧩 Types of Wall Art Mounting Brackets and Their Uses :
Install Antique Wall Art
🔧 What Is a Bracket and Why Is It Important?
A bracket is a small metal or plastic support that holds and stabilizes the artwork on the wall.
Using the wrong bracket can lead to crooked frames or, even worse, falling art.
That’s why knowing how to choose the right type of bracket is essential for hanging paintings, photo frames, or antique wall decor safely.
🪝 1. Picture Hook Bracket
Use: For light wall art up to 5 kg (11 lb)
Material: Metal or plastic
The picture hook is the most common and easiest option for small frames.
Simply hammer it into the wall or screw it in and hang your picture.
Advantages:
- Quick and easy to install
- Affordable and widely available
- Works well on drywall or wooden walls
Disadvantages:
- Limited weight capacity
- Can loosen over time
Best for: Small paintings, photo frames, and lightweight artwork
Install Antique Wall Art
⚙️ 2. D-Ring Bracket
Use: For medium to heavy frames with strong backing
The D-Ring bracket includes two metal loops (in the shape of a “D”) that are screwed to the back of the frame.
The painting is then hung from two screws or hooks on the wall.
Advantages:
- Excellent stability and balance
- Holds heavy or antique frames securely
Disadvantages:
- Requires precise drilling and positioning
Best for: Wooden frames, antique art, medium-to-heavy paintings
Install Antique Wall Art
🧵 3. Wire Hanging System
Use: Standard and flexible hanging system for home and office art
A steel hanging wire runs between two sides of the frame, allowing the painting to rest on a single hook or screw.
This is the most popular method for household picture hanging.
Advantages:
- Easy to level
- Simple DIY installation
- Adjustable positioning
Disadvantages:
- Not ideal for very heavy pieces
- The wire can stretch slightly over time
Best for: Decorative paintings, framed photos, light wall art
🧱 4. French Cleat Bracket
Use: For heavy, large, or valuable wall art
The French Cleat system consists of two interlocking pieces (wood or metal) cut at an angle — one attached to the wall and the other to the back of the artwork.
They lock together, distributing the weight evenly and securely.
Install Antique Wall Art
Advantages:
- Extremely strong and stable
- Perfectly level alignment
- Easy to remove or reposition
Disadvantages:
- Requires precision and more installation time
Best for: Heavy mirrors, antique paintings, large framed art
🪞 5. Hidden Mount Bracket
Use: For modern, minimalist, or frameless artwork
This type of invisible mounting bracket is installed behind the frame or recessed into the back, so it can’t be seen from the front.
Advantages:
Install Antique Wall Art
- Clean, minimal look
- Ideal for contemporary interiors
Disadvantages:
- More technical to install
- Requires accurate leveling tools
Best for: Frameless wall art, modern prints, gallery walls
Install Antique Wall Art
🧷 6. Clamp Bracket
Use: For glass, metal, or frameless artworks
Clamp brackets grip the edges of the artwork from the bottom or sides without the need to drill holes in the frame.
Advantages:
- No frame drilling required
- Quick and simple installation
Disadvantages:
- Limited weight capacity
- Not suitable for large or heavy art pieces
Best for: Glass panels, mirrors, or lightweight posters
Install Antique Wall Art
🖼️ 7. Gallery Hanging System (Rail Mount)
Use: For galleries, showrooms, offices, and luxury interiors
This system uses a slim rail installed along the top of the wall with adjustable cables or hooks that hold the paintings.
It’s a professional and flexible mounting solution.
Advantages:
- No repeated drilling or wall damage
- Easily adjust height or reposition art
- Clean, high-end appearance
Disadvantages:
- Higher installation cost
- May not suit traditional home interiors
Best for: Art galleries, offices, hotels, and lobbies
Install Antique Wall Art
🔩 8. Adjustable Angle Bracket
Use: When you need to tilt the artwork for display or lighting
This adjustable mount allows you to control the viewing angle of the painting — ideal for exhibits or illuminated artworks.
Advantages:
- Flexible angle adjustment
- Professional, exhibition-style display
Disadvantages:
- More expensive and requires precise installation
Best for: Art exhibitions, display lighting setups
Install Antique Wall Art
💡 Pro Tips for Choosing the Right Bracket
For multiple paintings in a row, gallery rails are the most efficient choice.
Always match the bracket type to the artwork’s weight.
For drywall, use toggle or molly bolts; for concrete, use metal anchors.
If aesthetics matter, choose hidden or rail-mounted brackets.
For heavy artwork, always use two mounting points or a French Cleat system.
Install Antique Wall Art
Conclusion
Installing antique wall art combines technical skill, design sense, and craftsmanship.
With the right tools and techniques — or help from a professional installer — you can transform your space into an elegant gallery filled with history and beauty.
📞 Need Help?
Let us take care of the hard work while you sit back and relax.
📍 Serving: Austin, Round Rock, Cedar Park & more
📱 Call or Text: (737) 420-6992
🌐 Visit: https://lavahandyman.com