
Roku Smart TV Wall Mount Installation | Safe & Clean Setup
Introduction
Professional wall mounting of Roku Smart TVs is one of the best ways to enhance the appearance of your home or workplace while making optimal use of space. Roku TVs are highly popular thanks to their slim design, high image quality, and user-friendly smart operating system.
However, to ensure optimal performance, safety, and long-term durability, Roku TVs must be installed on the wall in a fully professional and standardized manner.
In this article, we provide a complete guide to Roku TV wall mount installation, covering technical considerations, mounting standards, bracket selection, cable management, and the benefits of hiring a professional TV installer.
What Is a Roku Smart TV?
Roku Smart TV
A Roku Smart TV (Roku TV) is a television powered by the Roku OS, offering fast and easy access to popular streaming services.
Key Advantages of Roku TVs:
- Quick access to Netflix, YouTube, Prime Video, and more
- Simple and intuitive user interface
- Affordable pricing compared to features
- Ideal design for wall mounting
- Suitable for both residential and commercial spaces

Thanks to their slim profile, Roku TVs are an excellent choice for wall-mounted TV installation.
Why Professional Roku TV Wall Mount Installation Matters
Improper wall mounting can lead to serious problems, which is why professional Roku TV installation services are highly recommended.
Reasons to Choose Professional Installation:
Roku Smart TV
- Prevents TV falls and accidents
- Protects the screen and internal components
- Avoids wall damage
- Ensures correct viewing angle
- Delivers a clean, modern appearance
- Meets safety and mounting standards
An experienced installer considers all these factors to deliver a secure and polished result.
Choosing the Right Location for Roku TV Wall Mounting
Selecting the proper location is the first and most critical step in Roku TV wall mount installation.
Important Factors:
- Avoid direct sunlight and glare
- Maintain proper viewing distance
- Easy access to power outlets
- Keep away from heat sources
- Allow for cable concealment
The right placement significantly improves comfort and viewing quality.
Roku Smart TV
Standard Height for Wall Mounting a Roku TV
One of the most common installation mistakes is incorrect mounting height.
Recommended Mounting Height:
- The center of the screen should be at eye level when seated
- Typically between 90–110 cm (35–43 inches) from the floor
- May vary depending on TV size and room layout
A professional installer adjusts the height based on your space and viewing habits.
Roku Smart TV
Choosing the Right Wall Mount Bracket for Roku TVs
The wall mount bracket plays a vital role in safety and usability.
Types of TV Wall Mounts:
- Fixed wall mounts
- Full-motion (articulating) mounts
- Tilt wall mounts
Key Bracket Selection Tips:
- Compatible with TV size and weight
- Strong, high-quality materials
- VESA mounting standard compliance
- Durable screws and hardware
Using an improper mount significantly increases the risk of damage.
Roku Smart TV
Evaluating Wall Type Before Installation
Wall type is a crucial factor in professional TV wall mounting.
Roku Smart TV
Common Wall Types:
- Concrete walls
- Brick walls
- Drywall or gypsum (stud walls)
Each wall type requires specific anchors and screws to ensure maximum safety.
Step-by-Step Professional Roku TV Wall Mount Installation
- Site inspection and precise measurements
- Accurate wall marking
- Secure bracket installation using a level
- Attaching the mount to the TV
- Final wall mounting with safety locks
- Stability and viewing angle testing
Each step must be completed with professional tools and expertise.
Roku Smart TV
Cable Management and Concealment
One of the key elements of clean Roku TV wall installation is proper cable management.
Cable Concealment Methods:
- Wall-mounted cable raceways
- In-wall cable routing
- Decorative cable covers
Proper cable management results in a sleek and modern look.
Roku Smart TV
Safety Tips After Wall Mount Installation
- Ensure the bracket remains firmly secured
- Avoid applying pressure or hanging objects on the TV
- Periodically check mounting screws
- Protect the TV from direct impacts
These precautions help extend the lifespan of your Roku TV.
Benefits of Hiring a Professional Roku TV Installer
- Fast and precise installation
- Prevention of costly damage
- Clean and visually appealing results
- Expert consultation
- Complete peace of mind
Professional installation is a smart and cost-effective investment.
Roku TV Wall Mount Installation for Home and Office
Roku TV wall mounting services are ideal for:
- Residential homes
- Offices and workspaces
- Retail stores
- Waiting areas
- Conference rooms
Each environment requires a customized mounting approach.

Step-by-Step Guide to Installing a Roku Smart TV on the Wall
Roku Smart TV
Step 1: Check the Roku TV Model and Specifications
Before starting the installation, review the following:
- Roku TV model and screen size
- TV weight
- VESA mounting standard on the back of the TV
- Compatibility of wall mount screws
📌 Most Roku TVs include four VESA mounting holes on the back panel.
Step 2: Choose the Right Wall Mount Bracket for Roku TV
Selecting the correct bracket is essential for safe Roku TV wall installation.
Types of Roku TV Wall Mounts:
- Fixed wall mount (clean and minimal look)
- Full-motion or articulating mount (allows rotation)
- Tilt wall mount (ideal for higher installations)
✔️ The wall mount should:
- Support the weight of the Roku TV
- Match the TV size
- Be made from high-quality materials
Step 3: Determine the Installation Location and Standard Height
Proper placement improves viewing comfort and safety.
Standard Roku TV Wall Mount Height:
- The center of the screen should be at eye level when seated
- Typically between 90–110 cm (35–43 inches) from the floor
Location Tips:
- Avoid direct sunlight
- Ensure access to a power outlet
- Allow space for cable concealment
Roku Smart TV
Step 4: Identify the Wall Type Before Installation
Wall type plays a critical role in professional TV wall mounting.
Common Wall Types:
- Concrete walls
- Brick walls
- Drywall or gypsum (stud walls)
📌 For drywall installations, use special anchors or mount directly to wall studs.
Step 5: Mark and Level the Wall Mount Bracket
- Hold the wall mount bracket against the wall
- Use a level to ensure it is straight
- Mark drilling points accurately
- Double-check measurements
✔️ This step directly affects the final appearance of the installation.
Step 6: Drill and Secure the Wall Mount
- Drill holes using the correct drill bit
- Insert appropriate wall anchors
- Secure the bracket with standard mounting screws
- Recheck alignment with a level
The bracket must be firmly mounted with no movement.
Step 7: Attach the Mounting Arms to the Roku TV
- Place the TV on a soft surface
- Attach the mounting arms to the back of the TV
- Tighten screws firmly—but not excessively
⚠️ Over-tightening can damage the TV panel.
Step 8: Mount the Roku TV on the Wall
- Lift the TV with two people if possible
- Hang it securely onto the wall mount
- Lock the safety mechanism
Once installed, the TV should remain stable without wobbling.
Step 9: Adjust Viewing Angle and Final Alignment
- Adjust the viewing angle
- Check that the TV is level
- Test movement if using a full-motion mount
Step 10: Cable Management and Concealment
For a clean Roku TV wall installation:
- Use wall-mounted cable raceways
- Route cables inside the wall
- Secure cables with clips or ties
Professional cable management greatly enhances the final look.
Step 11: Final Testing of the Roku Smart TV
- Power on the TV
- Check picture and sound
- Test the Roku OS menu
- Confirm internet connectivity
Important Safety Tips After Installation
Periodically check mounting screws
Do not apply pressure to the TV
Avoid hanging objects from the TV
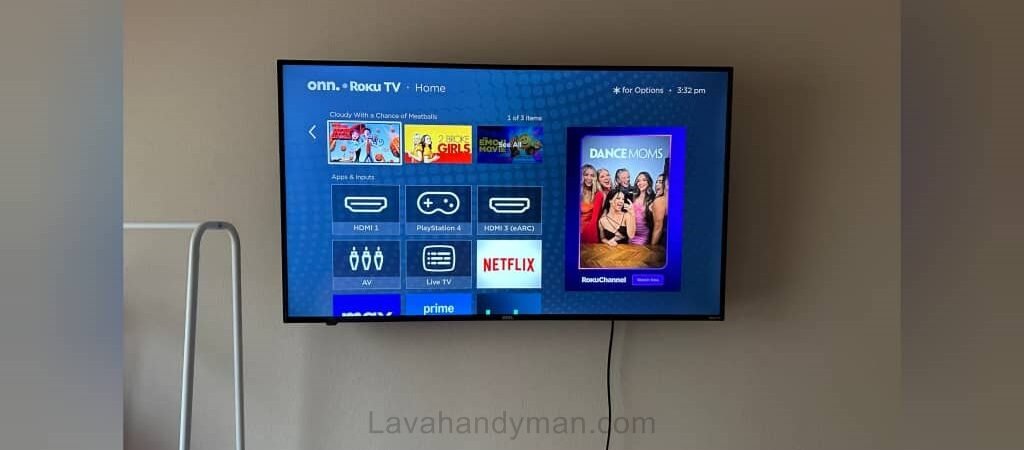
Best Wall Mounts for onn Roku TV
For professional installation of an onn Roku Smart TV, you can use three main types of wall mounts depending on your needs and space:
1. Fixed Wall Mount
- Ideal for simple installations without angle adjustment
- Keeps the TV close to the wall
- Provides a clean and neat appearance
2. Full-Motion / Articulating Mount
- Allows the TV to rotate left and right
- Adjust the viewing angle for different seating positions
- Perfect for multipurpose rooms or large spaces
3. Tilt Mount
- Allows the TV to tilt slightly forward
- Suitable for higher wall placements
- Reduces glare and improves viewing comfort
Key Considerations When Choosing a Mount for Roku TV
Use high-quality screws and hardware for safe installation
The mount must support the weight and size of the TV
Compatible with the VESA mounting standard
Proper Wall-Mounting of a TV
1. Choose a Suitable Wall
- A strong wall made of concrete, cement blocks, or solid structure is ideal.
- Optimal height: The center of the TV should be about 120–130 cm (47–51 in) from the floor, at eye level when seated.
2. Select the Right Wall Mount
- Choose a bracket compatible with your TV’s size and weight (e.g., 40–70 inches).
- Types of brackets:
- Fixed: close to the wall
- Tilt/Swivel: allows horizontal and vertical angle adjustment
3. Mark and Drill
- Use a level to mark the positions for screws.
- For concrete walls, use a masonry drill and anchors suitable for your TV’s weight.
4. Install the Bracket and TV
- Secure the bracket firmly to the wall.
- Place the TV on the bracket and tighten the locking screws.
5. Cable Management
- Organize the cables neatly, using cable ducts or wall channels if desired.
6. Safety Tips
Very heavy TVs may require a professional installer.
Check for hidden pipes or electrical wires before drilling.
Conclusion
If you are looking for professional Roku Smart TV wall mount installation, choosing an expert service is the best decision. Proper installation not only enhances aesthetics but also ensures safety, performance, and durability.
📞 Need Help?
Let us take care of the hard work while you sit back and relax.
📍 Serving: Austin, Round Rock, Cedar Park & more
📱 Call or Text: (737) 420-6992
🌐 Visit: https://lavahandyman.com
