
Step-by-Step Guide to Proper Window AC Installation
Introduction
During hot summer days, having an efficient cooling system makes life much more comfortable. Window air conditioners, thanks to their compact design, affordable price, and relatively simple installation, are among the most popular choices for apartments and small spaces.
However, improper installation often leads to issues such as high electricity consumption, dust leakage, or even premature damage to the unit. That’s why learning the correct installation steps is crucial.
This guide explains the step-by-step process of installing a window air conditioner properly — from preparing the installation site and choosing tools to sealing, safety, maintenance, and periodic servicing.
Proper Window AC Installation
1. What Is a Window Air Conditioner?
A window air conditioner is a self-contained cooling unit that houses all the essential components (compressor, condenser, evaporator, and fan) inside one casing. It is designed so that half of the unit sits indoors and the other half extends outdoors.
Advantages
- Quick and simple installation compared to split ACs
- Lower purchase cost
- No need for pipework or an external unit
- Ideal for small to medium rooms
Disadvantages
- Louder operation than split systems
- Takes up part of the window space
- Limited capacity for larger rooms
- Possible dust or rainwater infiltration if installed incorrectly
Proper Window AC Installation
2. Why Proper Installation Matters
Proper installation is not just about placing the unit in the window; it directly affects performance and durability. Common issues caused by poor installation include:
- Warm air leakage through gaps → reduced efficiency
- Higher power consumption due to compressor overload
- Unusual vibrations and noise
- Damage to the window frame or risk of falling
- Water and moisture seeping into the room
3. Tools and Materials Required
Before starting, prepare the following:
- Flathead and Phillips screwdrivers
- Drill with suitable bits
- Spirit level or laser level
- Foam or silicone weatherstripping
- Strong metal brackets and support frame
- Screws and wall plugs
- Hammer and pliers
- Safety gloves
- Ladder (for upper floors)
- Silicone sealant or waterproof adhesive
Proper Window AC Installation
4. Step-by-Step Installation Process
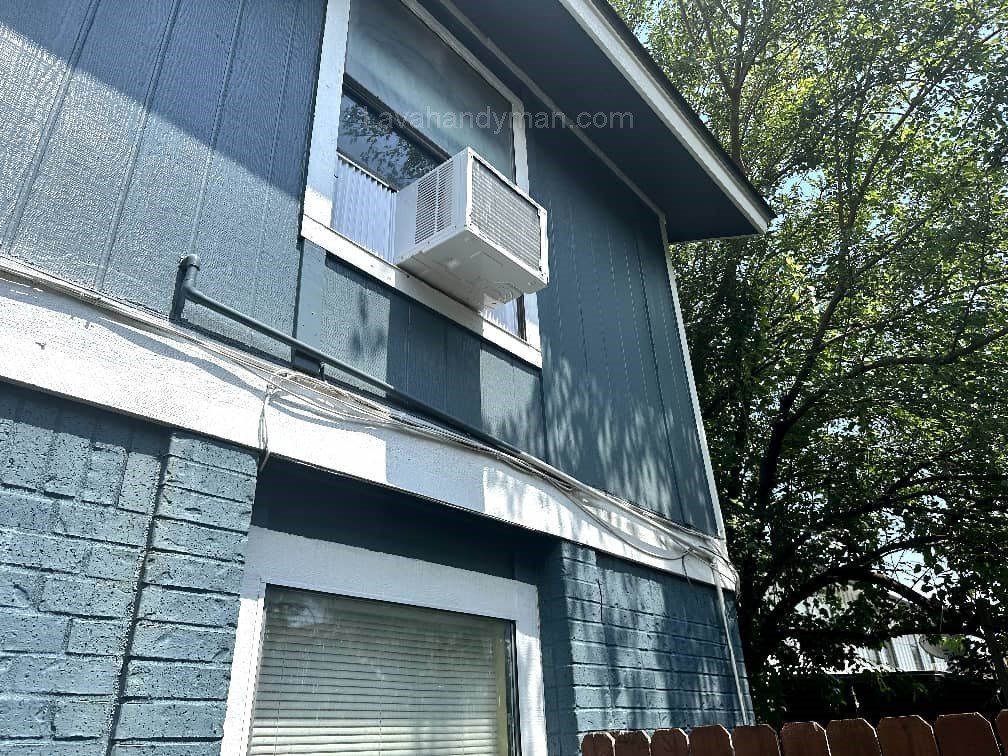
Step 1: Choose the Right Spot
- The window frame must be strong and undamaged.
- The AC should be near a dedicated power outlet.
- Outdoor space should be open and unobstructed — avoid walls or trees close to the unit.
Step 2: Prepare the Window Frame
- Clean off dust and debris.
- Check the sturdiness of the frame.
- If the unit is heavy, install a supporting metal bracket.
Step 3: Install the Bracket
- Secure the brackets firmly with screws and wall plugs.
- Ensure the unit slopes slightly outward (1–2 cm) to allow condensed water to drain.
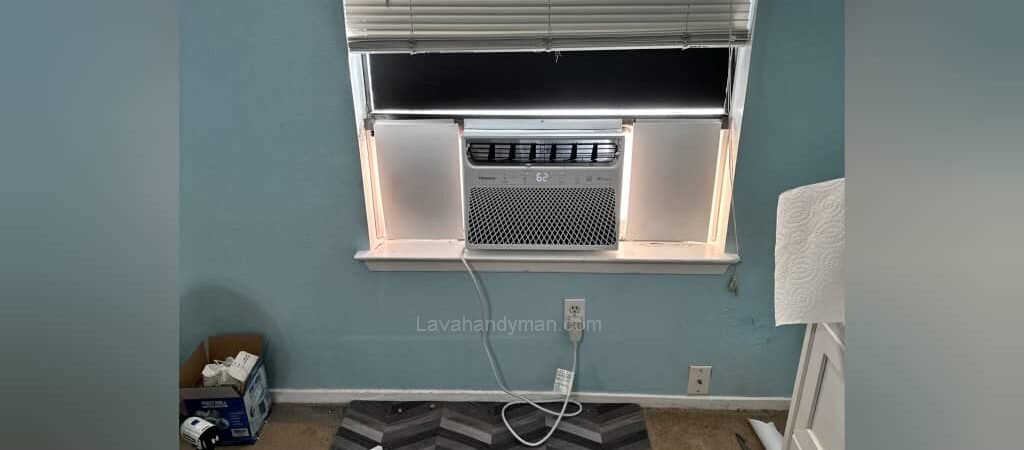
Step 4: Position the AC
- With help from another person, lift the unit.
- Carefully slide it into the window opening.
- Use a level to check proper alignment.
Proper Window AC Installation
Step 5: Secure the AC
- Tighten side screws and brackets.
- Make sure the weight is evenly supported by the frame and bracket.
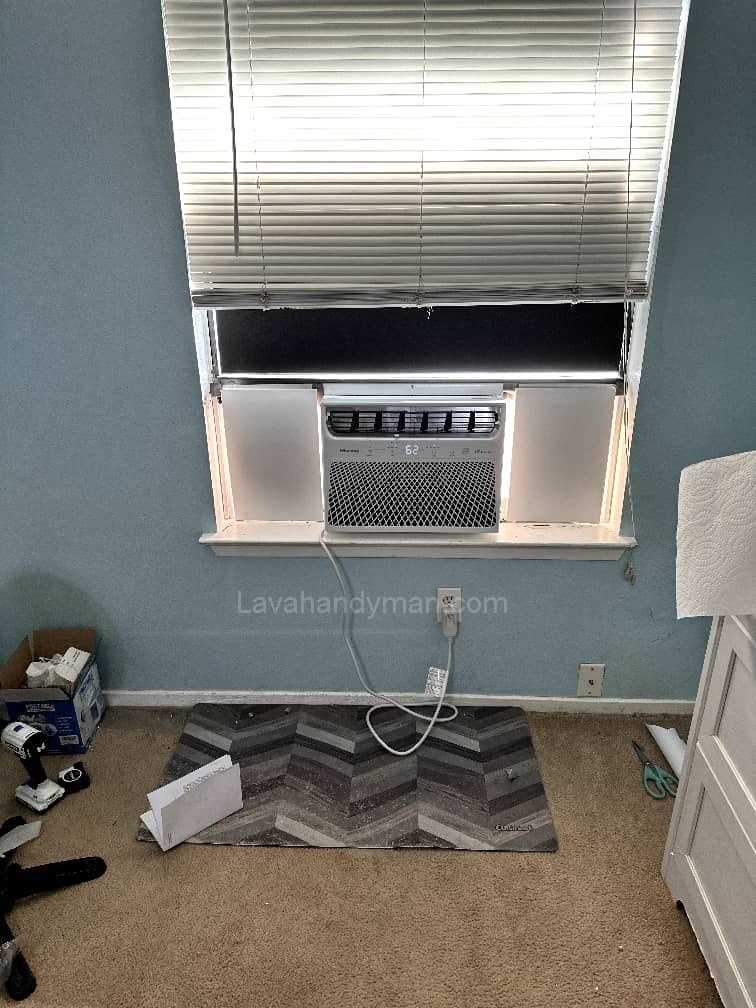
Step 6: Seal the Gaps
- Fill all gaps between the unit and the window with foam or silicone strips.
- Proper sealing prevents dust, insects, and warm air from entering.
Step 7: Connect to Power
- Plug the AC into a dedicated outlet with grounding.
- Avoid using power strips.
Step 8: Test the Unit
- Switch it on and check fan, compressor, and water drainage.
- If you notice abnormal noise or vibration, adjust leveling or bracket support.
5. Safety Tips
- Always install with two people for safety.
- Use a secure ladder and safety rope for upper floors.
- Check wiring and use a separate fuse for the AC.
- Never place objects on top of the unit.
- If you lack experience, call a certified technician.
Proper Window AC Installation
6. Common Installation Mistakes
- Improper leveling → water accumulates and noise increases.
- Poor sealing → warm air and dust leak inside.
- Unsafe electrical connection → compressor damage.
- No support bracket → window frame may break, risk of falling.
- Blocked outdoor airflow → excessive load on the motor.
7. Maintenance After Installation
- Clean the air filter every two weeks.
- Check the water drain regularly.
- Wash the coils (indoor and outdoor).
- Get annual servicing from a technician.
- Install a small awning to protect from heavy rain.
Proper Window AC Installation
Step-by-Step Installation of a Window Air Conditioner
1. Preparation
- Measure the window and compare with the AC dimensions
- Check the strength of the window frame; repair if weak or damaged
- Ensure a nearby power outlet with grounding and a dedicated fuse
- Prepare tools: screwdriver, drill, level, bracket, weatherstripping, silicone, gloves, ladder
2. Installing the Bracket
- Install the bracket under the window sill or on the wall
- Use a level to create a 1–2 cm outward slope for proper drainage
- Secure the screws and anchors tightly to support the unit’s weight
Proper Window AC Installation
3. Placing the AC in the Frame
- Lift the unit with two people
- Rest the bottom edge on the bracket or sill
- Slide the AC back carefully so part of it stays outside on the bracket
- Check alignment and slope again with a level
4. Securing the Unit
- Tighten the side screws and any included brackets
- Lower the window sash onto the top of the AC and secure it
- For extra safety, use a strap or safety lock to prevent falling
Proper Window AC Installation
5. Sealing and Insulation
- Fill gaps around the unit with foam strips or side panels
- Seal outer gaps with waterproof silicone (do not block the drainage path)
- Proper sealing prevents dust, hot air, and insects from entering
6. Power Connection
- Plug the AC into a dedicated, grounded outlet
- Do not use extension cords or power strips
- Check the cord and outlet before turning the unit on
Proper Window AC Installation
7. Testing the AC
- Turn on the unit and check airflow
- Ensure the compressor and fan are working
- Confirm that water drains properly outside
- If there’s vibration or unusual noise, recheck the leveling and brackets
Safety Tips
- Always install with two people
- Use a secure ladder and safety rope for upper floors
- Never rely only on glass or a weak frame to hold the unit
- If you lack experience, hire a professional installer
Maintenance After Installation
Install a small awning above the unit to protect from heavy rain
Clean the air filter every two weeks
Regularly check the drainage path
Keep coils free of dirt and debris
Schedule annual servicing
Proper Window AC Installation
Types of Brackets for Window Air Conditioner Installation
Brackets play a key role in the safety and stability of a window air conditioner installation. The right bracket depends on the AC weight, window frame material, and installation location. Below are the most common types of brackets:
1. L-Bracket
- The most common type of bracket
- L-shaped design
- Transfers the weight of the AC to the wall or window frame
- Suitable for most standard windows
2. U-Bracket
- U-shaped, sits on the inner and outer frame of the window
- Easy to install without much drilling
- Ideal for sliding or double-glazed windows
- Provides good support for medium-weight AC units
Proper Window AC Installation
3. Adjustable Bracket
- Adjustable length and height
- Suitable for ACs of different sizes and weights
- Comes with screws and locks for added safety
- Flexible and easy to install
4. Telescopic Bracket
- Sliding arms for adjustable length
- Ideal for unusually sized windows
- Higher strength and stability compared to simple brackets
Proper Window AC Installation
5. Heavy-Duty Wall Bracket
- Designed for heavy AC units or weak window frames
- Mounted directly on the wall, transferring the weight safely
- High safety, especially for upper floors
6. No-Drill Bracket
- For windows that cannot be drilled (e.g., aluminum or rental windows)
- Secures onto the frame with pressure or locking
- Suitable for lightweight AC units
- Less stable than L-shaped or wall-mounted brackets
Proper Window AC Installation
7. Hybrid Bracket
- Combination of U-shaped and wall-mounted bracket
- Distributes weight across the window frame and wall
- Suitable for heavy ACs and permanent installations
General Tips for Choosing a Bracket
Sensitive or rental windows: No-drill or adjustable bracket is preferred
Light to medium AC units: L or U bracket is sufficient
Heavy AC units or weak frames: Heavy-duty wall or hybrid bracket is recommended
Comparison of Installation Time for Window AC Brackets
Proper Window AC Installation
The type of bracket directly affects installation speed, difficulty, and safety. The table below shows approximate installation time and key details for each bracket type:
| Bracket Type | Approx. Installation Time | Difficulty | Brief Description |
|---|---|---|---|
| L-Bracket | 30–45 minutes | Medium | Most common bracket; easy to install with screws and anchors |
| U-Bracket | 25–40 minutes | Easy | Minimal drilling required; ideal for sliding or double-glazed windows |
| Adjustable Bracket | 35–50 minutes | Medium | Adjustable length and height; flexible but slightly time-consuming |
| Telescopic Bracket | 40–60 minutes | Medium | Sliding arms require precise adjustment; suitable for unusually sized windows |
| Heavy-Duty Wall Bracket | 50–70 minutes | Hard | Mounted on the wall for heavy AC units; high safety |
| No-Drill Bracket | 20–30 minutes | Easy | Quick installation without drilling; suitable for lightweight AC units; less secure |
| Hybrid Bracket | 45–65 minutes | Hard | Combination of U and wall-mounted bracket; weight distributed on frame and wall; slightly more complex |
Proper Window AC Installation
Key Notes:
Installation times are approximate for experienced installers with proper tools; beginners may take 10–20 minutes longer.
L and U brackets are faster to install and suitable for most homes.
Wall-mounted and hybrid brackets offer higher safety and weight support but take longer to install.
No-drill brackets are the quickest option for rental or lightweight windows but not suitable for heavy AC units.
Proper Window AC Installation
Conclusion
Installing a window air conditioner properly guarantees better cooling, lower energy use, and longer lifespan. Key points include:
- Correct leveling and slope
- Strong support bracket
- Proper sealing of all gaps
- Safe and dedicated power connection
If done right, the AC will perform efficiently and keep your room comfortable throughout the summer. For those with little experience, hiring a professional installer is always the safest choice.
📞 Need Help?
Let us take care of the hard work while you sit back and relax.
📍 Serving: Austin, Round Rock, Cedar Park & more
📱 Call or Text: (737) 420-6992
🌐 Visit: https://lavahandyman.com
