Step-by-Step Patio Swing Chair Assembly (with Safety Tips & Tools List)
Introduction: Why Learn to Assemble a Patio Swing Chair?
A patio swing chair is one of the most popular decorative and relaxing pieces of outdoor furniture for spaces like balconies, terraces, patios, and gardens.
Besides its elegant appearance, it brings comfort and tranquility to your home environment.
Many swing chairs are sold partially assembled or as separate parts, requiring the buyer to complete the setup.
In this educational article, you’ll learn how to assemble a patio swing chair easily, safely, and efficiently—even if you’ve never done it before.

Types of Patio Swing Chairs
Before you start assembling, it’s useful to understand the different types of swing chairs, as each may have slightly different assembly steps.
Step-by-Step Patio Swing Chair Assembly
1. Metal Swing Chairs
Made of steel, aluminum, or galvanized iron, metal swing chairs are durable and sturdy.
They’re perfect for outdoor patios and gardens.
Advantages: High strength, long-lasting, weather-resistant
Disadvantages: Heavy weight, prone to rust if not maintained properly
2. Wooden Swing Chairs
Wooden swing chairs have a warm and natural look, blending beautifully with outdoor décor.
Advantages: Elegant, eco-friendly, aesthetic
Disadvantages: Sensitive to humidity and requires regular oiling or sealing
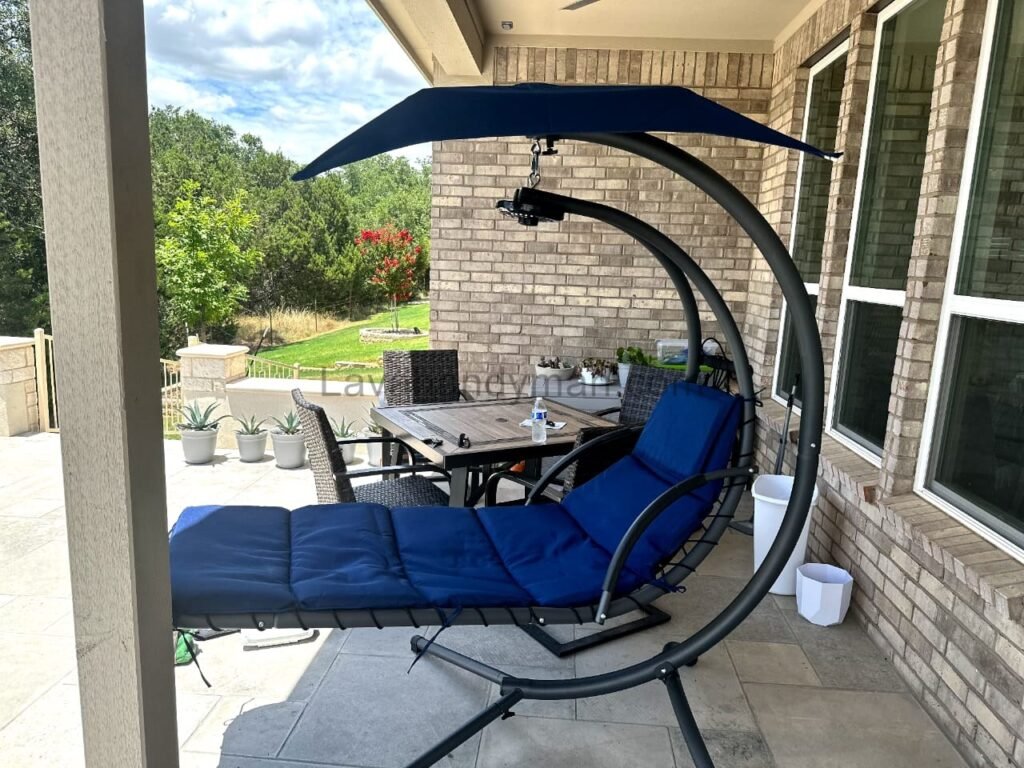
3. Freestanding Swing Chairs
These types have their own stand and don’t need to be attached to a ceiling or beam.
They usually consist of a base, a vertical pole, a hanging chain, and the chair seat.
4. Canopy or Double Swing Chairs
Larger models may include a canopy or double seats.
They offer more comfort but require two people for proper assembly.
Step-by-Step Patio Swing Chair Assembly
Tools and Equipment Needed
Before starting your swing chair assembly, gather the following tools:
- Adjustable wrench or socket wrench
- Phillips and flathead screwdrivers
- Rubber mallet
- Spirit level
- Lubricating oil (e.g., WD-40)
- Work gloves and safety glasses
- Product instruction manual
Check all the included parts before assembly:
- Seat and backrest
- Armrests
- Chains or springs
- Support pole
- Base structure
- Bolts, nuts, and washers
Step-by-Step Patio Swing Chair Assembly
Preparing the Work Area
Choose a flat, clean, and spacious area for assembly.
If working outdoors, use a hard surface such as concrete or tile to avoid damaging the chair parts.
Place cardboard or cloth under the pieces to protect the finish.
Ensure the area is dry and stable to prevent slipping.
Step-by-Step Instructions for Assembling a Patio Swing Chair
Step 1: Assemble the Base
- Lay out the two curved or angled base sections on the floor.
- Connect them with the horizontal stabilizing bars using bolts and nuts.
- Use a level to ensure the base is even.
- Do not fully tighten the bolts yet—this allows easy adjustment later.
Step 2: Install the Main Support Pole
- Attach the vertical support pole to the center of the base.
- Secure it tightly using nuts and washers.
- Make sure it stands perfectly vertical for proper balance.
Step 3: Attach the Hanging Hook or Spring
- At the top of the pole, attach the hanging hook or spring mechanism.
- This part supports the entire weight of the chair, so make sure it’s firmly locked in place.
- Adjust the chain length if necessary to achieve the desired chair height.
Step-by-Step Patio Swing Chair Assembly
Step 4: Assemble the Chair Body
- Connect the seat, backrest, and armrests using screws or bolts.
- Handle rattan or wicker parts gently to avoid damage.
- Do not over-tighten the bolts to prevent cracks or warping.
Step 5: Hang the Chair
- With assistance, lift the chair and attach it to the hook or spring.
- Check that it swings freely without touching the ground or base.
- Adjust the chain height for comfort and balance.
Step 6: Final Testing and Adjustment
- Sit carefully on the chair and test the swing motion.
- Listen for any squeaks or instability—tighten bolts if needed.
- Recheck all connections for safety.
Safety Tips During Swing Chair Assembly
- Always assemble on a flat, stable surface.
- Never exceed the weight limit specified in the manual.
- For outdoor use, apply anti-rust paint or protective coating.
- Keep children from pushing or swinging too aggressively.
- Inspect hooks, chains, and springs every few months.
Step-by-Step Patio Swing Chair Assembly
Maintenance Tips for a Longer-Lasting Swing Chair
1. Regular Cleaning
- Wipe dust and dirt using a damp cloth.
- For metal frames, use mild detergent.
- For rattan or wicker chairs, use a soft brush.
2. Protect from Sun and Rain
- Use a waterproof cover when not in use.
- Avoid direct sunlight to prevent color fading on cushions.
3. Lubricate Joints
Lubricate moving parts every few months to ensure smooth and silent movement.
4. Winter Storage
Store the chair in a covered area during cold or rainy seasons to extend its lifespan.
Step-by-Step Patio Swing Chair Assembly
Common Mistakes During Assembly and How to Avoid Them
| Mistake | Consequence | Solution |
|---|---|---|
| Over-tightening bolts | Frame damage or cracking | Tighten gradually and evenly |
| Incorrect spring installation | Instability or imbalance | Follow the instruction manual carefully |
| Uneven surface setup | Wobbling or tipping over | Assemble on a flat and stable surface |
| Wrong tools used | Damaged screws or threads | Use appropriate, standard tools |

Pro Tips for Comfort and Aesthetics
- Use water-resistant cushions for outdoor use.
- Add small lights or potted plants nearby for a cozy ambiance.
- Repaint or oil the frame annually to keep it looking new.
- Adjust the chain height for ergonomic seating.
Step-by-Step Patio Swing Chair Assembly
🪑 Step-by-Step Guide to Assembling a Patio Swing Chair (SEO Optimized)
Tools and Parts Needed for Patio Swing Chair Assembly
Required Tools:
- Adjustable wrench or socket wrench
- Phillips and flathead screwdrivers
- Rubber mallet
- Spirit level
- Lubricating oil (e.g., WD-40)
- Gloves and safety glasses
Typical swing chair parts include:
- Base sections
- Main support pole
- Hanging hook or spring
- Chair body (seat and backrest)
- Armrests
- Screws, nuts, and washers
Important Preparation Tips:
- Check that all parts are present.
- Work on a flat, clean surface.
- Use a cloth or cardboard under parts to protect the finish.
Step-by-Step Patio Swing Chair Assembly
Step-by-Step Patio Swing Chair Assembly
Step 1 – Prepare the Work Area
- Choose a flat space with enough room for swinging and assembly.
- Ensure the area is dry and stable to avoid slipping.
Step 2 – Assemble the Base
- Place the two main base sections on the floor.
- Connect them with horizontal stabilizing bars using screws or bolts.
- Use a level to ensure the base is balanced.
- Do not fully tighten bolts yet to allow adjustment later.
Step 3 – Install the Main Support Pole
- Attach the vertical pole to the center of the base.
- Secure it with bolts and washers.
- Check with a level to make sure it stands completely vertical.
Tip: The main pole bears the chair and user weight, so it must be sturdy.
Step 4 – Attach the Hanging Hook or Spring
- Install the hook or spring at the top of the support pole.
- Ensure this connection is secure—it holds the entire chair weight.
- Adjust the chain length for the desired chair height.
Step-by-Step Patio Swing Chair Assembly
Step 5 – Assemble the Chair Body
- Attach the seat, backrest, and armrests with bolts.
- Handle fabric or rattan parts carefully.
- Tighten bolts securely but do not overtighten to avoid damage.
- Place the cushion on the seat if included.
Step 6 – Hang the Swing Chair
- With assistance, lift the chair and attach it to the hook or spring.
- Make sure it swings freely without touching the floor or base.
- Adjust the chain or spring for comfort and balance.
Step 7 – Final Testing
- Sit on the chair and test the swing motion.
- Check for squeaks or loose connections and tighten bolts if needed.
- Ensure all attachments are secure for safe use.
Safety Tips for Assembly
- Always assemble the chair on a flat surface.
- Do not exceed the recommended weight limit.
- Supervise children using the chair.
- Regularly inspect hooks, chains, and springs for wear.
- Use gloves and safety glasses during assembly.
Step-by-Step Patio Swing Chair Assembly
Patio Swing Chair Maintenance
Store the chair indoors during cold or rainy seasons to prolong life.
Clean regularly with a damp cloth and mild detergent.
Use a waterproof cover to protect from rain and direct sunlight.
Lubricate moving parts every few months for smooth operation.
🪑 Types of Brackets for Patio Swing Chair Assembly
1. A-Frame Brackets
A-Frame brackets are designed for swing chairs installed on triangular or A-shaped frames.
- Material: Durable steel
- Use: Outdoor patio swing chairs
- Benefits: High stability, strong weight support, secure structure
Step-by-Step Patio Swing Chair Assembly
2. Double-Leg Brackets
Double-leg brackets are made for swing chairs with two base legs.
- Material: Steel or aluminum
- Use: Outdoor swing chairs in patios, gardens, or balconies
- Benefits: Easy installation, balanced support, ideal for two-person swings
3. Wall or Ceiling Mount Brackets
Wall or ceiling brackets are used to hang swing chairs from walls or ceilings.
- Material: Stainless steel
- Use: Indoor and outdoor swing chairs
- Benefits: Safe installation, strong weight support, perfect for limited spaces
Step-by-Step Patio Swing Chair Assembly
4. Swivel Brackets
Swivel brackets allow the chair to rotate in different directions for smoother swinging.
- Material: Stainless steel with rust-resistant coating
- Use: Swing chairs that need natural and smooth motion
- Benefits: Comfortable swinging experience, high safety, long-lasting durability
Tips for Choosing the Right Bracket
- Consider the weight of the chair and user
- Determine the type of installation: indoor or outdoor
- Check environmental conditions: humidity, rain, sun exposure
- Ensure the bracket is strong and durable for complete safety
Step-by-Step Patio Swing Chair Assembly
Conclusion: Assembling a Patio Swing Chair Is Easier Than You Think
Assembling a patio swing chair may look complicated at first, but by following these clear steps, it becomes an enjoyable and rewarding DIY project.
With a little patience and attention to safety, you’ll soon have a stylish, sturdy swing chair ready for relaxation, reading, or afternoon tea.
Take pride in your work — after all, this peaceful seat in your patio is something you built yourself! 🌿🪑
📞 Need Help?
Let us take care of the hard work while you sit back and relax.
📍 Serving: Austin, Round Rock, Cedar Park & more
📱 Call or Text: (737) 420-6992
🌐 Visit: https://lavahandyman.com