A Complete Guide to Installing Multi-Panel Framed Wall Art
Multi-panel wall art is one of the most stylish and practical ways to decorate empty walls. These artworks not only add beauty and character to a space, but their variety in form, design, and color makes them a versatile choice for reflecting your taste and enhancing interior design. If you’re planning to install multi-panel framed art on your wall, this guide will walk you through everything you need to know.
Table of Contents
- What Is Multi-Panel Wall Art?
- Benefits of Multi-Panel Artwork
- Choosing the Right Image
- Selecting the Right Frame
- Tools You’ll Need
- Step-by-Step Installation
- Key Tips for Mounting
- Layout and Arrangement Styles
- Where to Use Multi-Panel Art
- Lighting Considerations
- Care and Maintenance
- Common Mistakes to Avoid
- Creative Ideas for Display
- Final Thoughts
A Complete Guide to Installing Multi-Panel Framed Wall Art

1. What Is Multi-Panel Wall Art?
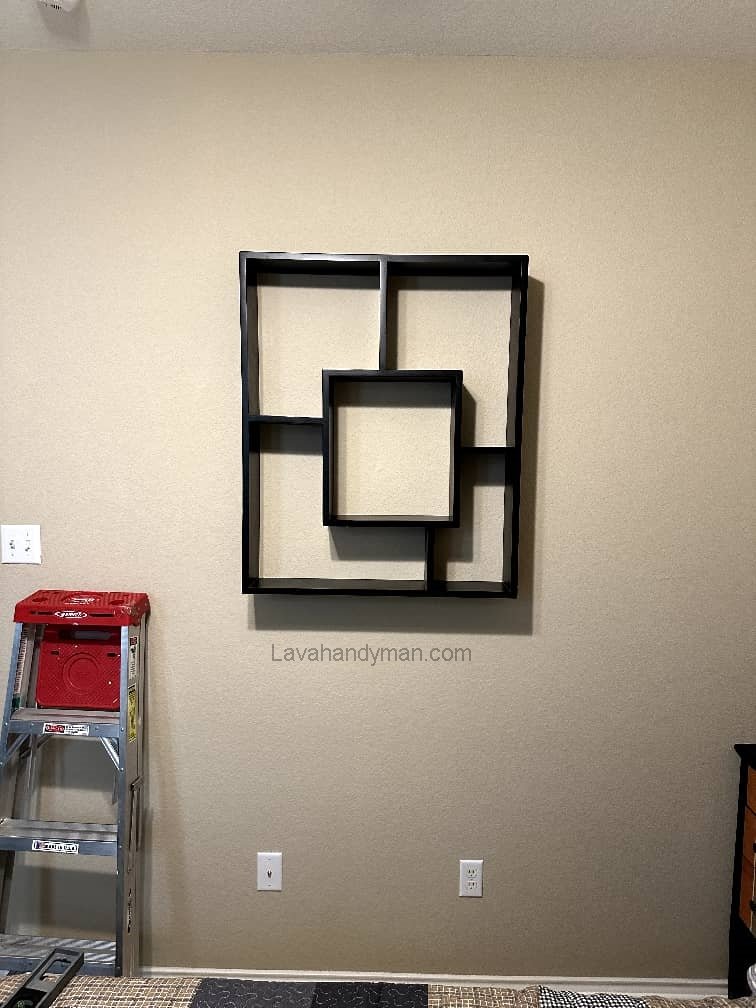
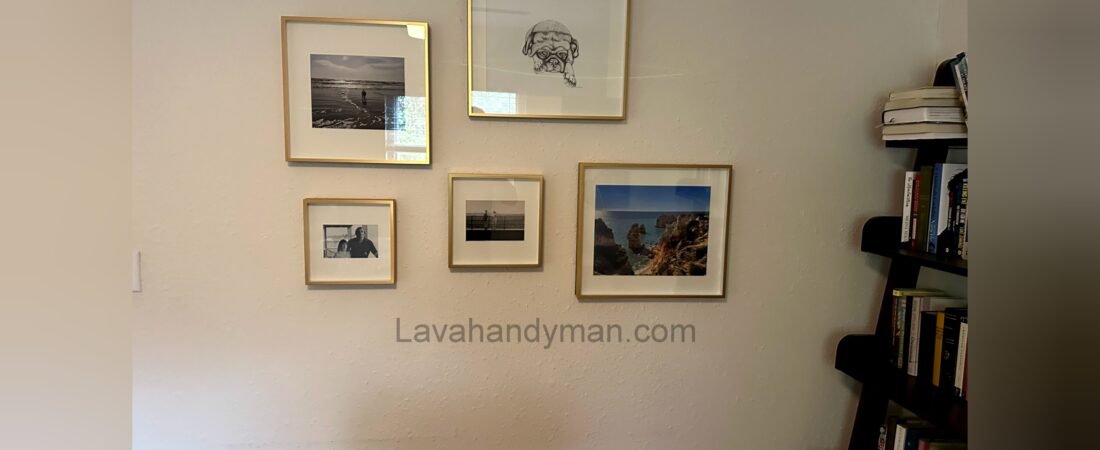
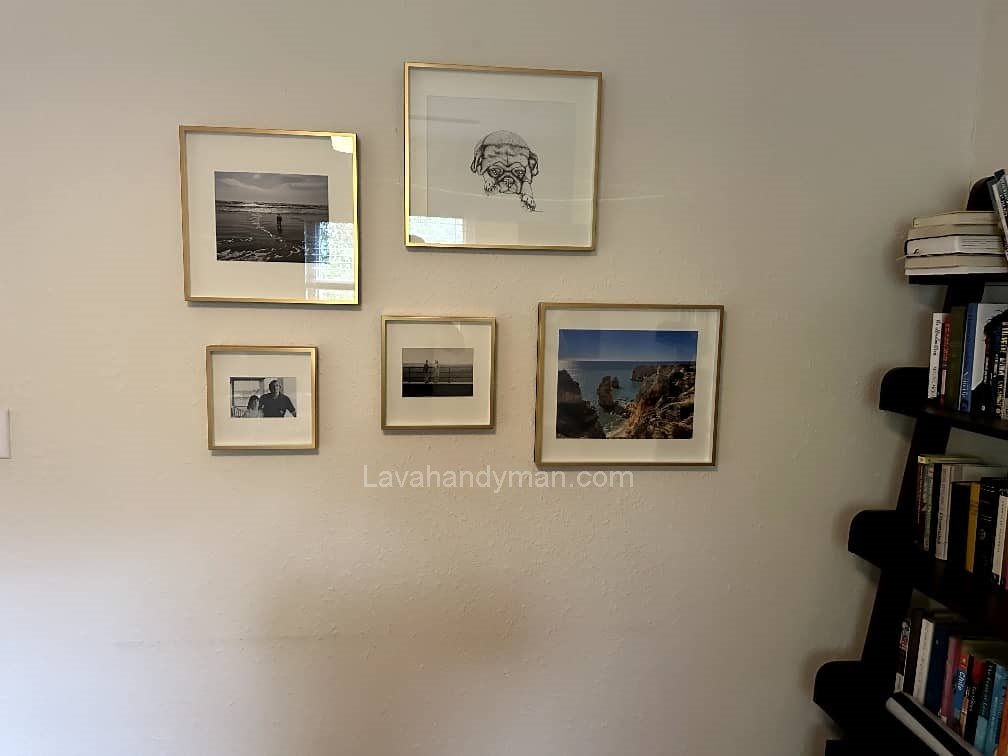
Multi-panel wall art consists of two or more connected pieces that together form one complete image or concept. These panels are typically hung with consistent spacing to create a cohesive design on the wall.
Common Types:
- Diptych – 2 panels
- Triptych – 3 panels
- Multi-panel sets – 4 or more
A Complete Guide to Installing Multi-Panel Framed Wall Art
2. Benefits of Multi-Panel Art
- Visual appeal and dimension
- Perfect for covering large wall spaces
- Endless design options
- Adds rhythm and depth to a room
- Easier to transport and hang than a single large piece
3. Choosing the Right Image
The image should resonate with your personality while complementing your interior design.
Tips for Image Selection:
- Theme – Nature, architecture, abstract, religious, portraits, etc.
- Interior Style – Modern, minimalist, traditional, classic
- Color Palette – Should blend or contrast well with the room’s tones
- Wall Size – Image should be scaled to fit the wall appropriately
A Complete Guide to Installing Multi-Panel Framed Wall Art
4. Selecting the Right Frame
Frames protect your artwork and enhance its aesthetic.
Frame Options:
- Wood – Warm, traditional
- Metal – Sleek, industrial
- Floating (frameless) – Clean and modern
- Colored or patterned – For bold or creative interiors
Pro Tip: Use identical frames for each panel to ensure visual consistency.
5. Tools You’ll Need
- Tape measure or laser measurer
- Level (manual or laser)
- Pencil or painter’s tape for marking
- Screws, nails, wall plugs (based on wall type)
- Hammer, drill, or screwdriver
- Double-sided adhesive tape (for temporary setup)
A Complete Guide to Installing Multi-Panel Framed Wall Art
6. Step-by-Step Installation
Step 1: Choose the Placement
Select a wall that offers good visibility, lighting, and enough space for all panels.
Step 2: Find the Center Point
Mark the central point of the arrangement on the wall.
Step 3: Measure Panel Spacing
Maintain 2–5 cm spacing between panels, measured accurately.
Step 4: Mark Mounting Spots
Use pencil or painter’s tape to mark each panel’s exact position.
Step 5: Install Mounting Hardware
Use appropriate fixings based on wall type. Ensure all points are level.
Step 6: Hang the Panels
Start from the center and move outward for balance and symmetry.
A Complete Guide to Installing Multi-Panel Framed Wall Art
7. Key Tips for Mounting
- Ideal Height: The center of the artwork should be around 145 cm from the floor.
- Leveling Is Crucial: Even slight misalignment can ruin the composition.
- Test Layout First: Use paper templates or masking tape to visualize before drilling.
8. Layout and Arrangement Styles
- Horizontal – Most popular, ideal for large walls
- Vertical – Great for narrow spaces or beside doors
- Stair-step (angled) – Perfect for stairways
- Asymmetrical – For creative or artistic interiors
A Complete Guide to Installing Multi-Panel Framed Wall Art
9. Where to Use Multi-Panel Art
| Room | Suggested Themes |
|---|---|
| Living Room | Landscapes, portraits, abstract paintings |
| Bedroom | Calming nature scenes, soft abstracts |
| Kitchen | Food, coffee, fruit prints |
| Home Office | Maps, quotes, geometric art |
| Hallway | Family photos, vertical sets |
A Complete Guide to Installing Multi-Panel Framed Wall Art
10. Lighting Considerations
Proper lighting enhances your wall art:
- Spotlights above or below each panel
- LED strips behind the frames
- Track lighting for adjustable focus
- Avoid direct sunlight to prevent fading
11. Care and Maintenance
- Dust panels every two weeks using a dry cloth
- Avoid spraying cleaners directly on frames or canvas
- Use microfiber cloth for glass frames
- Keep away from moisture and heat sources
A Complete Guide to Installing Multi-Panel Framed Wall Art
12. Common Mistakes to Avoid
- Uneven or crooked installations
- Mismatched frame styles
- Inappropriate height or spacing
- Poor lighting or overly cluttered background
- Choosing art that clashes with room decor
13. Creative Ideas for Display
- Combine artwork with wall-mounted plants
- Use colorful or contrasting frames for youth spaces
- Add mirrors or floating shelves around the panels
- Install RGB LED lighting for a modern glow
- Display multiple multi-panel sets across one large wall
A Complete Guide to Installing Multi-Panel Framed Wall Art
🛠 Complete Guide to Tools for Installing Multi-Panel Wall Art
Installing framed multi-panel wall art requires simple yet precise tools. Choosing the right tools and hardware ensures a secure installation while preventing damage to both the wall and the artwork.
🔧 Essential Installation Tools
| Tool | Purpose |
|---|---|
| Measuring tape or laser measurer | For accurate placement and spacing between panels |
| Manual or laser level | Ensures the panels are straight and aligned |
| Pencil or painter’s tape | For marking the wall without causing damage |
| Hammer or electric drill | For driving nails or drilling holes in harder surfaces |
| Screwdriver (manual or electric) | For fastening screws into anchors or wall plugs |
| Metal ruler or mounting template | For precise layout and alignment of frames |
A Complete Guide to Installing Multi-Panel Framed Wall Art
🪛 Common Mounting Hardware
Based on Wall Type:
| Wall Type | Recommended Hardware |
|---|---|
| Drywall or gypsum (plasterboard) | Drywall anchors or toggle bolts (Molly anchors) |
| Concrete or brick | Hammer drill, plastic wall plugs, size 6–8 screws |
| Wood or MDF | Wood screws or small nails |
Typical Mounting Accessories:
- Threaded wall hooks (metal or plastic)
- Wire or D-ring hangers on the back of frames
- Wall plugs and matching screws (choose by weight of frame)
- Command™ adhesive strips – for lightweight frames and no-drill installations
A Complete Guide to Installing Multi-Panel Framed Wall Art
💡 Professional & Optional Tools
| Tool | Special Use |
|---|---|
| 3-line laser level | For quick, precise alignment across multiple panels |
| Double-sided nano or industrial adhesive | For lightweight, drill-free installations |
| Mounting templates or guides | Useful for installers and retail setups |
✅ Key Installation Tips
In rental properties or temporary setups, adhesive wall hooks are a damage-free solution.
For heavier frames, always use heavy-duty wall anchors or toggle bolts.
For drywall or plaster walls, avoid regular nails—use proper drywall anchors instead.
A Complete Guide to Installing Multi-Panel Framed Wall Art
🎨 The Importance of Wall Art Installation with Proper Lighting
Mounting artwork without considering lighting is like showcasing a painting in the dark. Proper lighting not only enhances the beauty of the artwork but also draws attention, adds depth, and brings a refined, professional atmosphere to the space.
Why Is Lighting Important for Wall Art?
✅ 1. Enhances Visual Appeal
Good lighting brings out the colors, textures, and fine details in the artwork. Without light, even the best pieces may appear dull or lifeless.
✅ 2. Creates a Focal Point
Direct lighting focuses the viewer’s attention on the artwork, making it the central visual element in the room.
✅ 3. Reinforces Interior Style
The type and temperature of light (warm, cool, focused, ambient) can completely shift the mood—making the space feel elegant, cozy, modern, or artistic.
✅ 4. Adds Depth and Dimension
Directional lighting from above or below creates shadows and highlights that give the artwork a more dynamic, three-dimensional effect.
A Complete Guide to Installing Multi-Panel Framed Wall Art
💡 Types of Lighting for Wall Art
| Lighting Type | Best For |
|---|---|
| Spotlights | Focusing on a single artwork – perfect for living rooms or galleries |
| LED strips (behind the frame) | Soft background glow – modern and minimal style |
| Adjustable ceiling lights (track lighting) | Great for hallways or gallery walls |
| Wall-mounted up/down lights | Gives a formal, elegant look to the artwork |
⚠️ Tips:
Textured or darker artworks benefit most from angled lighting.
Avoid direct sunlight—it can fade colors over time.
Use the right color temperature (around 3000–4000K) for natural-looking art lighting.
🖼 Optimized Guide to Choosing the Right Wall Art
Choosing the right wall art goes beyond personal taste — it should complement your space, decor style, color palette, purpose, and wall dimensions. A well-selected piece brings character to your room and naturally draws the eye.
A Complete Guide to Installing Multi-Panel Framed Wall Art
✅ 1. Match the Art to Your Interior Style
| Interior Style | Recommended Art Type |
|---|---|
| Modern / Minimalist | Abstract, black & white, geometric shapes, negative space |
| Classic / Traditional | Landscapes, portraits, gold or wooden framed paintings |
| Industrial | Raw material textures, maps, typography, concrete/metal prints |
| Boho / Natural | Nature photography, botanical prints, canvas or wood art |
| Contemporary | Conceptual pieces, neutral tones, line art |
✅ 2. Choose the Right Color Palette
- For neutral walls or furniture, go with bold, colorful art (blue, yellow, orange).
- In colorful or busy spaces, use monochrome or black-and-white artwork for balance.
- Use a color wheel to select complementary or contrasting tones for harmony.
✅ 3. Choose the Right Material Based on the Space
| Art Type | Characteristics | Best For |
|---|---|---|
| Canvas Prints | Lightweight, matte finish, no glass | Living room, bedroom |
| Framed with Glass | Polished, more formal | Offices, hallways |
| Metal / Plexiglass Prints | Glossy, modern feel | Artistic or workspaces |
| Original Paintings | Unique, collectible | High-end or gallery-like settings |
A Complete Guide to Installing Multi-Panel Framed Wall Art
✅ 4. Scale the Artwork to Fit the Wall
- Large wall = oversized or multi-panel artwork
- Small wall = single medium piece or grid of smaller frames
- Keep a visual buffer — leave at least 15 cm (6 in) around the edges
✅ 5. Match the Theme to the Room’s Purpose
| Room | Recommended Art Content |
|---|---|
| Living Room | Landscapes, portraits, conceptual or abstract works |
| Bedroom | Calm scenery, soft tones, relaxing images |
| Children’s Room | Playful, colorful, educational or cartoon prints |
| Kitchen | Food-themed, coffee art, quirky quotes |
| Office / Study | Maps, motivational quotes, minimalist prints |
A Complete Guide to Installing Multi-Panel Framed Wall Art
✅ 6. Number and Layout of Frames
Keep 5–10 cm (2–4 in) spacing between frames for a clean look
For large walls: use multi-panel or gallery wall sets
For narrow spaces or hallways: try vertical rows of small frames
Final Thoughts
Multi-panel framed wall art is a smart, artistic way to upgrade any space. By carefully selecting the design, matching frames, and following a few practical steps for installation, you can easily create a stunning visual centerpiece. Whether you’re decorating your living room, bedroom, office, or hallway — multi-panel art brings harmony, depth, and personality to your walls.
📞 Need Help?
Let us take care of the hard work while you sit back and relax.
📍 Serving: Austin, Round Rock, Cedar Park & more
📱 Call or Text: (737) 420-6992
🌐 Visit: https://lavahandyman.com