
Installing Multi-Panel Wall Art: A Complete Guide
Introduction
In interior design, hanging artwork has long been a powerful way to elevate the aesthetics of a space. In recent years, arranging wall art as multi-panel compositions (also known as gallery walls or multi-frame art) has become one of the most popular trends in modern home decor.
This article offers a comprehensive and practical guide to designing and installing multi-panel artwork, covering layout styles, technical tips, frame and art selection, common mistakes, and creative display ideas for your home or workspace.
1. What Is Multi-Panel Wall Art and Why Use It?
Multi-panel wall art refers to the display of multiple framed artworks arranged together in a coordinated layout on a single wall. These can include:
- Several parts of one large artwork (e.g., a triptych or quadriptych)
- Or a series of separate, but stylistically or thematically related, pieces
Installing Multi-Panel Wall Art: A Complete Guide
Benefits of Multi-Panel Layouts:
- Adds visual depth and richness
- Tells a story or creates a narrative through imagery
- Ideal for covering large, blank wall areas
- Flexible and adaptable to different decor styles (modern, classic, minimal, etc.)
2. Popular Layout Styles for Multi-Panel Art
Choosing the right layout is essential to the overall look and feel of your wall display. Here are some of the most common and stylish layout types:
2.1 Symmetrical Layout
Installing Multi-Panel Wall Art: A Complete Guide
Frames are arranged in evenly spaced rows and columns. This style brings order, balance, and is ideal for formal or traditional rooms like living rooms or conference spaces.
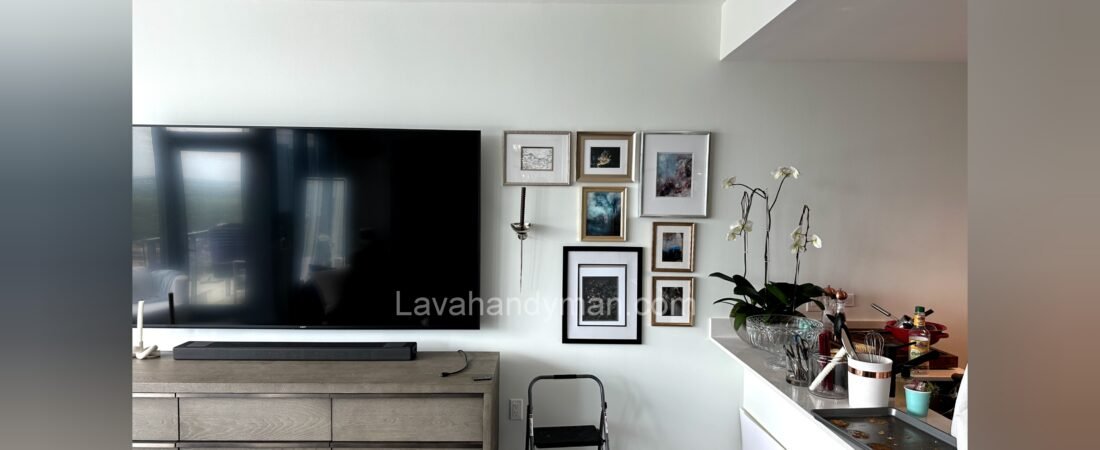
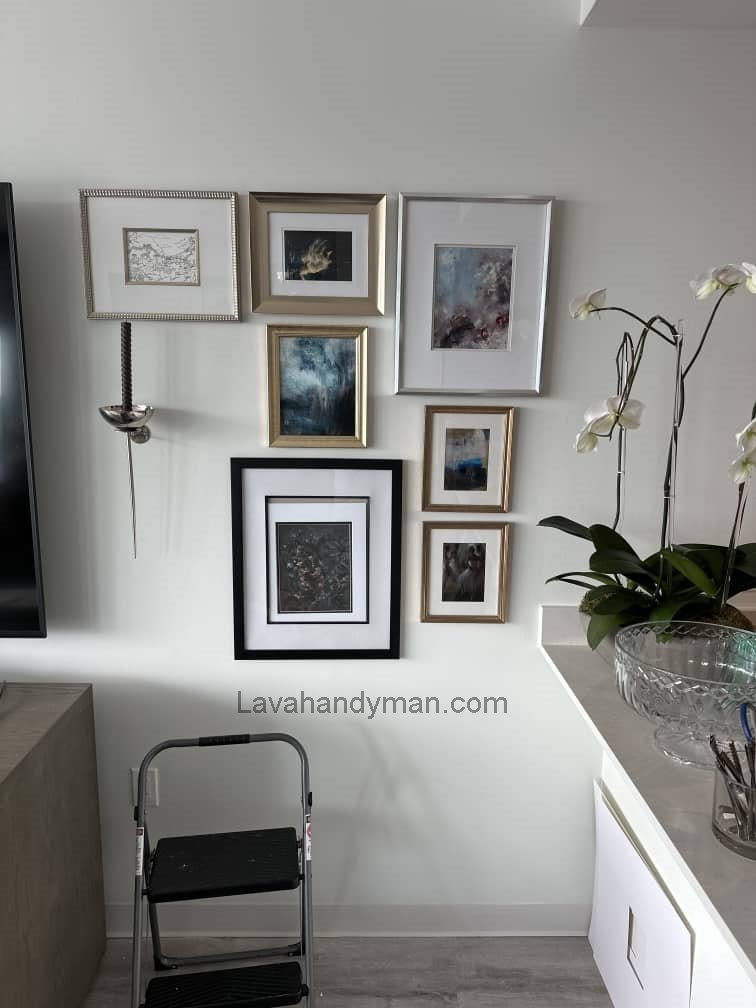
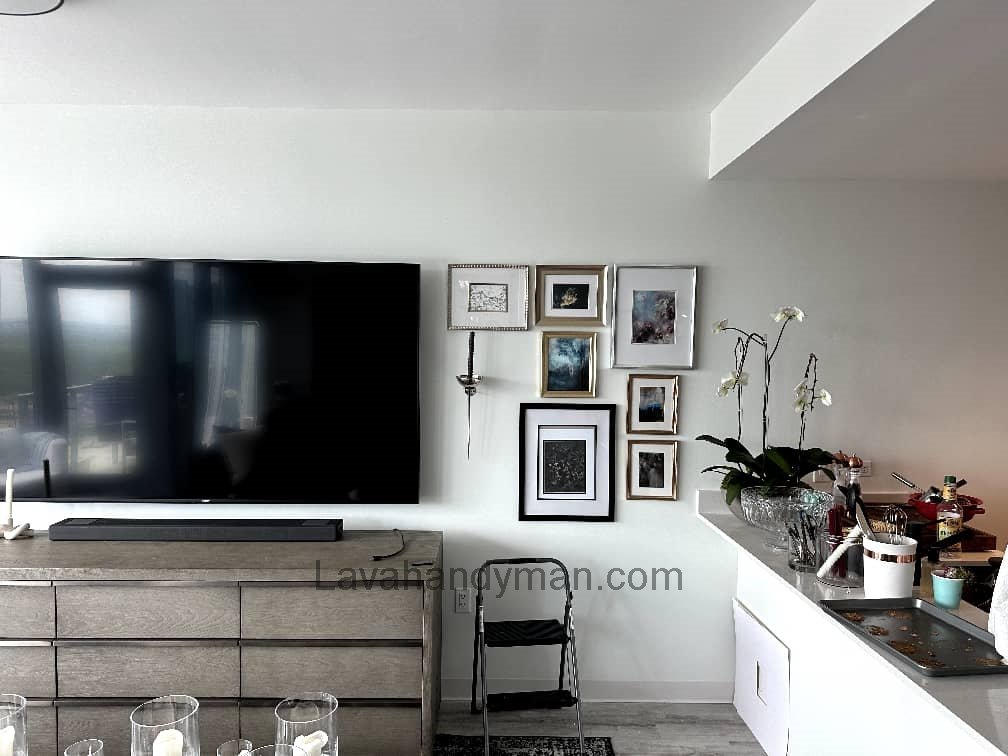
2.2 Asymmetrical Layout
Frames of varying sizes and spacing are creatively arranged with a sense of harmony in color or subject. Perfect for casual, modern, or artistic interiors.
2.3 Grid Layout
Frames are placed in a perfect grid—ideal for displaying photo collections or consistent graphic artworks. This layout emphasizes structure and consistency.
2.4 Split or Panel Art (Triptych)
A single image is divided into multiple sections, each mounted in its own frame. This approach is very impactful and works well in modern, minimal spaces.
Installing Multi-Panel Wall Art: A Complete Guide
3. Choosing the Right Artwork for Multi-Panel Displays
3.1 Match Art to the Room’s Function
| Space | Suggested Themes |
|---|---|
| Living Room | Abstract art, nature, portraiture, conceptual |
| Bedroom | Calming visuals, soft lines, gentle colors |
| Hallways | Travel photos, family memories |
| Office | Motivational prints, maps, typography |
Installing Multi-Panel Wall Art: A Complete Guide
3.2 Color Harmony
Choose artworks that share a similar color palette and complement your furniture, curtains, rugs, or wall color.
3.3 Frame Selection
The type of frame significantly affects the final aesthetic:
- Wood frames: Warm and classic
- Metal or black frames: Modern and sleek
- Frameless (canvas prints): Great for minimalist or contemporary interiors
Installing Multi-Panel Wall Art: A Complete Guide
4. Step-by-Step Installation Guide
Proper installation ensures your wall art is secure and visually balanced. Follow these steps:
4.1 Wall Preparation
- Clean the wall surface
- Identify the wall’s center point using a tape measure
- Use painter’s tape or paper templates to map out your layout before drilling
4.2 Ideal Spacing
- Standard space between frames: 5–10 cm (2–4 inches)
- In freeform layouts, spacing can vary creatively, but consistency helps visual cohesion
4.3 Tools & Materials
- Drill and wall plugs for brick or concrete walls
- Hammer and nails for drywall or wood
- Strong double-sided tape or damage-free wall hooks for temporary installations
4.4 Height Recommendations
Aim to place the center of your arrangement at approximately 145–150 cm (57–60 inches) from the floor—roughly at eye level.
Installing Multi-Panel Wall Art: A Complete Guide
5. Lighting Tips for Wall Art
Lighting enhances the impact of your wall art. Here are a few effective techniques:
- Spotlights: Direct lighting for highlighting individual pieces
- Overhead strip lighting: Ideal for hallway gallery walls
- Ambient daylight: Best if indirect; avoid direct sunlight to prevent fading
6. Creative Gallery Wall Ideas
- Family Gallery: Mix framed family photos of various sizes with consistent frame styles
- Story Wall: Arrange a sequence of images to depict travel, milestones, or a timeline
- Mixed-Media Display: Combine paintings, photography, and graphic prints
- Color-Themed Arrangement: Use different artworks that share a specific palette
Installing Multi-Panel Wall Art: A Complete Guide
7. Common Mistakes to Avoid
Avoiding these pitfalls will help your wall display look professional:
| Common Mistake | Recommended Fix |
|---|---|
| Hanging frames too high/low | Maintain center at eye level |
| Mismatched frames with no harmony | Use consistent frame tones or styles |
| Overcrowded layout | Leave enough negative (blank) space |
| Poor lighting or glare | Use spotlights or diffused lighting |
| Random drilling | Plan layout with templates beforehand |
Installing Multi-Panel Wall Art: A Complete Guide
✅ Step-by-Step Guide to Installing Multi-Panel Wall Art
Installing multi-panel wall art is one of the most stylish and popular ways to create an artistic and striking feature in your interior design. To achieve a clean, balanced, and professional result, it’s important to follow a structured installation process.
Here’s a complete, step-by-step guide to help you install your wall art correctly and beautifully.
1. Choose the Best Location for Your Artwork
Before you begin:
- Select a flat, clean wall surface.
- Ensure there is adequate (preferably indirect) lighting.
- The artwork should be in a visible and central location, not behind furniture or a TV.
- The wall dimensions should match the overall size of the art layout.
💡 Tip: Use large or wide layouts for big walls, and vertical or compact groupings for smaller spaces.
Installing Multi-Panel Wall Art: A Complete Guide
2. Measure and Mark the Center of the Layout
- Use a tape measure to determine the width of the wall.
- Find and mark the center point of the wall with a pencil.
- If you’re hanging multiple frames, calculate the total width of all frames plus spacing between them.
- Align the total layout so that its center matches the center of the wall.
🎯 Ideal Height: The center of the artwork should be around 145–150 cm (57–60 inches) from the floor — roughly at average eye level.
3. Plan the Layout (on the floor or with paper templates)
Method 1: Layout on the Floor
- Arrange the frames on the floor in the same order they will appear on the wall.
- Set and adjust the space between each frame.
Method 2: Use Paper Templates
- Cut out paper shapes matching each frame’s size.
- Tape them to the wall using painter’s tape.
- Rearrange freely until you’re happy with the layout.
🧠 Advantage: You get a clear idea of the final composition — without drilling any holes yet.
Installing Multi-Panel Wall Art: A Complete Guide
4. Mark Hanging Points Accurately
- Locate the hook or hanging hardware on the back of each frame.
- Measure the distance from the top edge of the frame to the hook.
- On the wall (or on your paper template), mark the exact hanging point.
- Use a level tool (manual or laser) to ensure all frames align properly — especially for symmetrical or grid layouts.
5. Choose the Right Installation Method Based on Weight & Wall Type
▪ For Lightweight Frames:
- Use strong double-sided adhesive strips or nail-free hooks
- Best for renters or drywall installations
▪ For Medium-Weight Frames:
- Use small nails and a hammer or wall plugs for added strength
▪ For Heavy Frames:
- Use a drill, wall anchors, and screws
- Preferably use two hooks per frame for better balance
⚠️ Warning: Never hang heavy frames with just one nail or adhesive. It may fall and cause damage.
Installing Multi-Panel Wall Art: A Complete Guide
6. Start Hanging the Frames in Order
- Begin with the central frame so that the rest align with it.
- Continue installation outward — either left/right or up/down.
- After hanging each frame, check alignment using a level tool.
7. Final Adjustments & Finishing Touches
After all frames are installed:
- Step back and view from different angles.
- Make sure the spacing is consistent, all frames are straight, and lighting is even.
- If needed, apply small adhesive pads behind corners to prevent shifting or tilting.
Installing Multi-Panel Wall Art: A Complete Guide
8. Optional: Add Lighting for Maximum Impact
Proper lighting can dramatically enhance your artwork display:
- Spotlights: Highlight individual pieces for dramatic effect
- Gallery lighting bars: Illuminate an entire wall section evenly
- Concealed LED strips: For a clean, modern glow
☀️ Caution: Avoid direct sunlight on artwork to prevent fading or damage over time.
✅ Summary Table of Steps
| Step | What to Do |
|---|---|
| 1. Select Wall | Choose a clean, well-lit, visible space |
| 2. Measure | Find center point, calculate layout dimensions |
| 3. Plan Layout | Arrange on floor or use paper templates |
| 4. Mark Points | Measure and mark exact hanging spots |
| 5. Choose Tools | Match tools to frame weight and wall material |
| 6. Hang Frames | Begin from center, check level after each step |
| 7. Adjust | Fix alignment, spacing, and stability |
| 8. Lighting | Add optional lighting for enhanced effect |
Conclusion
Installing multi-panel wall art is a smart and stylish way to bring life to your walls. Whether you’re aiming for a minimalist gallery wall, a bold artistic expression, or a personal storytelling composition, this format offers endless creative possibilities.
By following key design principles, using the right tools, and thoughtfully selecting artwork and frames, you can transform any blank wall into a stunning visual statement that reflects your personality and aesthetic taste.
📞 Need Help?
Let us take care of the hard work while you sit back and relax.
📍 Serving: Austin, Round Rock, Cedar Park & more
📱 Call or Text: (737) 420-6992
🌐 Visit: https://lavahandyman.com
