Installing Mirrors on the Wall and in the Bedroom
Mirrors are essential and versatile elements in interior design. Besides adding beauty, installing a mirror on the bedroom wall can help brighten and enlarge the space, create a modern and attractive look, and enhance the room’s functionality. In this article, we will thoroughly discuss the importance, types, methods, and tips for installing mirrors in the bedroom.
1. Introduction
The bedroom is a place for rest and relaxation, and its decor plays a vital role in quality of life. Mirrors not only serve a decorative purpose but also improve lighting and make the space appear larger. Installing a mirror on the bedroom wall adds both beauty and practicality to the environment.
Installing Mirrors on the Wall and in the Bedroom

2. Why Install a Mirror in the Bedroom?
2.1 Increased Natural Light
Mirrors reflect natural light, making the room brighter. This is especially important in small or dimly lit bedrooms.
2.2 Making the Space Appear Larger and More Open
The reflection in mirrors creates a sense of depth and spaciousness, making small rooms look bigger and more open.
2.3 Enhancing Beauty and Appeal
Mirrors with diverse frames and designs can serve as focal points in bedroom decor, adding a stylish and modern touch.
2.4 Practical Uses
A bedroom mirror allows you to check your appearance before leaving the house and can also serve as a space for makeup or exercise.
Installing Mirrors on the Wall and in the Bedroom
3. Types of Mirrors Suitable for Bedrooms
3.1 Simple Framed Mirrors
These mirrors have wooden, metal, or plastic frames and can be plain or decorative, depending on the room’s style.
3.2 Large Wall Mirrors
These cover the entire or part of a wall, making the space look significantly larger, ideal for modern bedrooms.
3.3 Decorative Mirrors with Various Shapes
Mirrors in circular, oval, or artistic shapes that serve both functional and decorative purposes.
Installing Mirrors on the Wall and in the Bedroom
4. Key Tips for Installing Mirrors on the Bedroom Wall
- Choose the Right Location: Install the mirror where it can reflect natural light well or become a focal point.
- Proper Height: Install at a height that provides a good view.
- Safety and Stability: Use strong tools and adhesives to prevent the mirror from falling.
- Match with Decor: The mirror frame should complement the overall room style.
5. Steps to Install a Mirror in the Bedroom
5.1 Prepare Tools
Needed tools: mirror, screws and wall plugs or special adhesive, drill, level, measuring tape, pencil.
5.2 Mark the Installation Spot
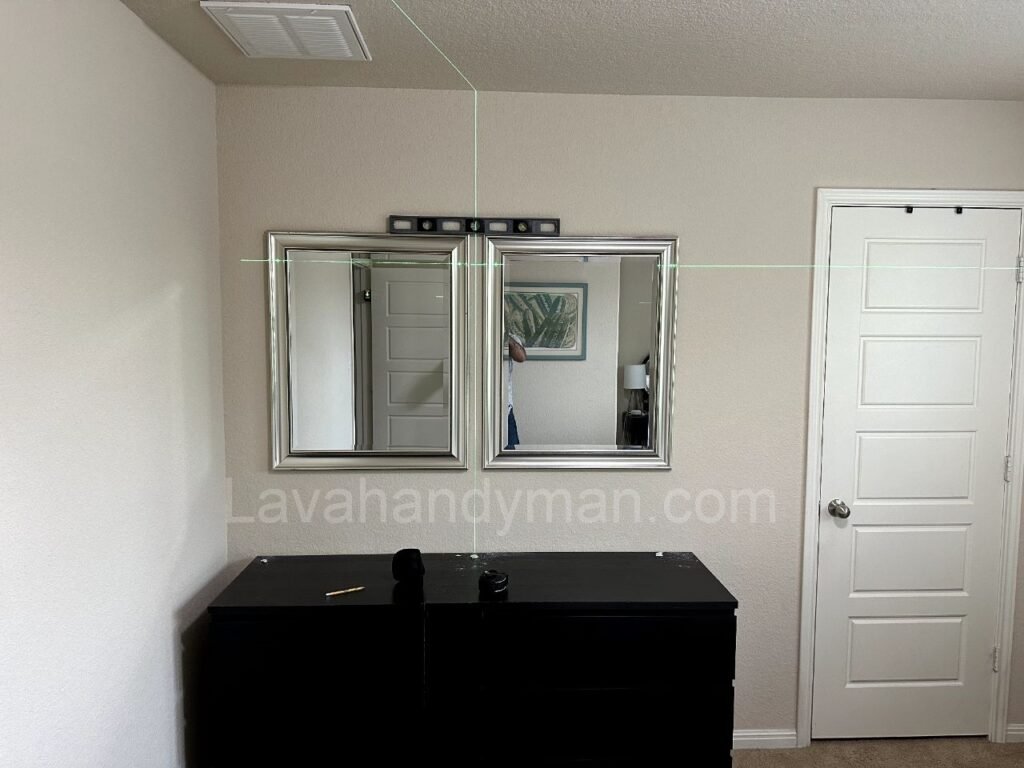
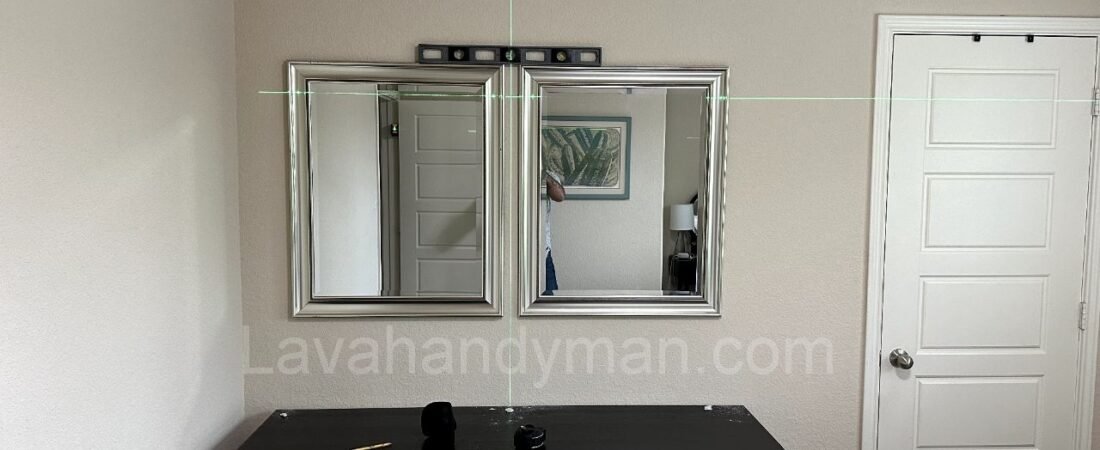
Use measuring tape and pencil to mark the exact location. Use a level to ensure the mirror will be straight.
5.3 Install Wall Plugs and Screws
Drill holes in the wall, insert plugs and screws.
5.4 Mount the Mirror
Carefully place the mirror on the screws or adhesive and make sure it is securely fixed.
Essential Tools for Installing a Mirror on the Wall
Proper and secure mirror installation requires using the right tools. The choice of tools depends on the weight of the mirror, the type of wall, and whether you’re using screws or adhesive. Below is a list of the most important and practical tools used for installing mirrors:
Installing Mirrors on the Wall and in the Bedroom
🔧 Main Tools for Mirror Installation
1. Measuring Tape
Used to precisely measure the installation area and determine distances from the floor or other decor elements.
2. Pencil or Marker
For marking the drilling or adhesive points on the wall before final installation.
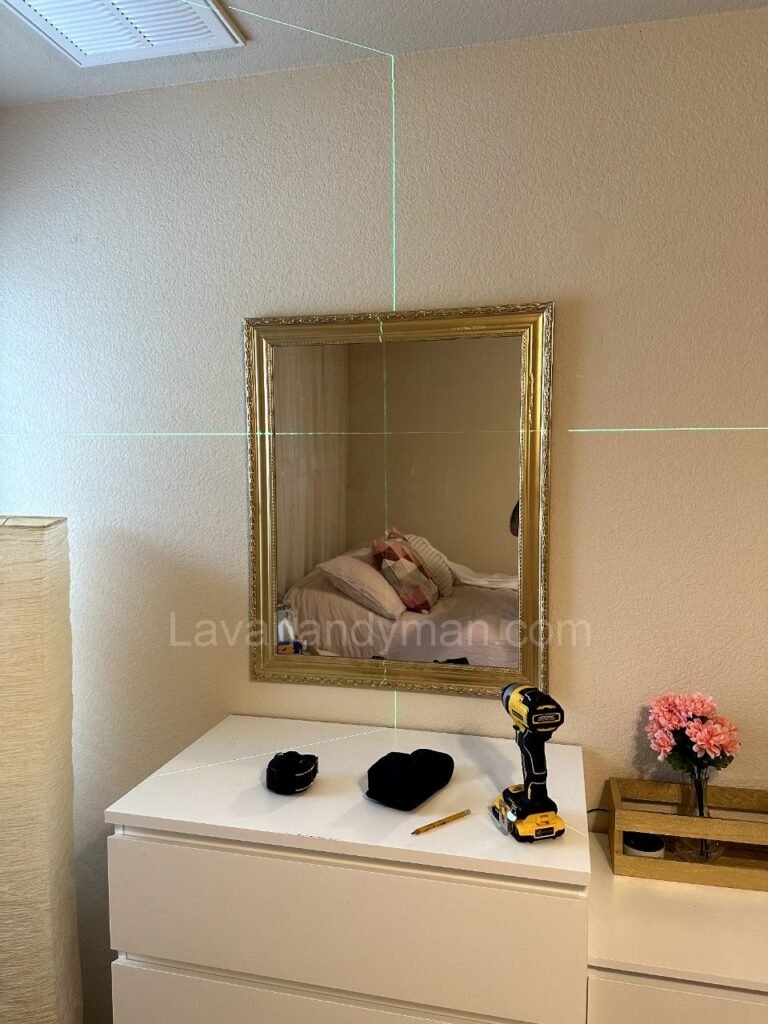
3. Level (Manual or Laser)
Ensures that the mirror is installed straight and horizontally. A tilted mirror can ruin the room’s aesthetic.
4. Electric or Cordless Drill
For drilling holes in the wall to insert wall plugs and screws—especially useful for concrete or drywall surfaces.
5. Appropriate Drill Bits
Installing Mirrors on the Wall and in the Bedroom
Choose based on the wall material (e.g., plaster, concrete, wood). For most mirrors, 6 mm or 8 mm drill bits are commonly used.
6. Wall Plugs (Anchors)
Used to secure screws in the wall and bear the weight of the mirror, especially important on weaker walls like plasterboard.
7. Screws
To attach the mirror or mounting brackets to the wall. The size and type of screw should match the wall plugs.
8. Mirror Adhesive
A strong adhesive (such as silicone designed for mirrors or glass) is an alternative to drilling. Ideal for lightweight mirrors or smooth surfaces like tile.
9. Wall Hooks or Brackets
For mirrors designed to hang. These are mounted on the wall first, and the mirror is then hung on them.
10. Safety Gloves
To protect your hands while handling or installing the mirror—especially important for heavy or sharp-edged mirrors.
11. Soft Cloth or Microfiber Towel
For cleaning the mirror before and after installation without scratching the surface.
Installing Mirrors on the Wall and in the Bedroom
✅ Additional Tips:
For tiled or marble walls, it’s often best to use strong adhesives to avoid damaging the surface with drilling.
For large or heavy mirrors, always ask someone to assist you to avoid accidents or breakage.
When using adhesive, allow at least 24 hours for it to fully cure before letting go of the mirror.
Types of Brackets for Wall-Mounted Mirror Installation:
Choosing the right bracket is essential for safe and proper mirror installation. The type of bracket you need depends on the mirror’s weight, shape, wall material, and installation method. Below is an overview of the most common types of mirror brackets, along with their uses and advantages:
🔩 1. L-Shaped Bracket (L-Bracket)
- Use: Supports the mirror from the bottom or sides.
- Features: Strong and capable of holding heavy loads.
- Ideal for: Large, heavy, or frameless mirrors.
- Installation: Secured to the wall; the mirror rests on top.
Installing Mirrors on the Wall and in the Bedroom
🪝 2. D-Ring Hangers
- Use: For mirrors with hanging hardware or hooks on the back.
- Features: Easy and commonly used, similar to picture hanging.
- Ideal for: Lightweight to medium-sized framed mirrors.
- Installation: Screwed into the wall; the mirror is hung onto the rings.
🧩 3. Z-Clips / French Cleats
- Structure: Two interlocking metal pieces—one attached to the wall and one to the mirror.
- Features: Very secure, hidden, and professional-looking.
- Ideal for: Heavy or decorative mirrors; ideal for a clean, flush mount.
Installing Mirrors on the Wall and in the Bedroom
🧷 4. Glass Mirror Clips
- Structure: Small, transparent or metallic clips that grip the mirror’s edges.
- Features: Simple and cost-effective; ideal for minimal setups.
- Ideal for: Thin, frameless, lightweight mirrors—often used in bathrooms.
🛠 5. Mounting Channel or Rail
- Structure: A plastic or metal rail that holds the mirror in place.
- Features: Creates a neat, gap-free appearance with no visible hardware.
- Ideal for: Wide or tall mirrors that need even support across the length.
Installing Mirrors on the Wall and in the Bedroom
✅ Bracket Selection Guide
| Mirror Type & Condition | Recommended Bracket |
|---|---|
| Lightweight, framed | D-Ring or basic clips |
| Thin and frameless | Glass clips or mounting channel |
| Heavy or full-length | Z-clips or heavy-duty L-brackets |
| Hidden or flush installation | Z-Clips / French Cleats |
🔍 All About Mirror Materials and Their Types
The material of a mirror greatly impacts its reflective quality, durability, weight, safety, and ideal use. Understanding the different types of mirror materials helps you choose the best option for your space—whether it’s a bedroom, bathroom, or high-traffic area.
Installing Mirrors on the Wall and in the Bedroom
🧱 Basic Structure of a Mirror
A standard mirror consists of three main layers:
- Glass panel: A clear, smooth sheet of glass
- Reflective coating: Usually silver or aluminum that creates the mirror image
- Protective layer: Paint or epoxy that prevents moisture damage, corrosion, and scratches
🪞 Common Types of Mirror Materials
1. Glass Mirror
- The most traditional and widely used type
- Offers high clarity and accurate reflection
🔹 Pros: Excellent image quality, clear surface, long-lasting
🔸 Cons: Heavy and fragile
📌 Best for: Bedrooms, living rooms, hallways, bathrooms
Installing Mirrors on the Wall and in the Bedroom
2. Acrylic or Plexiglass Mirror
- Made from transparent plastic with a reflective coating
- Lighter and safer than glass
🔹 Pros: Lightweight, shatter-resistant, child-safe
🔸 Cons: Prone to scratches, slightly less clear than glass
📌 Best for: Kids’ rooms, nurseries, high-traffic areas
3. Polycarbonate Mirror
- Ultra-durable and impact-resistant plastic mirror
- Designed for heavy-duty or industrial use
🔹 Pros: Shatterproof, very strong, safe
🔸 Cons: More expensive, slightly lower reflectivity
📌 Best for: Gyms, industrial settings, public areas
Installing Mirrors on the Wall and in the Bedroom
4. Polished Metal Mirror
- Made from highly polished metals like stainless steel or aluminum
- Offers a metallic reflection surface
🔹 Pros: Water-resistant, corrosion-proof, durable
🔸 Cons: Lower image clarity, higher cost
📌 Best for: Wet environments, industrial or modern designs
5. Smart Mirror
- A modern combination of technology and mirror
- Includes LED lighting, displays, or smart sensors
🔹 Pros: Sleek look, added smart functions
🔸 Cons: Expensive, requires power and maintenance
📌 Best for: Luxury bathrooms, modern bedrooms, beauty salons
Installing Mirrors on the Wall and in the Bedroom
✅ Mirror Material Guide by Application
| Area or Use | Recommended Material |
|---|---|
| Bedroom or living room | Glass mirror with wood/metal frame |
| Bathroom or kitchen | Moisture-resistant glass or metal |
| Kids’ room or gym | Shatterproof acrylic or polycarbonate |
| Modern or digital space | Smart mirror with LED/display features |
📞 Need Help?
Let us take care of the hard work while you sit back and relax.
📍 Serving: Austin, Round Rock, Cedar Park & more
📱 Call or Text: (737) 420-6992
🌐 Visit: https://lavahandyman.com