
A Complete Guide to Hanging Paintings in the Living Room and Bedroom
1. Introduction
Paintings are more than just wall decorations—they reflect your personality, taste, and lifestyle. The right artwork can warm up a space, enhance its elegance, and create a calm atmosphere. But choosing the right painting isn’t enough—its installation must be done properly to truly highlight its beauty and impact.
2. Why Proper Installation Matters
Correctly hanging a painting ensures it is displayed in the best possible way, while also maintaining safety and visual harmony. A painting hung too high, too low, or off-center can make a space feel unbalanced or cluttered. Proper installation elevates both the artwork and the room.
A Complete Guide to Hanging Paintings in the Living Room and Bedroom

3. How to Choose the Right Painting
Artistic Style
Match the painting’s style to your home’s interior design:
- Modern spaces work well with abstract, minimal, or graphic artwork.
- Traditional or classic interiors look better with portraits, landscapes, or realistic scenes.
- Scandinavian design pairs well with neutral, soft-toned, and simple line artwork.
Size and Proportion
Follow the general rule: the painting’s width should be around 2/3 to 3/4 of the wall or furniture beneath it.
- In living rooms, go for larger, horizontal pieces on main walls.
- In bedrooms, medium or vertical paintings work best next to the bed or above it.
Color and Harmony
Select artwork that complements or gently contrasts with your room’s color palette.
For example, in a light-toned room, a bold painting can create a focal point, while in a colorful space, neutral art can offer balance.
4. Tools Needed
To hang a painting properly, you’ll need:
- Pencil (for marking)
- Level (bubble or laser)
- Measuring tape or ruler
- Nails, screws, wall plugs
- Hammer or power drill
- Special adhesive (for lightweight art)
- Safety gloves and goggles
A Complete Guide to Hanging Paintings in the Living Room and Bedroom
5. Step-by-Step Installation
Step 1: Accurate Measurements
- Find the center of the wall.
- The center of the painting should generally be 145–155 cm (57–61 inches) from the floor—roughly eye level.
- If hanging multiple pieces, use painter’s tape to visualize their layout beforehand.
Step 2: Mounting Methods
- Nails or Screws + Wall Plugs: Best for heavy paintings and plaster walls.
- Adhesive Strips: Ideal for lightweight frames on flat walls.
- Wire and Hook Systems: Great for creating gallery-style arrangements.
Step 3: Safety Tips
- Use quality hardware and secure fasteners.
- Keep kids and pets away during installation.
- Always test the hook or anchor strength before hanging.
6. Hanging Paintings in the Living Room
Choosing the Right Wall
The wall behind the sofa or opposite the main entrance is ideal. These areas are most visible and impactful.
Layout Options
Single Painting:
- Center the artwork at eye level.
- Its width should be about two-thirds the width of the furniture below.
Gallery Wall:
- Keep 5–10 cm (2–4 inches) between each frame.
- Start with the largest piece in the center and build around it.
- Maintain a clear visual axis or symmetry in your arrangement.
7. Hanging Paintings in the Bedroom
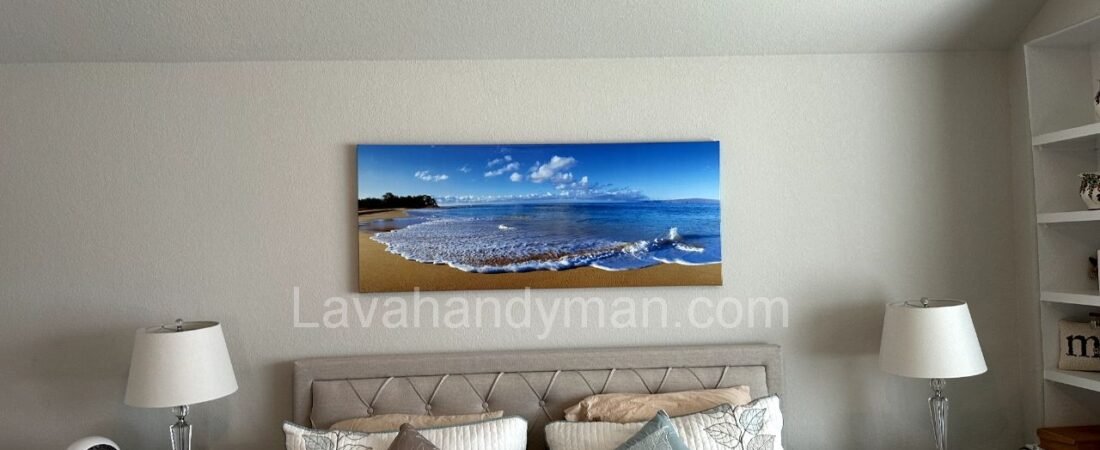
Above the Bed
This is a popular spot for artwork:
- Use horizontal pieces or sets of two or three smaller frames.
- Position them 20–30 cm (8–12 inches) above the headboard.
Side Wall Decor
- Small vertical pieces work well above nightstands or near windows.
- Choose narrow frames to avoid crowding the space.
Psychological Impact
Art in the bedroom should promote calm and positivity:
- Use soft, restful colors like blue, green, beige, or light pink.
- Nature scenes, peaceful portraits, or soothing abstracts work well.
- Avoid dark, intense, or chaotic imagery that may disrupt rest.
8. Expert Tips and Practical Advice
- Lighting: Use spotlights or picture lights to highlight the painting at night.
- Avoid Direct Sunlight: UV rays can fade artwork over time.
- Choose the Right Frame: Ornate gold or wood frames suit classic styles; sleek metal suits modern spaces.
- Temporary Hanging (for renters): Use removable adhesive hooks or strips to avoid damaging walls.
- Mock Layout First: Use paper cutouts to preview where the painting will go before drilling holes.
- Design Consistency: The painting should complement other decor elements such as pillows, rugs, and plants.
🛠️ Tools Needed for Hanging a Painting
| Tool | Purpose |
|---|---|
| Pencil or Marker | For marking the installation spot on the wall |
| Measuring Tape or Ruler | To measure exact placement |
| Level (Bubble or Laser) | To ensure the painting is perfectly straight |
| Hammer | For driving nails or hooks into the wall |
| Drill (with appropriate bits) | To drill holes in concrete, brick, or plaster walls |
| Screws, Wall Plugs (Anchors), and Nails | For safe and secure installation depending on wall type |
| Picture Hanging Hooks (e.g., sawtooth, double hook) | For precise and easy hanging |
| Strong Double-Sided Tape or Adhesive Strips | For lightweight frames or temporary installation |
| Wire or Hanging String | For frames that have mounting loops or hooks at the back |
| Safety Gloves and Goggles | To protect yourself when using tools like a drill or hammer |

💡 Additional Tips:
When hanging multiple paintings or creating a gallery wall, a laser level or painter’s tape layout mock-up is very helpful.
For drywall or gypsum board, use toggle bolts or special drywall anchors for secure mounting.
For concrete or brick walls, use a hammer drill, the correct masonry bit, and heavy-duty wall plugs.
🔩 Types of Brackets for Hanging Paintings
Choosing the right bracket is essential for a secure, clean, and professional-looking wall installation. The type of bracket should match the weight of the painting, frame type, and wall material. Below are the most common types:
1. Sawtooth Hanger
- Ideal for lightweight paintings and small frames.
- Easily attached to the top-center of the frame.
- Simply hangs on a nail or hook.
2. D-Ring Hanger
- Installed on both sides of the back of the frame.
- Can be hung with wire or directly on wall hooks.
- Suitable for medium to slightly heavy artwork.
3. Keyhole Bracket
- Features a keyhole-shaped slot that locks securely onto a screw.
- Offers a clean, flush finish against the wall.
- Good for light to medium-weight frames.
4. Triangle Hook
- A triangular metal loop that attaches with a screw.
- Can be hung with wire or directly on a nail.
- Best for lightweight or temporary displays.
5. French Cleat (Z Bracket)
- Consists of two angled interlocking pieces — one on the wall, one on the frame.
- Very sturdy and ideal for large, heavy artworks.
- Provides adjustability and a professional finish.
6. Command Strips (Adhesive Hooks)
- Perfect for lightweight artwork and rental spaces.
- No drilling required; clean and quick installation.
- Weight capacity is limited (usually up to 4 kg / 9 lbs).
7. Gallery Rail Hooks
- Used in gallery hanging systems with ceiling or wall-mounted rails.
- Allows flexible adjustment of height and position without damaging the wall.
- A luxury and professional choice for multiple artworks.
✅ Key Considerations When Choosing a Bracket:
➤ Painting Weight
- Lightweight (under 2 kg / 4.4 lbs): Sawtooth, Command Strips
- Medium (2–8 kg / 4.4–17.6 lbs): D-Ring, Keyhole
- Heavy (8+ kg / 17.6+ lbs): French Cleat, D-Ring with screws and anchors
➤ Wall Type
Wood: Screws or nails can usually be used directly
Drywall or Plasterboard: Use toggle bolts or butterfly anchors
Concrete or Brick: Use a drill, masonry screws, and wall plugs
🖼️ Types of Painting Materials and Installation Tips
The material of a painting directly affects its weight, delicacy, durability, and installation method. Knowing the type of painting helps choose the right tools and ensures safe mounting. Below are the most common painting materials and their characteristics:
1. Canvas Painting
- Material: Cotton or linen fabric stretched over a wooden frame
- Features: Lightweight, widely used, usually unframed or with a slim frame
- Installation: Can be hung using nails, sawtooth hangers, or D-rings. Lightweight pieces usually don’t require wall anchors.
2. Framed Wooden Painting
- Material: Painted canvas or wood mounted inside a sturdy wooden frame
- Features: Durable, heavier than simple canvas
- Installation: Recommended to use D-ring brackets, sturdy hooks, or French cleats with screws and wall anchors.
3. Printed Wall Art
- Material: Prints on paper, synthetic canvas, MDF board, or panel
- Features: Diverse, ranging from lightweight to moderately heavy, modern appearance
- Installation: Lightweight pieces can be mounted with strong double-sided tape or Command hooks; heavier pieces require brackets.
4. Glass or Acrylic Art
- Material: Glass, plexiglass, or mirrors
- Features: Transparent, fragile, heavy
- Installation: Requires secure mounting with metal brackets, screws, and wall anchors. French cleats are recommended.
5. Metal Wall Art
- Material: Sheets of aluminum, steel, or other metals
- Features: Durable, industrial or modern style, moderately to very heavy
- Installation: Best mounted with Z-brackets, metal screws, and wall anchors for full stability.
6. Fabric or Traditional Wall Art
- Material: Fabric, kilim, felt, or printed textiles
- Features: Lightweight, flexible, traditional or minimalist style
- Installation: Hung using decorative rods, clips, fabric tape, or light hooks; often no drilling required.
✅ Summary Table
| Painting Type | Main Material | Approx. Weight | Recommended Installation Method |
|---|---|---|---|
| Canvas Painting | Fabric & Wood | Lightweight | Sawtooth hanger, D-rings, simple nails |
| Framed Wooden Art | Wood & Canvas | Medium to Heavy | D-rings, French cleats |
| Printed on MDF | MDF or panel | Light to Medium | Strong tape, hooks, screws |
| Glass/Acrylic Art | Glass or Acrylic | Heavy and Fragile | French cleats, screws, wall anchors |
| Metal Wall Art | Aluminum, Steel | Medium to Heavy | Z-brackets, metal anchors |
| Fabric Wall Art | Fabric, Kilim | Lightweight | Rods, clips, fabric tape |
Conclusion
Hanging a painting isn’t just a decorative choice—it’s a design statement. When done thoughtfully, it can dramatically enhance the atmosphere of your home. Whether it’s a bold piece in the living room or a calming artwork in the bedroom, proper placement, proportion, and style are key.
By following these principles, you turn a blank wall into a personal gallery and make your space both elegant and emotionally engaging.
📞 Need Help?
Let us take care of the hard work while you sit back and relax.
📍 Serving: Austin, Round Rock, Cedar Park & more
📱 Call or Text: (737) 420-6992
🌐 Visit: https://lavahandyman.com
