
Complete Guide to Assembling a Stationary Bike
Introduction
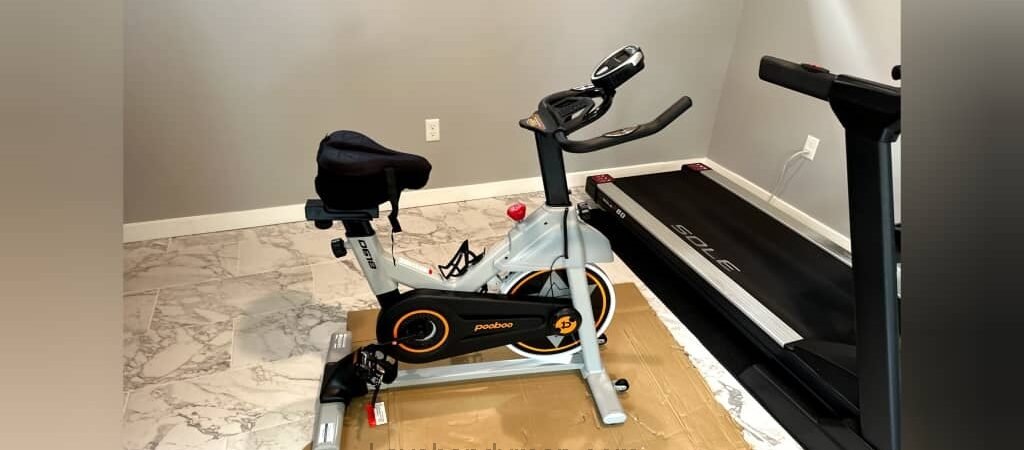
The stationary bike is one of the most popular home fitness machines due to its compact size, ease of use, and effectiveness in cardio workouts. However, proper assembly is crucial to ensure optimal performance, safety, and long-term durability. This step-by-step guide walks you through the full assembly process in detail.
Part 1: Initial Preparation
1. Checking the Package Contents
- Begin by opening the package on a flat surface in a spacious area.
- Remove all components and lay them out. Cross-check them with the user manual.
- Make sure all small parts like bolts, screws, and tools are included.
Complete Guide to Assembling a Stationary Bike
2. Required Tools
- Phillips and flathead screwdrivers
- Allen (hex) wrench
- Open-end or adjustable wrench
- Optional: work gloves for added safety
3. Reading the User Manual
- Each model may have specific instructions. Read the manual thoroughly to avoid common mistakes during assembly.
Part 2: Step-by-Step Assembly Process
1. Installing the Stabilizer Bars
- Attach the front and rear stabilizers to the main frame using the provided bolts.
- Ensure they are flush with the floor and firmly secured to prevent wobbling during use.
Complete Guide to Assembling a Stationary Bike
2. Attaching the Pedals
- Pedals are usually marked with “R” (right) and “L” (left).
- Turn the right pedal clockwise and the left pedal counterclockwise to install.
- Use a wrench to securely tighten, but avoid over-tightening.
3. Mounting the Seat
- Insert the seat post into the frame and lock it with the clamp or bolt.
- Mount the seat on top of the post and adjust the angle as needed.
- Seat height should allow a slight bend in your knee when pedaling.
4. Attaching the Handlebars
- Insert the handlebar post into its slot and secure it using bolts or clamps.
- Some models also allow height and angle adjustment.
5. Installing the Display and Electronics
- Mount the digital display on the console and insert batteries.
- If the model includes internal wiring, connect cables based on color codes or markings.
- The display should activate when you start pedaling.
6. Optional Attachments
- Install accessories such as water bottle holders or phone/tablet mounts using the included screws or clips.
Complete Guide to Assembling a Stationary Bike
Part 3: Final Check & Performance Test
1. Safety Inspection
- Recheck all bolts, screws, and connections. Tighten any loose parts.
- Ensure no component is misaligned or wobbly.
2. Initial Adjustments
- Set the seat and handlebars to match your height and reach.
- Pedaling should feel smooth and natural.
3. Resistance Test
- Set resistance to the lowest level and begin pedaling.
- Gradually increase resistance to test the tension system.
Complete Guide to Assembling a Stationary Bike
Part 4: Safety Tips & Maintenance
1. General Safety
- For your first session, start with low intensity.
- Always wear proper footwear to avoid slipping.
- Keep the bike away from moisture and direct sunlight.
Complete Guide to Assembling a Stationary Bike
2. Regular Maintenance
- Wipe down all parts with a clean cloth after each workout.
- Lubricate moving parts every few months using silicone-based lubricant.
- Replace the display batteries every 6–12 months.
3. Periodic Inspection
- Every two weeks, check the tightness of bolts, pedals, and the seat.
- Address any unusual noises or performance issues promptly.
Part 5: Common Troubleshooting
Complete Guide to Assembling a Stationary Bike
| Issue | Possible Cause | Solution |
|---|---|---|
| Clicking noise while pedaling | Loose pedal or crank | Tighten connections |
| Resistance not working | Disconnected cable or knob issue | Reconnect or inspect mechanism |
| Display not turning on | Dead batteries or poor connection | Replace batteries and check wiring |
| Bike wobbling during use | Uneven stabilizers or floor surface | Adjust position and retighten |
Part 6: Notes for Specific Models
- Some brands (like Yosuda, Schwinn, or Marcy) may have unique assembly steps, particularly for handlebars or displays.
- Watching video tutorials for your specific model on YouTube or the manufacturer’s site is highly recommended.
Complete Guide to Assembling a Stationary Bike
✅ Complete & Optimized Guide to Assembling a Stationary Bike
🔹 Step 1: Initial Preparation
Required Tools:
- Allen wrench (Hex key)
- Open-end or adjustable wrench
- Phillips screwdriver
- Optional: Work gloves
Ideal Setup Environment:
- Flat, dry, and stable surface
- Spacious area for easy layout of parts
- A mat or cloth to protect components and flooring
Complete Guide to Assembling a Stationary Bike
🔹 Step 2: Unboxing and Identifying Parts
- Carefully open the box and remove all parts.
- Lay out all components and match them with the manual’s checklist.
- Confirm that all bolts, washers, and included tools are present.
🔹 Step 3: Installing the Stabilizer Bars
- Position the front and rear stabilizers under the main frame.
- Secure them with the appropriate bolts and washers.
- Make sure the bike is firmly planted and does not rock or wobble.
Complete Guide to Assembling a Stationary Bike
🔹 Step 4: Attaching the Pedals
- Identify the right pedal (R) and left pedal (L).
- Turn the right pedal clockwise and the left pedal counterclockwise to install.
- Use a wrench to tighten them securely.
- Pedals should rotate smoothly without looseness or noise.
🔹 Step 5: Installing the Seat
- Insert the seat post into the frame and adjust the height.
- Mount the seat on top of the post and tighten the central bolt.
- Adjust the seat angle and position for comfort while pedaling.
Complete Guide to Assembling a Stationary Bike
🔹 Step 6: Attaching the Handlebars
- Insert the handlebar post into its designated slot.
- Fasten it using the supplied bolts.
- If available, adjust the handlebar height or angle to fit your reach.
🔹 Step 7: Installing the Digital Display (for smart models)
- Mount the display console onto the handlebar or frame.
- Connect the wires to the sensors as instructed in the manual.
- Insert the required batteries (usually AA or AAA).
- After setup, ensure the screen turns on when you start pedaling.
Complete Guide to Assembling a Stationary Bike
🔹 Step 8: Installing the Resistance Knob
- Mount the resistance knob in its designated position.
- Connect the cable to the resistance mechanism.
- Turning the knob should clearly increase or decrease resistance.
- Test the emergency brake if your model includes one.
🔹 Step 9: Final Checks and Test Run
- Double-check all bolts and connections for tightness.
- Ensure the bike is level and stable on the floor.
- Test pedaling, resistance adjustment, and display functionality.
- Finalize seat and handlebar position based on your height and comfort.
Complete Guide to Assembling a Stationary Bike
🔹 Step 10: Maintenance & Safety Tips
Keep the bike in a dry, indoor space away from moisture.
Always begin workouts at a low intensity, especially after assembly.
Wipe the bike with a dry cloth after each use.
Inspect and tighten bolts monthly.
Wear proper workout shoes during use.
Complete Guide to Assembling a Stationary Bike
🔍 Comparison: Pre-Assembled vs. Home-Assembled Stationary Bikes
| Feature | Pre-Assembled (Factory-Ready) | Home-Assembled (DIY) |
|---|---|---|
| 🔧 Ease of Use | Ready to use out of the box | Requires time, tools, and careful assembly |
| ⏱ Setup Time | No setup needed | 30–60 minutes of assembly time |
| 🛠 Tools Required | None | Yes (Allen key, screwdriver, wrench) |
| ⚠️ Risk of Assembly Errors | Very low | Moderate, especially for beginners |
| 🚚 Shipping Cost | Higher due to bulk size | Lower due to compact packaging |
| 🔩 Initial Customization | Limited (preset by manufacturer) | Fully adjustable during setup |
| 💰 Overall Cost | Typically more expensive | More affordable (no assembly labor cost) |
| 🛡 Warranty & Support | Full and hassle-free | Valid, but may depend on correct assembly |
| 🧳 Transport & Handling | Difficult due to size/weight | Easier to move when boxed |
Complete Guide to Assembling a Stationary Bike
✅ Which Option Is Better for You?
| If you… | Recommended Option |
|---|---|
| Have basic tools and technical skills | Home-assembled bike |
| Prefer convenience and zero setup | Pre-assembled model |
| Need easy transport and storage | DIY packaged version |
| Don’t want to risk installation mistakes | Factory-assembled bike |
Conclusion
Proper assembly of your stationary bike ensures safe, effective workouts and extends the life of your equipment. By following the outlined steps, using the correct tools, and applying safety precautions, you can fully assemble your bike in under an hour—without professional assistance. Regular maintenance further guarantees long-term performance and reliability.
📞 Need Help?
Let us take care of the hard work while you sit back and relax.
📍 Serving: Austin, Round Rock, Cedar Park & more
📱 Call or Text: (737) 420-6992
🌐 Visit: https://lavahandyman.com
