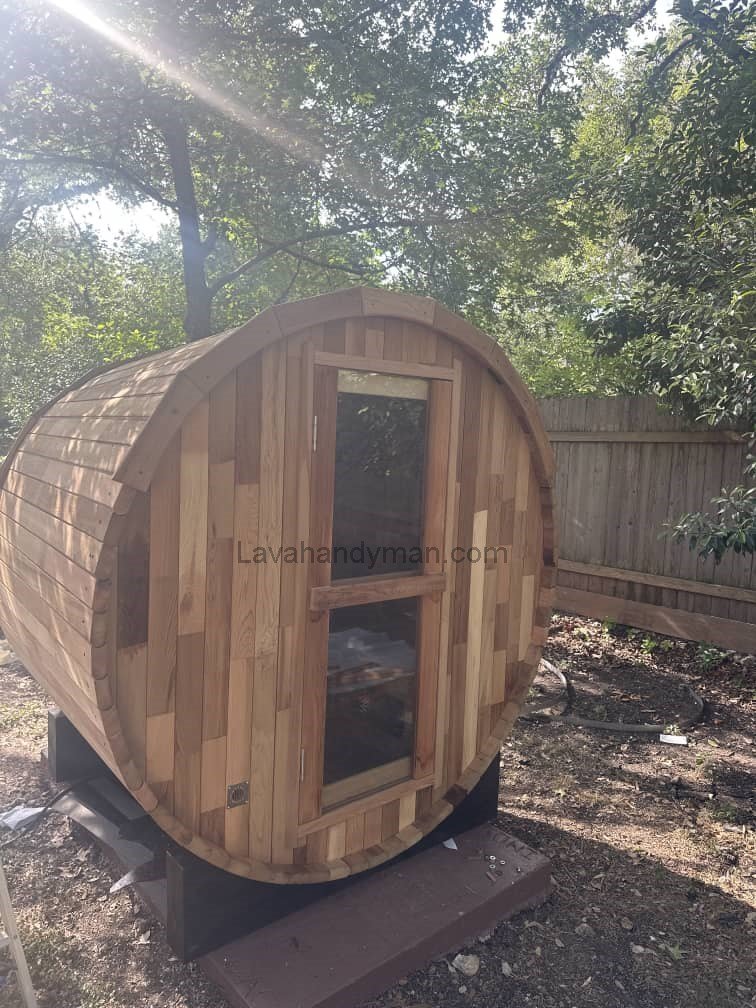
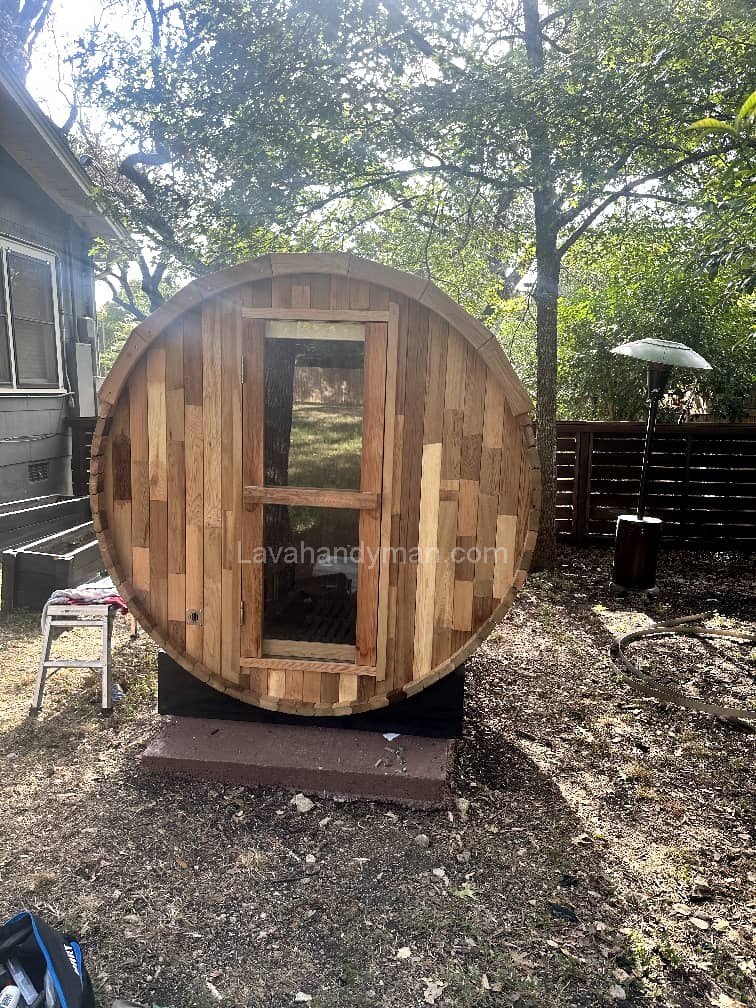
Comprehensive Guide: Assembling a Dry Sauna in the Patio
Introduction
Modern life is full of stress and fatigue. One of the best ways to restore balance and relaxation is by having a dry sauna at home. Beyond its undeniable health benefits, a dry sauna also adds a touch of luxury and value to a property. Among the different spaces in a home, the patio is one of the most suitable and practical areas to install a sauna. This semi-open, private space can easily be transformed into a personal wellness retreat.

Why Choose a Dry Sauna?
- High temperature and low humidity (5–15%) stimulate perspiration and detoxify the body.
- Blood circulation improves, and muscle tension is reduced.
- Stress decreases while sleep quality improves.
- The immune system becomes stronger.
Assembling a Dry Sauna
Patio Requirements for a Dry Sauna
- Space: A minimum of 2×2 meters is required for a small sauna. For families, 3×3 meters is recommended.
- Ventilation: Although patios generally offer natural airflow, an additional air inlet and outlet should be installed.
- Flooring: Must be level, waterproof, and durable. Stone or ceramic tiles are ideal.
- Power Access: An electrical outlet with heat-resistant cabling is necessary.
- Thermal Insulation: Prevents energy loss and avoids heat transfer to adjacent rooms.
Materials and Tools Needed
- Wood: Canadian cedar, spruce, or thermo-treated wood are the best options.
- Heater: Electric or gas, chosen according to the sauna volume.
- Thermal insulation: Rock wool or heat-resistant foam.
- Aluminum foil: For reflecting heat.
- Fasteners: Heat-resistant screws and connectors.
- Tools: Drill, electric saw, measuring tape, and level.
Assembling a Dry Sauna
Step-by-Step Assembly of a Dry Sauna in the Patio
1. Preparing the Space
- Level and waterproof the floor.
- Add an extra moisture barrier if needed.
2. Building the Walls
- Install a wooden frame structure.
- Insert insulation, then cover with aluminum foil.
- Finish with cedar or thermo-treated wooden panels.
3. Ceiling and Flooring
- Ensure the ceiling is fully insulated.
- Floors can be finished with stone, ceramic, or waterproof wood.
4. Installing the Heater
Assembling a Dry Sauna
- Choose the heater size according to the sauna’s cubic volume (e.g., 6 kW heater for 6 m³ space).
- Maintain safe distances from benches and walls as per manufacturer instructions.
5. Benches
- Install two or three bench levels at different heights (45, 75, and 90 cm).
- Use knot-free, heat-resistant wood for comfort and durability.
6. Lighting
- Use heat- and moisture-resistant fixtures.
- Soft, warm-toned lighting is ideal for a relaxing atmosphere.
7. Final Testing
- Turn on the heater and check temperature rise.
- Test airflow and fix any heat leakage issues.
Safety Guidelines
- Use heat-resistant wiring and install a residual current circuit breaker (RCD).
- Doors must be made of tempered safety glass and open outward.
- Avoid painting or using chemical coatings on the wood.
- Ensure proper ventilation to prevent suffocation or gas buildup.
Assembling a Dry Sauna
Interior Design and Aesthetics
- Add hidden LED lighting behind the benches for ambiance.
- Himalayan salt stones can improve air quality and aesthetics.
- Essential oil diffusers (eucalyptus, lavender) can enhance the experience with aromatherapy.
- Glass walls can be integrated for a modern look and visual connection with the patio greenery.
Maintenance and Regular Service
- Clean benches and walls with a damp cloth and mild cleaners.
- Replace sauna stones every 6–12 months.
- Inspect wiring and electrical connections regularly.
- Disinfect surfaces periodically to prevent mold and fungi.
Assembling a Dry Sauna
Step-by-Step Guide: Assembling a Dry Sauna in the Patio
1. Planning and Initial Check
- Measure the patio space (minimum 2×2 m).
- Decide the location for the heater, benches, and door.
- Check if you need permits or building approval.
2. Preparing the Floor
- The patio floor must be level, solid, and waterproof.
- Add a waterproof layer if there is moisture risk.
- Create a slight slope for water drainage.
3. Building the Frame and Walls
- Build a wooden or metal frame structure.
- Fill the gaps with thermal insulation (rock wool or fireproof foam).
- Cover with aluminum foil to reflect heat.
Assembling a Dry Sauna
4. Installing the Interior Panels
- Use sauna-grade wood (cedar, spruce, or thermo-treated wood) for walls and ceiling.
- Use heat- and rust-resistant screws.
- Choose knot-free, smooth wood.
5. Insulating the Ceiling
- Fully insulate the ceiling; heat rises and accumulates there.
- Add a small exhaust vent if needed.
6. Final Flooring
- Finish the floor with stone, ceramic, or waterproof wood.
- Use wooden slatted mats for comfort and safety.
7. Installing the Heater
- Place the heater in the designated spot.
- Size the heater based on sauna volume (rule: ~1 kW per 1 m³).
- Only a licensed technician should connect electricity or gas.
8. Ventilation
- Place an air inlet near the floor and heater.
- Place an outlet near the ceiling, opposite the inlet.
- Proper ventilation prevents suffocation and improves airflow.

9. Installing Benches
- Build 2–3 bench levels at 45 cm, 75 cm, and 90 cm heights.
- Use knot-free, heat-resistant wood.
10. Door and Glass
- Use tempered glass or sauna-grade wood for the door.
- The door must always open outward.
Assembling a Dry Sauna
11. Lighting
- Install heat- and moisture-resistant lights.
- Use warm, soft lighting for relaxation.
12. Wiring and Controls
- Use heat-resistant cables and proper grounding.
- Install an RCD safety breaker.
- Place thermostat and timer outside the hot zone.
13. Final Testing
- Turn on the heater and check temperature rise.
- Test ventilation and check for leaks.
- Tighten all screws and fittings.
14. Usage and Maintenance
- Teach family members safe sauna use and rest intervals.
- Replace sauna stones every 6–12 months.
- Regularly clean and disinfect benches and walls.
Assembling a Dry Sauna
Key Safety Notes
Proper ventilation and an RCD breaker are essential.
Electrical and gas connections must be done by professionals.
The sauna door must always open from the inside.
Do not use paint or chemicals on the wood.
Tools Required for Installing and Assembling a Dry Sauna in the Patio
🛠 General Carpentry Tools
- Measuring tape and level (for accurate measurements and alignment)
- Circular saw or hand saw (for cutting wood panels and beams)
- Electric drill and screwdriver (for drilling and fastening screws)
- Hammer and clamps (for fixing and holding parts in place)
Assembling a Dry Sauna
⚡ Electrical Tools and Wiring
- Pliers, wire stripper, and wire cutter (for preparing cables)
- Voltage tester or multimeter (for safety checks and voltage testing)
- Residual Current Device (RCD) and thermostat (for safety and temperature control)
⚠️ Note: Electrical and heater connections must always be done by a licensed electrician.
🔧 Fastening and Assembly Tools
- Heat- and rust-resistant screws and fittings
- Drill bits suitable for wood and metal
- Heatproof silicone sealant (to prevent heat loss and seal gaps)
🧱 Insulation and Paneling Tools
- Utility knife (for cutting insulation and aluminum foil)
- Tin snips (for cutting foil sheets)
- Roller or trowel (for applying and smoothing insulation layers)
🧰 Safety and Additional Tools
Ladder or sturdy step stool (for ceiling and upper installations)
Protective gloves, safety glasses, and mask (for safe handling of materials)
Ear protection (when using loud power tools)
Types of Brackets for Installing a Dry Sauna
Using the right brackets is essential for building a strong and stable sauna structure. All brackets should be rust-resistant and heat/moisture resistant.
Assembling a Dry Sauna
1. L-Bracket
- Purpose: Connects two pieces of wood at a 90° angle.
- Common Use: Attaching walls to the floor or ceiling, supporting bench frames.
2. T-Bracket
- Purpose: Creates a T-shaped connection to reinforce the structure.
- Common Use: Supporting benches or connecting vertical and horizontal supports.
3. Z-Bracket
- Purpose: Connects pieces at different heights or creates a gap between frames.
- Common Use: Installing ceiling frames or creating space for insulation.
4. U-Bracket / Channel Bracket
- Purpose: Holds horizontal pieces or rods within a frame.
- Common Use: Supporting bench bases or lower framework.
5. Adjustable Angle Bracket
- Purpose: Connects two pieces at a custom angle.
- Common Use: Sections that require precise angles, such as sloped ceilings or custom benches.
6. Bench Bracket
- Purpose: Secures benches to the wall or frame.
- Features: Metal, strong against weight and heat, multiple screw holes for secure attachment.
Assembling a Dry Sauna
Key Tips
For extra strength, consider combining two bracket types (e.g., L + T) for benches or heavy supports.
Always use rust- and heat-resistant brackets.
Screws must also be heat- and moisture-resistant (stainless steel or coated metal).
Install brackets with a level to ensure structural stability.
Suggested Timeline for Assembling a Dry Sauna in the Patio
Step 1: Planning and Preparation (1 day)
- Measure the patio accurately and determine sauna dimensions
- Check electrical access, ventilation, and required permits
- Gather all necessary tools and materials
Step 2: Flooring and Base Preparation (1 day)
- Level the floor and install a waterproof layer
- Create a slight slope for water drainage
- Prepare the base for frame installation
Step 3: Frame and Walls (1–2 days)
- Install wooden or metal frame
- Place thermal insulation (rock wool or fireproof foam)
- Cover with aluminum foil for heat reflection
Assembling a Dry Sauna
Step 4: Interior Paneling and Ceiling (1–2 days)
- Install wooden panels for walls and ceiling
- Ensure full ceiling insulation
- Check alignment and secure all components
Step 5: Final Flooring and Benches (1 day)
- Install final flooring (waterproof wood or stone/ceramic)
- Build benches at 45, 75, and 90 cm heights
- Verify stability and level of benches
Step 6: Heater and Electrical Installation (Half day)
- Install electric or gas heater by a licensed technician
- Complete wiring, thermostat, and RCD safety breaker installation
- Perform initial tests for electricity, temperature, and safety
Step 7: Lighting and Accessories (Half day)
- Install heat- and moisture-resistant lights
- Add accessories such as shelves, buckets, and other sauna equipment
Step 8: Final Testing and Handover (Half day)
- Turn on the heater and check temperature and ventilation
- Inspect level, bench stability, and door operation
- Resolve minor issues and prepare the sauna for use
Assembling a Dry Sauna
⏱ Estimated Total Time
- Typically, the project takes 5–7 working days
- With a professional team, it can be completed in 3–4 days
Key Tips
After frame and walls installation, always check alignment and measurements before proceeding.
Take extra care during insulation and paneling; do not rush.
Heater and electrical connections must be installed by a licensed professional.
Assembling a Dry Sauna
Conclusion
Assembling a dry sauna in the patio combines technical knowledge with creative design. With proper materials, safe installation practices, and attention to detail, a patio can be transformed into a luxurious wellness space. This not only enhances your lifestyle by offering relaxation and health benefits, but also increases your property’s value. Ultimately, proper use and regular maintenance ensure that your dry sauna will provide long-lasting comfort and serenity.
📞 Need Help?
Let us take care of the hard work while you sit back and relax.
📍 Serving: Austin, Round Rock, Cedar Park & more
📱 Call or Text: (737) 420-6992
🌐 Visit: https://lavahandyman.com


