

Easy Home Setup: Assemble Your Table and Treadmill Without a Technician
Introduction: Why Home Assembly Matters
In today’s world, especially in small apartments, people prefer assembling their furniture and workout equipment — such as tables and home treadmills — right inside the living room.
This detailed guide will teach you how to safely and efficiently assemble a table and a treadmill without needing professional installation. We’ll cover the necessary tools, safety precautions, setup process, and tips for decorating and organizing your living space.
Part 1: Preparing for Assembly in the Living Room

Choosing the Right Spot
Before starting the assembly of your table or treadmill, choose a suitable area in your living room. Make sure the space has:
- A flat and stable surface to prevent wobbling or noise
- Good lighting for visibility while working
- Enough clearance around the treadmill for safety
- Access to a power outlet (use a surge protector to protect the treadmill motor)
Assemble Your Table and Treadmill Without a Technician
Tools You’ll Need
Here are the basic tools required for assembling both the table and treadmill:
| Tool | Purpose |
|---|---|
| Screwdriver | Tightening screws and metal fittings |
| Allen wrench | Securing bolts and joints |
| Rubber mallet | Gently fitting pieces without scratching |
| Measuring tape | Leveling the surface |
| Work gloves | Hand protection |
| User manual | Reference for correct part order |
Having all the tools ready beforehand saves time and ensures smooth assembly.
Easy Home Setup: Assemble Your Table and Treadmill Without a Technician
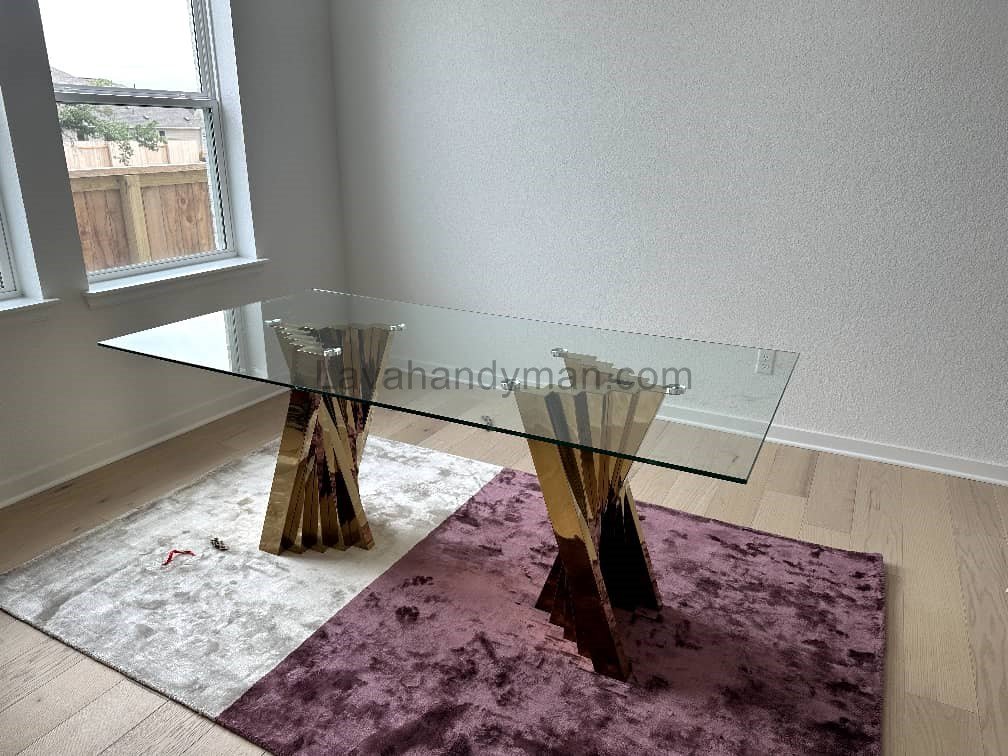
Part 2: How to Assemble a Table at Home
Step 1: Unbox and Organize the Parts
Carefully open the package on a soft surface to prevent scratches. Lay all pieces out and compare them with the instruction manual to confirm nothing is missing.
Step 2: Install the Table Legs
Assemble Your Table and Treadmill Without a Technician
Position each leg in its designated spot and use the Allen screws to attach them. Keep the screws slightly loose until you check the table’s level.
Step 3: Attach Drawers or Crossbars
If your table includes drawers, shelves, or metal connectors, install them next. Secure both sides first before tightening the middle screws for balanced pressure.
Step 4: Final Tightening and Leveling
After confirming the table is perfectly level, tighten all screws firmly. Optionally, apply thread-locking glue or washers to prevent future loosening.
Finally, wipe the surface clean — your table is ready for use!
Assemble Your Table and Treadmill Without a Technician
Part 3: How to Assemble a Home Treadmill
Step 1: Unpacking
Open the treadmill box carefully. Keep electronic parts like the console and power cables away from moisture or pressure.
Step 2: Identify Main Components
A standard treadmill includes:
- Main frame and base
- Side handles
- Console panel
- Motor and running belt
- Screws, nuts, and wires
Assemble Your Table and Treadmill Without a Technician
Lay them out and double-check using the manual.
Step 3: Attach the Base and Upright Supports
Connect the uprights to the main frame and secure them with bolts. Proper leveling here is essential for treadmill stability.
Step 4: Connect the Handles and Console
Attach the side handles and pass the control cables through them. Mount the console panel on top and connect the cables firmly.
⚠️ Keep the power unplugged until all wiring is complete.
Step 5: Check the Belt and Motor
Before powering up, manually move the belt to ensure it turns freely. Then plug in and start the treadmill at a low speed to confirm smooth operation.
Step 6: Safety Checks
- Always use a surge protector.
- Recheck all screws every few months.
- Avoid cleaning with water; use a damp cloth.
- Stop the machine immediately if you hear unusual noise or vibration.
Easy Home Setup: Assemble Your Table and Treadmill Without a Technician
Part 4: Organizing and Decorating the Living Room
To make your living room both functional and stylish after assembling:
- Place the table near a window for natural light.
- Choose foldable or compact tables to save space.
- Match table colors with your furniture and rugs.
- Position the treadmill near a wall to reduce clutter.
- Use anti-vibration pads to minimize sound and floor damage.
Assemble Your Table and Treadmill Without a Technician
Part 5: Maintenance and Longevity
- Keep the treadmill area dry at all times.
- Clean the tabletop regularly using wood polish or surface spray.
- Lubricate the treadmill belt every few weeks.
- Always unplug the treadmill before cleaning or moving.
🧰 Step-by-Step Guide to Assembling a Table and Treadmill in Your Living Room (Full DIY Tutorial 2025)
✅ Preparation Before Assembly
Choosing the Right Spot in the Living Room
Before you start, make sure to select the right area:
- Choose a flat and level surface to prevent wobbling.
- Ensure good lighting for better visibility during assembly.
- Leave enough free space around the table and treadmill for easy movement.
- Have access to a power outlet, preferably with a surge protector for your treadmill.
Required Tools
Here are the essential tools you’ll need to assemble both the table and the treadmill:
Assemble Your Table and Treadmill Without a Technician
| Tool | Purpose |
|---|---|
| Phillips & flat screwdrivers | Tightening screws |
| Allen wrench | Securing bolts and legs |
| Rubber mallet | Fitting parts without damage |
| Level or measuring tape | Checking alignment and balance |
| Work gloves | Hand protection |
| Instruction manual | Installation reference |
🪑 Part 1: How to Assemble a Table at Home
Step 1: Unbox and Organize the Parts
- Open the box carefully on a soft surface (carpet or blanket) to avoid scratches.
- Take out all the components and match them with the instruction manual list.
Step 2: Identify and Prepare the Parts
- Separate the legs, bolts, and brackets.
- Make sure you have the correct tools for each type of screw.
Assemble Your Table and Treadmill Without a Technician
Step 3: Attach the Table Legs
- Position the legs and tighten the screws loosely (about 70%) first.
- Do not over-tighten until you’ve checked the table’s alignment.
Step 4: Install Drawers or Shelves (if included)
- Assemble drawers or shelves following the instructions.
- Tighten the side screws first, then the middle ones for even pressure distribution.
Step 5: Level and Final Tightening
- Use a level tool to check balance.
- Once it’s level, tighten all screws securely but gently to avoid thread damage.
Step 6: Cleaning and Finishing
- Wipe the table surface with a damp cloth.
- Apply wood polish if your table has a wooden finish for extra shine and protection.
Assemble Your Table and Treadmill Without a Technician
🏃♂️ Part 2: How to Assemble a Home Treadmill
Step 1: Unboxing the Treadmill
- Carefully remove all parts and lay them flat on the floor.
- Keep cables and electronic components away from sharp edges or moisture.
Step 2: Installing the Main Frame
- Place the base of the treadmill on a flat surface in its final location (it’s heavy to move later).
- Use anti-vibration pads to reduce noise and floor impact.
Step 3: Attaching Uprights and Routing Cables
Easy Home Setup: Assemble Your Table and Treadmill Without a Technician
- Fix the vertical uprights to the base using bolts.
- Run the console cables through the uprights before tightening.
⚠️ Important: Do not plug in the power cord during this step.
Step 4: Mounting the Console
- Place the control console on top and secure it with bolts.
- Connect all cables properly before powering on the treadmill.
Assemble Your Table and Treadmill Without a Technician
Step 5: Adjusting the Belt and Motor Check
- Spin the belt manually to make sure it moves smoothly.
- Plug the power cord into a surge protector, then test the treadmill at a low speed.
Step 6: Safety and Performance Test
- Walk slowly on the treadmill for a few minutes.
- If you notice unusual noise, vibration, or smell, turn off the machine immediately.
- Check the safety key to ensure it works correctly — it should stop the treadmill instantly if pulled.
🧩 Quick Troubleshooting Guide
| Problem | Possible Cause | Solution |
|---|---|---|
| Belt slipping | Belt too loose | Tighten rear adjustment bolts slightly |
| Table wobbling | Uneven floor or loose screws | Tighten screws or add floor pads |
| Console not turning on | Unplugged cable or tripped fuse | Check all connections and power source |
| Excessive treadmill noise | Loose bolts or unstable floor | Retighten bolts and use anti-vibration pads |
Assemble Your Table and Treadmill Without a Technician
🧽 Part 3: Maintenance After Assembly
Keep your table away from humidity and direct heat to extend its lifespan.
Inspect and retighten screws on both table and treadmill every 2–3 months.
Lubricate the treadmill belt according to the manufacturer’s instructions.
Clean dust from the console and motor area with a dry or slightly damp cloth.
Assemble Your Table and Treadmill Without a Technician
💡 Key Tips for Assembling a Table and Treadmill at Home
1. Plan Before You Start
- Remove all parts from the box and match them with the instruction manual.
- Prepare all the tools in advance to avoid interruptions during assembly.
- Make sure there’s enough free space around the table and treadmill for easy movement.
2. Leveling is Crucial
- Before fully tightening screws, make sure all parts are properly aligned.
- For tables, the surface should be flat and stable.
- For treadmills, make sure the base is firm and the belt is centered.
3. Partially Tighten Screws at First
- Initially, tighten screws only partially to allow adjustments and leveling.
- Fully tighten screws only after verifying correct placement.
4. Safety Tips for Treadmill Assembly
- Keep the treadmill unplugged until assembly is complete.
- Use a helper when lifting or moving heavy parts.
- Test the safety key before the first use.
Assemble Your Table and Treadmill Without a Technician
5. Proper Cable Management
- Route console cables through the uprights before tightening any parts.
- Avoid stretching, bending, or pinching cables to prevent damage.
6. Use a Surge Protector and Anti-Vibration Pad
- Plug the treadmill into a surge protector to protect the motor from voltage spikes.
- Use an anti-vibration mat to reduce noise and protect the floor.
7. Initial Test at Low Speed
- Before full use, test the treadmill belt at a slow speed for a few minutes.
- Ensure there is no unusual noise, shaking, or irregular movement.
8. Maintenance After Assembly
- Check and tighten screws and bolts every 1–3 months.
- Keep wooden tables away from moisture and direct heat.
- Lubricate the treadmill belt as per the manufacturer’s instructions.
- Clean surfaces with a damp cloth, avoiding direct water contact.
9. Organize and Handle Parts Carefully
Assemble Your Table and Treadmill Without a Technician
- Keep small screws, washers, and connectors in separate containers.
- Avoid using replacement screws that are not supplied with the product, as this may damage the device.
10. Patience and Precision Are Key
Small mistakes early in the assembly can cause table wobbling or treadmill belt/motor issues.
Take your time! Proper assembly requires patience.
Follow each step exactly as instructed in the manual.
Assemble Your Table and Treadmill Without a Technician
Conclusion: From Assembly to a Beautiful Living Space
By following these steps, you can easily assemble your table and treadmill at home — saving both time and money.
Not only will you gain practical assembly skills, but you’ll also create a balanced, multifunctional living room for work and exercise.
If you found this guide helpful, share it with others searching for DIY treadmill assembly or home furniture setup tips!
📞 Need Help?
Let us take care of the hard work while you sit back and relax.
📍 Serving: Austin, Round Rock, Cedar Park & more
📱 Call or Text: (737) 420-6992
🌐 Visit: https://lavahandyman.com
