A Complete Guide to Hanging Paintings on Walls: From Choosing the Right Height to Professional Installation Techniques
Introduction
Learning how to hang paintings on walls is an essential skill for creating a beautiful, balanced, and professionally styled interior. Whether you want to display a canvas painting in your living room, hang framed artwork in your bedroom, or create a gallery wall in your hallway, the right installation technique can make a significant difference.
Proper painting installation involves more than attaching a frame to a wall. You need to consider the artwork’s size and weight, the ideal hanging height, the wall material, the mounting hardware, and the surrounding furniture. Incorrect placement can make a painting look unbalanced, while unsuitable fasteners may damage the wall or allow the artwork to fall.
In this complete guide to hanging paintings on walls, you will learn how to choose the best location, calculate the correct hanging height, select the right picture-hanging hardware, and install artwork securely. We will also cover professional techniques for hanging heavy paintings, arranging multiple pictures, and displaying wall art without drilling.
By following these practical steps, you can improve your interior design, protect your artwork, and create a stylish display that complements your home.
A Complete Guide to Hanging Paintings on Walls
1. How to Choose the Best Place to Hang a Painting
Choosing the right location is the first step in hanging a painting successfully. Even an expensive or beautifully designed artwork may look out of place if it is positioned incorrectly.
Before installing any hardware, evaluate the available wall space, furniture arrangement, lighting conditions, and overall style of the room.
Consider the Room’s Layout
A Complete Guide to Hanging Paintings on Walls
Start by identifying the areas where a painting could create a natural focal point. Common locations include the wall above a sofa, the space above a console table, the wall behind a bed, and an empty section of a hallway.
The artwork should complement the room rather than compete with other decorative elements. Consider the relationship between the painting and nearby windows, doors, shelves, lighting fixtures, and architectural details.
For example, a large horizontal painting can work well above a sofa, while a vertical artwork may be more suitable for a narrow wall or hallway.
Choose the Right Wall Size
The dimensions of the wall should influence your choice of artwork. A large painting can fill an expansive wall, while smaller paintings may look better as part of a coordinated gallery wall.
As a general design guideline, artwork displayed above furniture often looks balanced when its width is approximately two-thirds to three-quarters of the furniture’s width. This is a starting point rather than a strict rule, as the ideal proportions depend on the room and the artwork.
Leave enough negative space around the painting to prevent the wall from appearing overcrowded. A carefully positioned artwork often makes a stronger visual impact than several pieces placed without a clear arrangement.
A Complete Guide to Hanging Paintings on Walls
Consider Lighting and Environmental Conditions
Lighting affects how a painting looks throughout the day. Natural light can enhance colors and textures, but prolonged exposure to direct sunlight may cause fading or damage to delicate artwork.
Avoid hanging valuable paintings near radiators, fireplaces, damp areas, or locations exposed to extreme temperature changes.
Before drilling, inspect the wall for cracks, loose plaster, and peeling paint. A damaged surface may not provide reliable support for picture-hanging hardware.
2. What Is the Ideal Height for Hanging Paintings?
Choosing the correct painting hanging height is one of the most important steps in creating a professional-looking interior.
Artwork that hangs too high may appear disconnected from the furniture below it. Paintings positioned too low can make a room feel crowded or interfere with everyday activities.
A Complete Guide to Hanging Paintings on Walls
The 57-Inch Rule for Hanging Artwork
A commonly used gallery guideline is to position the center of a painting approximately 57 to 60 inches (145 to 152 centimeters) above the floor.
This measurement provides a useful starting point for placing artwork around average eye level. However, it is not a universal rule. Furniture height, ceiling proportions, and viewing conditions may require adjustments.
Always measure the center of the framed painting rather than the top edge.
For example, if a painting is 30 inches tall and its center should be 57 inches above the floor, the top edge will be approximately 72 inches above the floor.
How High Should a Painting Hang Above a Sofa?
When hanging paintings above a sofa, console table, or similar piece of furniture, the distance between the furniture and the bottom of the frame is particularly important.
A Complete Guide to Hanging Paintings on Walls
A gap of approximately 6 to 10 inches (15 to 25 centimeters) is a useful starting point for many arrangements.
The ideal distance depends on the height of the furniture, the size of the artwork, and the overall composition. The painting should feel visually connected to the furniture without appearing crowded.
For wider sofas, consider selecting artwork or a gallery arrangement that is proportionate to the furniture’s width.
The Best Painting Height for Different Rooms
The ideal height for hanging paintings may vary depending on how a room is used.
- Living room: Position the artwork at a comfortable viewing height while considering the sofa and other seating.
- Bedroom: Center the painting above the bed or headboard while maintaining sufficient clearance and secure mounting.
- Dining room: Consider the seated viewing position and the height of the dining furniture.
- Hallway: Use a comfortable standing viewing height without obstructing movement.
- Home office: Position the artwork where it can be viewed comfortably from the primary working position.
The goal is to create a natural visual connection between the painting, the room, and the people using the space.
A Complete Guide to Hanging Paintings on Walls
3. Essential Tools for Hanging Paintings on Walls
Using the right picture-hanging tools makes installation easier, improves accuracy, and reduces the risk of wall damage.
Depending on the artwork and wall material, you may need:
- A tape measure for measuring the frame and wall.
- A pencil for marking installation points.
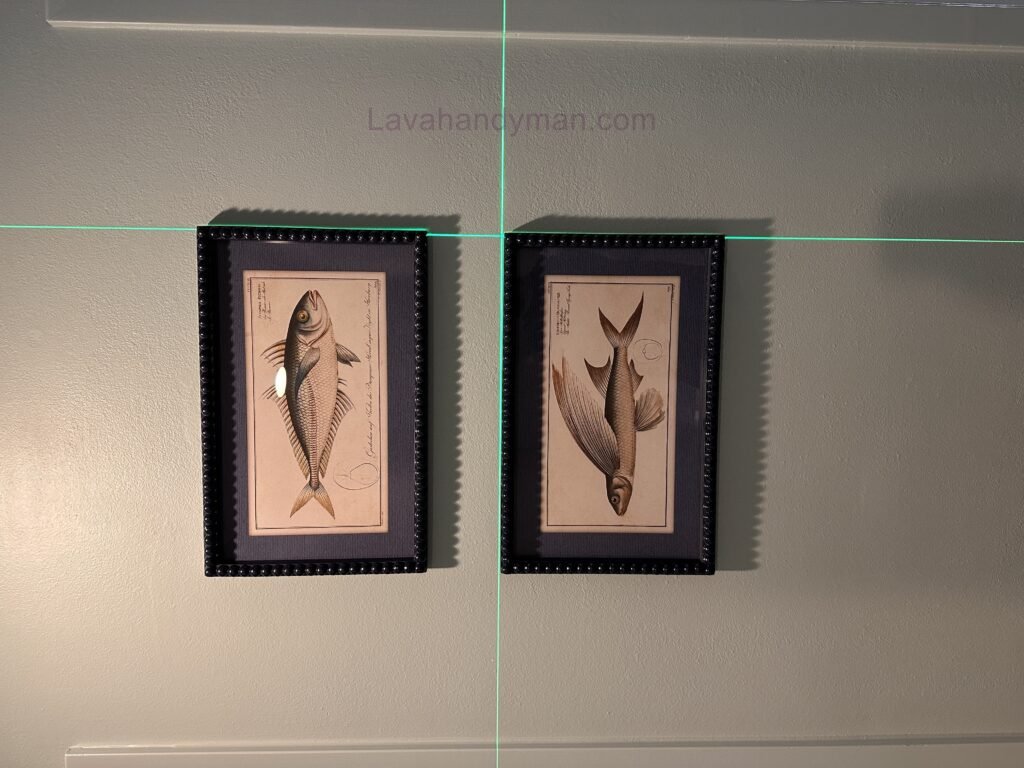
- A spirit level for checking alignment.
- A hammer for installing compatible picture hooks.
- A drill and suitable drill bits when required.
- A screwdriver for securing screws and mounting brackets.
- A stud finder for locating structural supports behind drywall.
- Appropriate picture hooks, screws, anchors, or mounting brackets.
- Painter’s tape for planning the layout.
- Safety glasses when drilling.
Not every project requires all these tools. A lightweight framed print may need only a suitable picture hook, while a large painting may require structural support and a more robust mounting system.
A Complete Guide to Hanging Paintings on Walls
Before choosing your hardware, determine the painting’s weight and identify the wall material.
4. How to Choose the Right Picture-Hanging Hardware
Selecting appropriate mounting hardware is essential for keeping artwork secure. The best option depends on the painting’s weight, the wall construction, and the hanging mechanism attached to the frame.
Picture Hooks and Nails
Purpose-designed picture hooks can support many lightweight and medium-weight framed artworks when installed according to the manufacturer’s instructions.
A Complete Guide to Hanging Paintings on Walls
Some hooks use angled nails, while others feature shaped brackets designed to support picture wire.
Ordinary nails are not suitable for every wall type or painting. They may loosen in weak plaster or fail to provide adequate support for heavier frames.
Always check the product’s load rating and confirm that it is suitable for your particular wall.
Screws and Wall Anchors
Screws provide a reliable attachment point when installed into suitable structural material or paired with an appropriate wall anchor.
Drywall anchors are designed to improve fastening in hollow plasterboard walls. Depending on the design, they may expand behind the wall, grip the material, or distribute the load over a wider area.
Different anchors have different load capacities. Their performance depends on the anchor design, wall thickness, installation quality, and direction of the applied force.
Never assume that a small plastic anchor is suitable for a heavy painting simply because it fits the screw.
A Complete Guide to Hanging Paintings on Walls
Wall Studs
Wall studs provide structural support behind many drywall walls. Attaching suitable screws or mounting hardware to a stud can be an effective option for heavier artwork.
Use a stud finder or another appropriate method to locate the stud before drilling. Make sure the selected fastener is compatible with the wall construction.
If the desired mounting position does not align with a stud, consider an appropriately rated alternative mounting system.
Picture Rails and French Cleats
Picture rails can be useful when displaying multiple paintings or when artwork needs to be repositioned regularly.
A French cleat is a mounting system that uses two interlocking components, typically with angled edges, to support artwork when installed correctly.
The rail or cleat, wall fasteners, and frame attachments must all be suitable for the total load. For heavy or valuable paintings, professional installation may be advisable.
A Complete Guide to Hanging Paintings on Walls
5. How to Hang a Painting on a Wall Step by Step
Following a consistent installation process helps you position artwork accurately and securely.
Step 1: Measure the Painting
Measure the outside height and width of the frame. If the painting is framed, use the complete frame dimensions rather than the dimensions of the image alone.
Divide the frame height by two to identify its vertical center.
For example, a painting measuring 24 inches wide and 36 inches tall has a center point 18 inches below the top edge.
Step 2: Determine the Desired Hanging Height
A Complete Guide to Hanging Paintings on Walls
Choose the intended center height according to the room layout and viewing conditions.
For an unobstructed wall, approximately 57 to 60 inches above the floor is a useful starting point.
If the painting will hang above furniture, determine the appropriate gap between the furniture and the frame before finalizing the position.
Step 3: Calculate the Correct Mounting Point
The position of a nail, screw, or hook is usually different from the center of the painting.
For artwork suspended by wire, gently pull the wire upward as it would sit when the painting is hanging. Measure the vertical distance from the top of the frame to the highest point of the taut wire.
Use this formula:
A Complete Guide to Hanging Paintings on Walls
Fastener height = desired center height + half the frame height − wire drop
For example:
- Desired center height: 57 inches.
- Frame height: 30 inches.
- Half the frame height: 15 inches.
- Wire drop: 3 inches.
The calculation is:
57 + 15 − 3 = 69 inches.
The mounting point should therefore be approximately 69 inches above the floor.
For D-rings, fixed brackets, or other hanging mechanisms, calculate the mounting position using the actual hardware measurements.
Step 4: Mark the Installation Position
Use a pencil to mark the mounting point. Measure the horizontal position carefully, particularly when centering artwork above a sofa, bed, or console table.
A Complete Guide to Hanging Paintings on Walls
For frames with two hanging points, measure the distance between the attachments on the back of the frame and transfer those measurements to the wall.
Avoid estimating the second point by eye, as even small differences can cause the painting to hang unevenly.
Step 5: Install the Mounting Hardware
Choose hardware that is compatible with the wall material and the painting’s weight.
Before drilling, check for concealed electrical wiring and plumbing. Use appropriate detection equipment and follow local safety guidance. If you cannot establish that the location is safe, consult a qualified professional.
Install the hook, screw, anchor, or bracket according to the manufacturer’s instructions.
A Complete Guide to Hanging Paintings on Walls
Step 6: Hang the Painting Carefully
Lift the painting carefully and position its hanging mechanism onto the installed support.
For large or heavy frames, ask another person to assist. Confirm that the wire, bracket, or mounting points are fully engaged before releasing the painting.
Do not rely on a quick visual check alone when installing heavy or valuable artwork.
Step 7: Check the Alignment
Use a spirit level to check whether the frame is horizontal. Adjust the painting if necessary, then step back and inspect its position from the usual viewing area.
Check the height, spacing, and relationship to nearby furniture.
A Complete Guide to Hanging Paintings on Walls
A final inspection helps ensure that the painting looks balanced and remains securely mounted.
6. How to Hang Paintings on Different Types of Walls
Different wall materials require different installation methods. Identifying the wall type before drilling helps you choose suitable hardware and avoid unnecessary damage.
Hanging Paintings on Drywall
Drywall and plasterboard are common in modern homes. Lightweight artwork may be suitable for a purpose-designed picture hook, while heavier paintings may require a suitable anchor or attachment to a wall stud.
The correct method depends on the artwork’s weight, the condition of the wall, and the hardware specifications.
Avoid installing heavy artwork on damaged or poorly supported drywall without assessing the wall’s capacity.
A Complete Guide to Hanging Paintings on Walls
Hanging Paintings on Brick and Concrete
Brick and concrete generally require masonry-compatible fasteners and drill bits.
Determine whether the surface is solid brick, mortar, concrete, or another material before selecting a fixing system.
Follow the manufacturer’s instructions for the drill bit, hole diameter, depth, and anchor installation. Avoid drilling near fragile edges, and take care not to damage surrounding surfaces.
Hanging Paintings on Plaster Walls
Traditional plaster can be brittle, especially in older buildings.
Inspect the wall and determine what lies behind the plaster. Depending on the wall construction and artwork weight, the fixing may need to engage structural support.
A Complete Guide to Hanging Paintings on Walls
If the plaster is cracked, loose, or deteriorating, address the problem before installing the painting.
Hanging Paintings on Tile or Stone
Tile and stone surfaces require particular care because drilling may cause cracking or chipping.
Use tools and fasteners specifically designed for the surface and the material behind it. Confirm that drilling will not damage concealed services.
Adhesive mounting products should only be used when the manufacturer confirms that they are appropriate for the surface, environmental conditions, and artwork weight.
7. How to Hang Heavy Paintings Safely
A Complete Guide to Hanging Paintings on Walls
Hanging heavy paintings requires more careful planning than installing lightweight prints.
First, determine the complete weight of the artwork, including the frame, glazing, backing, and mounting components.
Inspect the frame and its hanging hardware to ensure that they are designed to support the load.
Depending on the wall construction, suitable options may include structural screws into studs, appropriately rated anchors, or a properly installed French cleat.
Using two hooks does not automatically double the safe load capacity. The actual capacity depends on the wall material, fastener spacing, installation quality, and load distribution.
A Complete Guide to Hanging Paintings on Walls
For unusually heavy, fragile, or valuable artwork, consider hiring a professional installer.
Avoid placing heavy paintings above beds, seating areas, or other locations where a falling frame could cause injury unless the mounting system has been properly assessed and installed.
8. How to Create a Professional Gallery Wall
A gallery wall combines multiple paintings, prints, or photographs into a coordinated arrangement. When planned carefully, it can create an attractive focal point in a living room, bedroom, hallway, or office.
Plan the Gallery Wall Layout
Arrange the frames on the floor before drilling. Experiment with different positions until the collection looks balanced.
A Complete Guide to Hanging Paintings on Walls
You can also create paper templates matching the dimensions of each frame and temporarily position them on the wall with suitable painter’s tape.
This approach allows you to adjust the layout without creating unnecessary holes.
Maintain Consistent Spacing Between Paintings
A gap of approximately 2 to 4 inches (5 to 10 centimeters) between frames is a useful starting point for many gallery walls.
Smaller frames may benefit from narrower spacing, while larger pieces may need more room.
Consistency is more important than following one exact measurement. Aim for a visually connected arrangement.
A Complete Guide to Hanging Paintings on Walls
Balance Different Artwork Sizes
Combine large and small paintings thoughtfully. A larger artwork can act as the visual anchor, while smaller pieces provide variation around it.
Consider coordinating colors, frames, subjects, or artistic styles to create a unified display.
Center the complete arrangement as a single visual unit rather than positioning every painting independently.
9. How to Hang Paintings Without Nails or Drilling
A Complete Guide to Hanging Paintings on Walls
If you want to avoid drilling holes, several alternative mounting methods may be available.
Adhesive picture strips, removable hooks, and picture ledges can work for certain lightweight artworks when used according to the manufacturer’s instructions.
Before using adhesive hardware, check the surface requirements and load rating. Textured walls, damp conditions, loose paint, and wallpaper can reduce adhesion.
Follow the specified surface preparation and waiting periods. Never exceed the product’s stated weight limit.
For larger collections, a securely installed picture rail or picture ledge may allow you to reposition artwork without creating new holes for each frame.
These alternatives are not suitable for every painting. Heavy, valuable, or fragile artwork generally requires a more robust mounting solution.
A Complete Guide to Hanging Paintings on Walls
10. Common Mistakes to Avoid When Hanging Paintings
Avoiding common installation mistakes can improve both the appearance and safety of your wall art.
Hanging Artwork Too High
Placing artwork too close to the ceiling can make it appear disconnected from the room. Start with a comfortable viewing height and adjust it according to furniture and room proportions.
Choosing the Wrong Artwork Size
Artwork should relate visually to the wall and the furniture beneath it. Consider a larger piece or a coordinated group of smaller paintings when one frame looks too small for the available space.
Using Unsuitable Mounting Hardware
A Complete Guide to Hanging Paintings on Walls
Fasteners that are incompatible with the wall material or artwork weight may loosen or fail. Always check the manufacturer’s load rating and installation requirements.
Ignoring Measurements
Guessing the height or spacing of mounting points can result in crooked artwork and unnecessary holes. Measure the frame and hanging mechanism before drilling.
Overcrowding the Wall
Too many artworks or inconsistent gaps can make a room feel visually cluttered. Plan the arrangement and leave enough negative space around each piece.
Ignoring Environmental Conditions
A Complete Guide to Hanging Paintings on Walls
Prolonged exposure to direct sunlight, excessive heat, or moisture can damage paintings. Choose a location that supports both visual appeal and long-term preservation.
Skipping Regular Inspections
Wires, hooks, and fasteners can deteriorate or loosen over time. Inspect the installation periodically, particularly for heavy or valuable artwork.
11. How to Maintain Paintings After Installation
Regular inspection helps keep paintings secure and attractive.
Check that the frame remains level and that the mounting hardware shows no signs of movement, corrosion, cracking, or deterioration.
A Complete Guide to Hanging Paintings on Walls
Dust the frame gently with a suitable soft cloth or brush. Avoid spraying cleaning products directly onto the artwork or allowing moisture to collect around the frame.
For valuable original paintings and delicate works on paper, consult a professional conservator if you notice mold, discoloration, loose paint, or other signs of damage.
Proper maintenance protects both the artwork and the wall while helping preserve the appearance of your display.
12. When to Hire a Professional Painting Installer
Many lightweight paintings can be installed by following the correct procedures. However, some projects require specialist knowledge and equipment.
Consider hiring an experienced installer for oversized frames, unusually heavy artwork, fragile walls, stone or tile surfaces, difficult stairwells, and valuable original paintings.
A Complete Guide to Hanging Paintings on Walls
A professional can assess the wall construction, select suitable mounting hardware, plan a gallery wall, and handle large frames safely.
Professional installation may be especially worthwhile when the cost of a mistake could include personal injury, significant wall damage, or damage to an irreplaceable artwork.
Frequently Asked Questions About Hanging Paintings on Walls
What is the best height for hanging a painting?
A practical starting point is to position the center of the painting approximately 57 to 60 inches (145 to 152 centimeters) above the floor. Adjust the height to suit the room, furniture, and viewing conditions.
How far above a sofa should a painting hang?
A Complete Guide to Hanging Paintings on Walls
A gap of approximately 6 to 10 inches (15 to 25 centimeters) between the top of the sofa and the bottom of the frame is a useful starting point. The ideal spacing depends on the artwork’s dimensions and the furniture arrangement.
What is the safest way to hang a heavy painting?
The safest method depends on the painting’s weight and the wall construction. Suitable options may include structural fasteners, rated anchors, or a properly installed French cleat.
Can I hang paintings without drilling holes?
Yes. Certain lightweight artworks can be displayed with compatible adhesive strips, removable hooks, or picture ledges. Always check the manufacturer’s weight limits and surface requirements.
How do I hang multiple paintings evenly?
A Complete Guide to Hanging Paintings on Walls
Plan the layout before drilling, maintain consistent spacing, and calculate each mounting point carefully. Center the complete arrangement to create a balanced gallery wall.
How can I prevent a painting from becoming crooked?
Use suitable hanging hardware, check the frame with a spirit level, and ensure that all mounting points are secure. Inspect the frame again after installation.
How often should picture-hanging hardware be checked?
Inspect the mounting system periodically and whenever you notice tilting, movement, or visible deterioration. Heavy or valuable artwork deserves particular attention.
Conclusion
Learning how to hang paintings on walls correctly involves selecting the right location, determining the ideal hanging height, measuring accurately, and choosing appropriate mounting hardware.
Whether you are installing a single canvas painting, displaying framed artwork above a sofa, or creating a gallery wall, careful planning helps you achieve a secure and visually balanced result.
Always consider the wall material, the artwork’s weight, and the condition of the mounting hardware before installation. For heavy, fragile, or valuable paintings, professional assistance may provide additional safety and peace of mind.
By following these wall art installation tips, you can enhance your interior design, protect your artwork, and create a beautiful display that lasts for years.
📞 Need Help?
Let us take care of the hard work while you sit back and relax.
📍 Serving: Austin, Round Rock, Cedar Park & more
📱 Call or Text: (737) 420-6992
🌐 Visit: https://lavahandyman.com