Complete Guide to Installing a Mirror on the Wall with a Laser Level: From Measuring to Precise Installation
Installing a mirror on the wall is one of the most important steps in interior decoration. Although it may seem simple, achieving a professional result requires accurate measurements, choosing the right installation method, and properly leveling the mirror. This is especially important when installing large, decorative, or frameless mirrors.
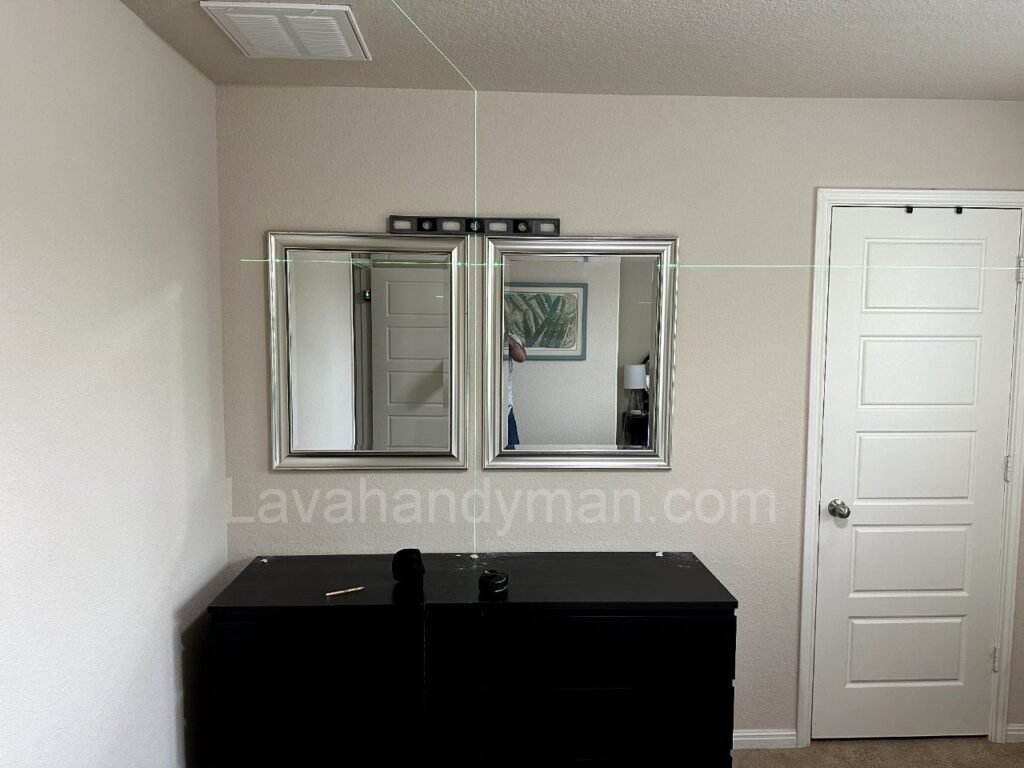
Using a laser level to install a mirror can significantly improve installation accuracy and make the process easier. A laser level helps you create precise horizontal and vertical reference lines on the wall, allowing you to position the mirror accurately in relation to the wall, vanity, cabinet, or other surrounding elements.
In this guide, we will explain how to install a mirror on a wall using a laser level, from measuring the installation area and finding the center of the mirror to setting up the laser level, marking the mounting points, installing the hardware, and performing the final alignment check.
Installing a Mirror on the Wall with a Laser Level
If you want to install a wall mirror straight, accurately, and professionally, keep reading.
Why Use a Laser Level to Install a Mirror?
One of the main reasons to use a laser level when installing a mirror is to prevent it from being tilted. With large and decorative mirrors, even a small difference in height or angle can be clearly visible.
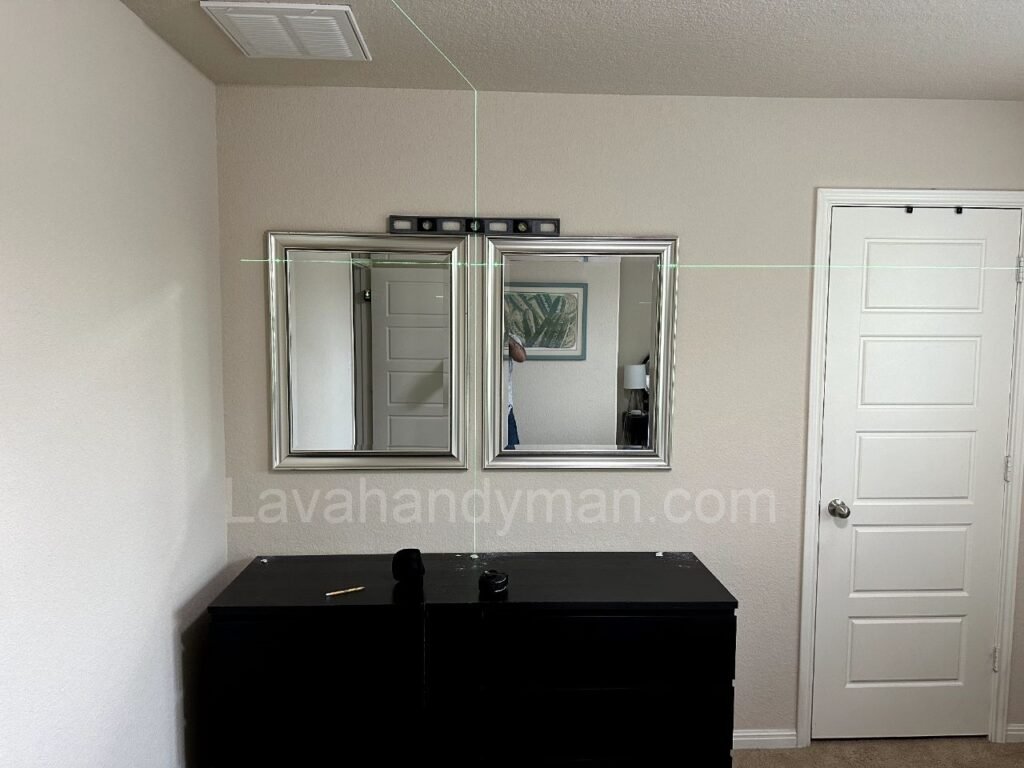
A laser level projects horizontal and vertical lines onto the wall, providing an accurate reference for installation. These lines can be used to determine the center of the mirror, the installation height, and the exact position of mounting brackets or supports.
Installing a Mirror on the Wall with a Laser Level
The main benefits of installing a mirror with a laser level include:
- Improved installation accuracy
- Preventing the mirror from being tilted
- Finding the exact center of the mirror
- Determining the correct installation height
- Easier marking of screw and mounting points
- Suitable for large and decorative mirrors
- Reducing errors during drilling
Installing a Mirror on the Wall with a Laser Level
What Tools Do You Need to Install a Mirror on a Wall?
Before starting the installation, it is best to prepare all the necessary tools. The exact tools required depend on the weight of the mirror, the type of wall, and the chosen installation method.
Common tools include:
Installing a Mirror on the Wall with a Laser Level
- Laser level
- Measuring tape
- Pencil for marking
- Drill
- Drill bit suitable for the wall material
- Appropriate screws and wall anchors
- Mirror brackets or mounting hardware
- Work gloves
- Soft cloth
Installing a Mirror on the Wall with a Laser Level
For large or heavy mirrors, choosing the correct mounting hardware is extremely important. Screws and wall anchors should be selected according to the weight of the mirror and the type of wall.
Steps for Installing a Mirror on a Wall with a Laser Level
1. Check the Installation Area
Before starting the installation, inspect the wall and the area where the mirror will be installed.
Installing a Mirror on the Wall with a Laser Level
Determine what type of wall you are working with, such as concrete, brick, plaster, tile, or drywall.
You should also consider the mirror’s position in relation to other elements in the room. For example, if the mirror will be installed above a bathroom vanity, its distance from the vanity, faucet, cabinets, and surrounding fixtures should be considered beforehand.
Before drilling, make sure there are no electrical wires or pipes behind the drilling points.
2. Measure the Mirror and Wall
The next step is to accurately measure the width and height of the mirror.
Then measure the width of the installation area to determine its center. If the mirror is going to be installed in the center of the wall, the center of the wall should align with the center of the mirror.
For example, if the wall is 200 cm wide and the mirror is 100 cm wide, installing the mirror in the center would leave approximately 50 cm of space on each side.
Installing a Mirror on the Wall with a Laser Level
This simple measurement can prevent the mirror from being positioned incorrectly or appearing asymmetrical.
3. Set Up the Laser Level
Place the laser level on a stable surface. If possible, using a tripod will help prevent the device from moving during the measurement process.
Turn on the laser level and allow its self-leveling system, if available, to find the correct position.
Once the laser line is stable, you can use it as a reference line for installing the mirror.
Installing a Mirror on the Wall with a Laser Level
4. Mark the Horizontal Line
One of the most useful features of a laser level is its ability to create a precise horizontal reference line.
Position the horizontal laser line at the desired installation height. This line can be used to determine the top or bottom position of the mirror and the location of mounting brackets.
At this stage, check the mirror height several times before drilling to avoid having to relocate the mounting points later.
5. Mark the Center of the Mirror with a Vertical Line
Installing a Mirror on the Wall with a Laser Level
If your laser level can project a vertical line, use it to identify the center of the mirror.
Position the vertical laser line along the center of the installation area. Then align the center of the mirror with this line.
This creates an accurate vertical reference that helps ensure the mirror is positioned correctly.
Installing a Mirror on the Wall with a Laser Level
6. Mark the Mounting Points
Once the horizontal and vertical reference lines have been established, mark the exact locations of the mirror brackets, clips, or mounting hardware.
If the back of the mirror has pre-drilled holes or designated mounting points, carefully measure the distance between them and transfer those measurements to the wall.
At this stage, double-check all measurements before drilling.
Installing a Mirror on the Wall with a Laser Level
7. Drill the Wall
After confirming the exact drilling locations, drill the holes.
The drill bit should be appropriate for the wall material. Drilling into concrete, brick, tile, and drywall requires different tools and techniques.
Make sure the holes are drilled precisely at the marked locations.
8. Install the Wall Anchors and Mounting Hardware
After drilling, install the appropriate wall anchors, screws, brackets, or mounting system.
Installing a Mirror on the Wall with a Laser Level
For heavy mirrors, using properly rated mounting hardware is particularly important. The load capacity of the mounting system should be suitable for the mirror’s weight and the structure of the wall.
After installing the brackets, use the laser level again to check their position.
9. Place the Mirror on the Wall
For large mirrors, it is recommended to have another person help with moving and positioning the mirror.
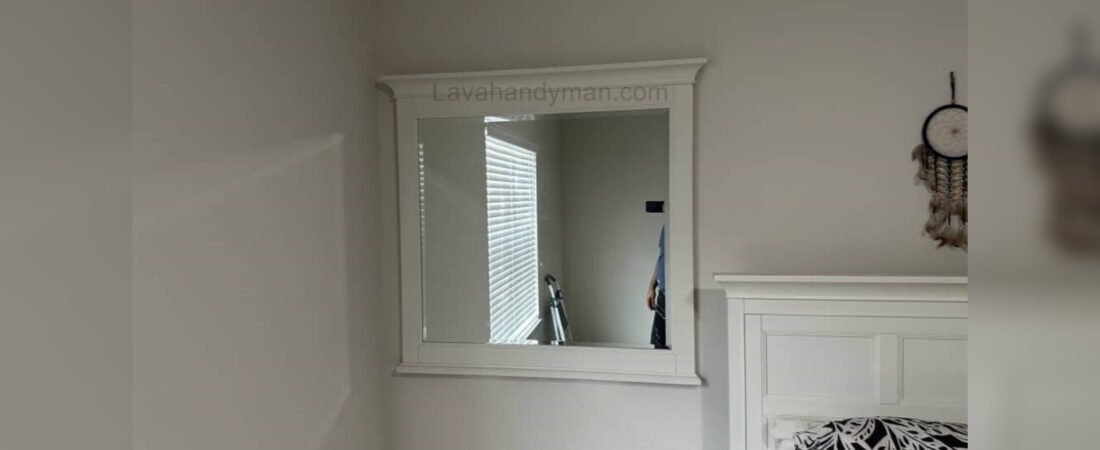
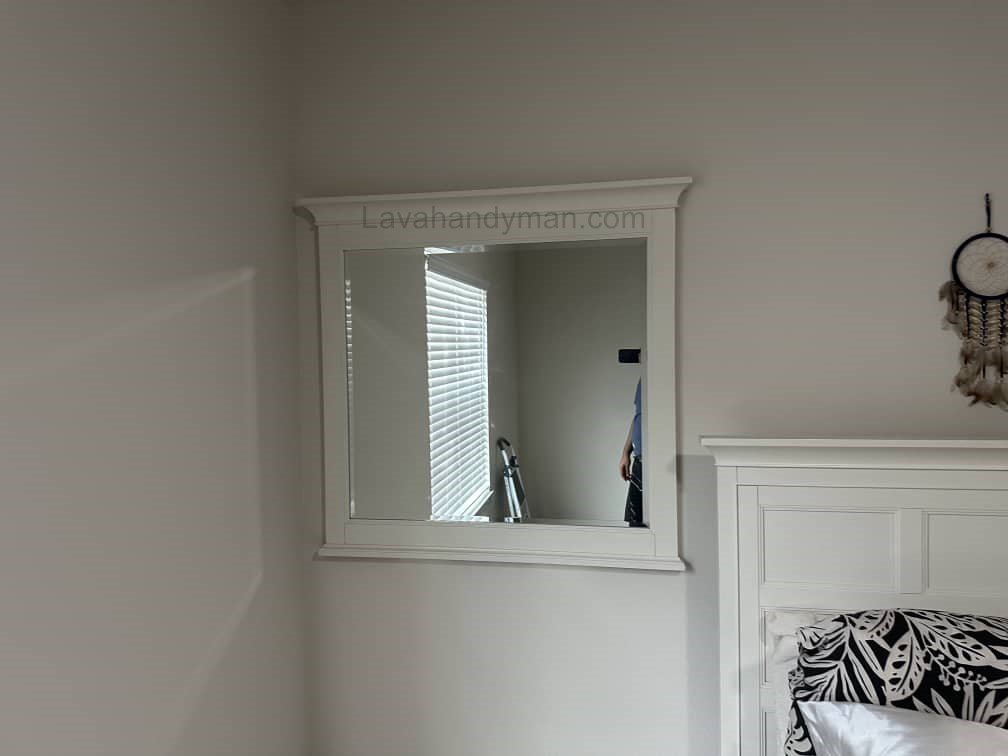
Carefully place the mirror onto the brackets or mounting system and align it with the laser reference lines.
The horizontal and vertical laser lines will help you determine whether the mirror is positioned correctly.
10. Check the Mirror’s Alignment
Installing a Mirror on the Wall with a Laser Level
Finally, inspect the mirror from several angles.
Pay attention to the following:
- The top edge of the mirror should be level.
- The mirror should be aligned with the intended vertical axis.
- The distance from both sides of the mirror should be appropriate.
- All mounting hardware should be secure.
- The mirror should not be under uneven pressure at the mounting points.
If you notice even a small alignment issue, correct it before completing the installation.
How to Install a Large Mirror on a Wall
Installing a Mirror on the Wall with a Laser Level
Installing a large mirror on a wall requires more careful planning because of its greater size and weight.
Before installation, you should determine:
- The weight of the mirror
- The dimensions of the mirror
- The type of wall
- The exact mounting points
- The load capacity of the mounting hardware
- How the mirror will be moved safely
- How the mirror will be supported during installation
For very large or heavy mirrors, it is recommended to have the installation performed by experienced professionals.
Can You Install a Mirror with Adhesive?
In some situations, special mirror adhesive can be used to install a frameless mirror. However, the adhesive must be selected according to the type and weight of the mirror, the wall surface, and the manufacturer’s recommendations.
Installing a Mirror on the Wall with a Laser Level
Not every type of adhesive is suitable for use on the back of a mirror. Some products can damage the backing layer of the mirror.
For large or heavy mirrors, the installation method should be selected based on the mirror’s weight and the appropriate support system.
Common Mistakes When Installing a Mirror with a Laser Level
Not Finding the Center Line
If the mirror needs to be centered on the wall, failing to identify the center line can make the mirror appear asymmetrical in relation to the surrounding space.
Drilling Without Accurate Measurements
Installing a Mirror on the Wall with a Laser Level
One of the most common mistakes is drilling the wall before checking all measurements.
Before drilling, double-check the position of every mounting hole.
Using the Wrong Wall Anchors
Installing a Mirror on the Wall with a Laser Level
Wall anchors must be suitable for both the wall material and the weight of the mirror. Using the wrong anchors can compromise the stability of the installation.
Placing the Laser Level on an Unstable Surface
If the laser level moves while you are taking measurements, the reference lines will also move, resulting in inaccurate measurements.
Always place the laser level on a stable surface.
Installing a Mirror on the Wall with a Laser Level
Installing a Heavy Mirror Alone
Large and heavy mirrors should preferably be moved and installed with the help of another person.
Important Tips for Professional Wall Mirror Installation
For a clean and accurate result, follow these tips:
- Determine the exact installation area.
- Measure the mirror and wall accurately.
- Find the center of the mirror.
- Place the laser level on a stable surface.
- Establish the horizontal and vertical reference lines.
- Mark the mounting points.
- Double-check all measurements before drilling.
- Choose mounting hardware suitable for the mirror’s weight.
- Check the mirror’s alignment after installation.
- Ask a professional for help if the mirror is particularly large or heavy.
Installing a Mirror on the Wall with a Laser Level
What Is a Laser Level and How Is It Used for Mirror Installation?
A laser level is a tool that projects horizontal, vertical, or, depending on the model, multiple laser lines to provide a clear reference for measuring and installation.
When installing a mirror, the main purpose of a laser level is to create a perfectly straight horizontal line for determining the installation height and a vertical line for finding the center of the mirror.
Using this tool is particularly useful when installing large and decorative mirrors, because even small installation errors can become highly noticeable.
Installing a Mirror on the Wall with a Laser Level
Benefits of Using a Laser Level to Install a Mirror
- Improves installation accuracy
- Helps level the mirror
- Makes it easier to find the center of the installation area
- Helps determine the correct installation height
- Reduces marking errors
- Makes installation faster
- Useful for large and frameless mirrors
Installing a Mirror on the Wall with a Laser Level
What Tools Do You Need to Install a Mirror on a Wall?
Before starting the installation, prepare all the necessary tools. The exact tools required depend on the mirror’s weight, dimensions, wall type, and installation method.
The main tools typically include:
- Laser level
- Measuring tape
- Pencil or marking tool
- Drill
- Drill bit suitable for the wall material
- Appropriate screws and wall anchors
- Mirror brackets or mounting hardware
- Work gloves
- Soft cloth for cleaning the mirror
Installing a Mirror on the Wall with a Laser Level
If the mirror is large or heavy, you should also have another person available to help with moving and positioning it.
Steps for Installing a Mirror on a Wall with a Laser Level
1. Choose the Right Location for the Mirror
Before drilling any holes, determine exactly where the mirror will be installed.
The mirror’s position should complement the surrounding elements of the room. For example, in a bathroom, a mirror is usually installed above a vanity. In a bedroom, hallway, or living room, the installation location should be selected based on the wall dimensions and the overall interior design.
Installing a Mirror on the Wall with a Laser Level
Consider the following factors:
- Wall width and height
- Mirror dimensions
- Distance from the floor and ceiling
- Distance from surrounding objects
- Location of lights
- Electrical outlets and switches
- Possible wires or pipes behind the wall
Choosing the right installation location is the foundation of a professional-looking result.
Installing a Mirror on the Wall with a Laser Level
2. Measure the Mirror and Wall
Once the installation area has been selected, measure the mirror’s width and height.
Then measure the width of the installation area to determine its center.
For example, if the wall is 200 cm wide and the mirror is 100 cm wide, installing the mirror in the center would leave approximately 50 cm of space on each side.
However, not every decorative design requires the mirror to be centered on the wall, so the measurements should always be based on the final design plan.
3. Find the Center of the Mirror
Installing a Mirror on the Wall with a Laser Level
To position the mirror accurately, you need to determine its center.
Measure the width of the mirror and mark the midpoint. Do the same for the installation area on the wall.
Once these points have been identified, you can use the vertical line from the laser level to create an accurate center axis.
This is particularly useful when installing round, rectangular, or frameless mirrors.
4. Set Up the Laser Level
Installing a Mirror on the Wall with a Laser Level
Place the laser level on a stable surface. If possible, use a tripod to prevent the device from moving during the measurement process.
Turn on the laser level and, if it has a self-leveling function, allow it to complete the leveling process.
Before continuing, make sure the laser line is stable.
Important: If the laser level moves while you are marking the wall, all of your reference points may become inaccurate.
5. Create a Horizontal Reference Line
Use the horizontal laser line to determine the installation height of the mirror.
Position the line at the desired height and use it as the main reference for the installation.
Installing a Mirror on the Wall with a Laser Level
For example, if the bottom of the mirror needs to be positioned at a specific height above a vanity, you can place the horizontal laser line at that height.
This method ensures that the mirror’s edge is aligned with a perfectly straight reference line.
6. Create a Vertical Reference Line
If your laser level can project a vertical line, use it to determine the center of the installation area.
Position the vertical laser line along the center of the wall or the desired installation position.
You will now have two main reference lines:
Installing a Mirror on the Wall with a Laser Level
Horizontal line: Used to determine the installation height.
Vertical line: Used to determine the center and alignment of the mirror.
Positioning the mirror according to these two axes significantly reduces the chance of installing it at an angle.
7. Mark the Mounting Points
After establishing the horizontal and vertical reference lines, mark the locations of the mirror brackets, clips, or mounting hardware.
If the mirror has mounting holes or designated attachment points on the back, carefully measure the distance between them and transfer those measurements to the wall.
Installing a Mirror on the Wall with a Laser Level
At this stage, take your time.
Before drilling, check all measurements one more time.
8. Check the Wall Material
One of the most important factors when installing a mirror on a wall is the type of wall.
The installation method for a concrete wall is different from the method used for brick, plasterboard, or drywall.
The wall type affects the choice of:
- Drill bit
- Wall anchors
- Screws
- Number of mounting points
- Mirror support system
Installing a Mirror on the Wall with a Laser Level
For this reason, the mounting hardware should always be selected according to the actual conditions of the wall.
9. Drill the Wall Carefully
After confirming the exact locations of the mounting points, drill the holes.
Use a drill bit suitable for the wall material and make sure the holes are positioned precisely according to your markings.
Before drilling, check for possible electrical wires or plumbing behind the wall.
If you are unsure about the wall structure or the location of utilities, it is safer to consult a qualified professional.
Installing a Mirror on the Wall with a Laser Level
10. Install the Wall Anchors and Mounting Hardware
After drilling the holes, install the appropriate wall anchors, screws, brackets, or mounting system.
For heavy mirrors, choosing suitable mounting hardware is especially important. The load capacity of the mounting hardware should be appropriate for the mirror’s weight and the type of wall.
After installing the mounting hardware, use the laser level again to check its position.
11. Install the Mirror on the Wall
Carefully place the mirror onto the brackets or mounting system.
Installing a Mirror on the Wall with a Laser Level
If the mirror is large or heavy, do not attempt to move and install it alone.
Once the mirror is in position, align it with the laser reference lines.
At this stage, avoid fully tightening all connections immediately so that you can make minor adjustments if necessary.
12. Check the Mirror Alignment
Finally, check whether the mirror is properly aligned.
The horizontal laser line should correspond with the desired reference edge, while the vertical laser line should align with the intended center axis of the mirror.
Installing a Mirror on the Wall with a Laser Level
In addition to using the laser level, step back several feet and visually inspect the mirror.
Sometimes a mirror may be technically level but still appear slightly asymmetrical in relation to the surrounding elements. Therefore, a visual inspection is also important.
Installing a Large Mirror with a Laser Level
Installing a large mirror requires more planning because of its size and weight.
Before installation, determine the mirror’s weight, wall type, number of mounting points, and method of moving the mirror.
Installing a Mirror on the Wall with a Laser Level
For large mirrors:
- Use mounting hardware rated for the mirror’s weight.
- Measure all mounting points carefully.
- Use a laser level to establish the installation axes.
- Do not move a heavy mirror by yourself.
- Check the stability of the mounting system after installation.
If the mirror is particularly large or heavy, professional installation is recommended.
Installing a Mirror on a Tiled Wall
Installing a Mirror on the Wall with a Laser Level
Installing a mirror on a tiled wall requires additional care because incorrect drilling can damage the tile.
Before drilling, determine the exact mounting locations. A laser level can help minimize unnecessary markings and make it easier to position the holes accurately.
The drill bit should also be appropriate for the type of tile and the wall structure behind it.
If the mirror is being installed above a bathroom vanity, check the location of plumbing, electrical wiring, and other fixtures before drilling.
Installing a Frameless Mirror with a Laser Level
Installing a Mirror on the Wall with a Laser Level
Frameless mirrors are popular because of their clean and minimalist appearance. However, installation errors can be more noticeable because there is no frame to hide imperfections.
When installing a frameless mirror, establish the horizontal and vertical reference lines with the laser level before marking the mounting points.
If mirror adhesive is being used, make sure the adhesive is specifically suitable for mirror installation and compatible with the mirror’s backing.
Installing Multiple Mirrors Side by Side
Modern interior designs sometimes use several mirrors arranged next to each other.
Installing a Mirror on the Wall with a Laser Level
In this situation, a laser level can be extremely useful. First, establish one horizontal reference line for all the mirrors. Then use vertical laser lines to determine the position of each individual mirror.
The spacing between the mirrors should also remain consistent throughout the installation.
This method helps create a clean, balanced, and unified appearance.
Common Mistakes When Installing a Mirror on a Wall
Not Finding the Center of the Wall
If the mirror is supposed to be centered, simply measuring from the wall corners may not be sufficient. Determine the center of the installation area first.
Installing a Mirror on the Wall with a Laser Level
Using the Wrong Mounting Hardware
Choosing the wrong screws or wall anchors can reduce installation stability. The mirror’s weight and the wall material must be considered when selecting the mounting system.
Moving the Laser Level
If the laser level moves during the marking process, the reference lines will also shift.
Drilling Before the Final Check
Always double-check all measurements before drilling into the wall.
Installing a Mirror on the Wall with a Laser Level
Installing a Mirror on the Wall with a Laser Level
Installing a Heavy Mirror Alone
Large mirrors should preferably be moved and installed with the help of another person.
Can You Install a Mirror Without Drilling the Wall?
In some situations, no-drill installation methods such as specialized mirror adhesives or mounting systems can be used.
However, whether these methods are suitable depends on the mirror’s weight, the wall surface, the mirror backing, and the specifications of the installation product.
For large or heavy mirrors, do not rely on an adhesive-based installation method without first checking its load capacity and suitability.
Installing a Mirror on the Wall with a Laser Level
Frequently Asked Questions About Installing a Mirror with a Laser Level
Do You Really Need a Laser Level to Install a Mirror?
No. A standard spirit level can also be used to install a mirror. However, a laser level can improve the speed and accuracy of measuring and marking, especially when working with large mirrors.
What Is the Best Way to Level a Mirror on a Wall?
First, determine the desired center and height of the mirror. Then use the horizontal and vertical lines from a laser level to position the mirror accurately.
What Type of Mounting Hardware Should Be Used for a Large Mirror?
Installing a Mirror on the Wall with a Laser Level
The appropriate mounting hardware depends on the weight of the mirror and the type of wall. Therefore, there is no single type of screw or wall anchor that is suitable for every mirror installation.
Can You Install a Mirror Without Drilling the Wall?
In some situations, adhesive-based or no-drill mounting methods can be used. However, their suitability depends on the mirror’s weight, the wall surface, and the specifications of the mounting product.
Installing a Mirror on the Wall with a Laser Level
Conclusion
Using a laser level to install a mirror is an accurate and practical way to prevent the mirror from being tilted and to improve installation precision. By projecting horizontal and vertical reference lines, a laser level helps you determine the mirror’s center, installation height, and mounting points more accurately.
For installing a mirror on a wall with a laser level, start by checking the installation area and wall material. Then measure the mirror and determine its center. Next, use the laser level to create horizontal and vertical reference lines and mark the mounting points.
After selecting the appropriate mounting hardware for the mirror’s weight and the wall type, install the mirror carefully and perform a final alignment and stability check.
If you are installing a large, heavy, or decorative mirror, choosing the right mounting hardware and following proper safety procedures are especially important. For particularly large or heavy mirrors, professional installation may be the safest and most reliable option.
📞 Need Help?
Let us take care of the hard work while you sit back and relax.
📍 Serving: Austin, Round Rock, Cedar Park & more
📱 Call or Text: (737) 420-6992
🌐 Visit: https://lavahandyman.com