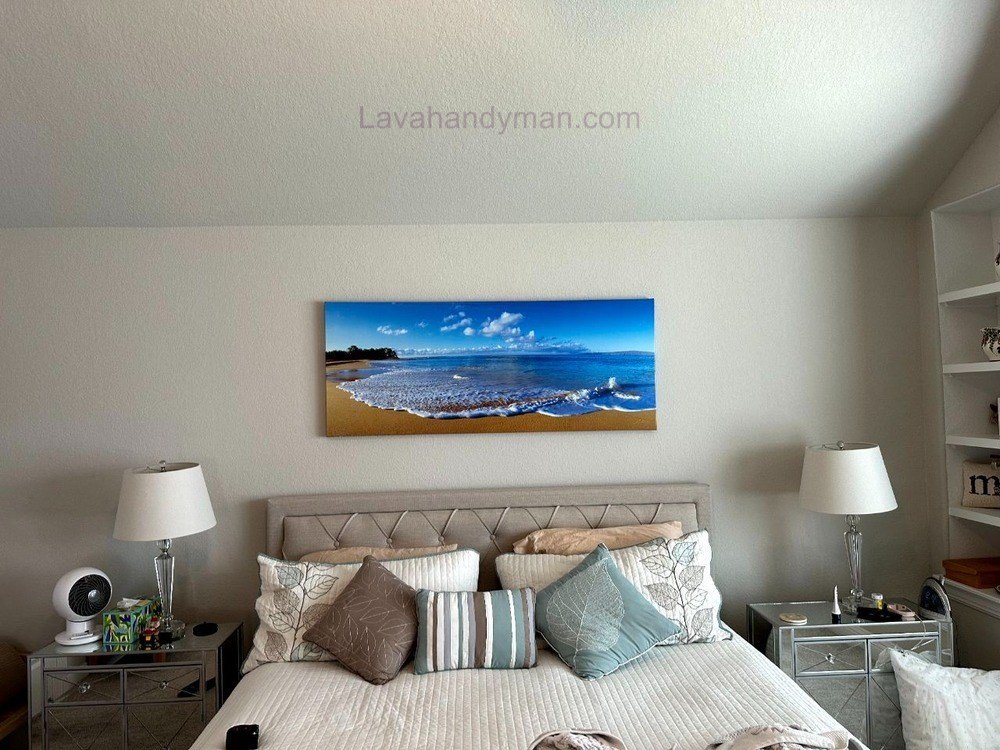
How to Install a Picture with a Laser Level: A Complete Guide to Accurate and Perfectly Level Wall Mounting
Installing a picture on a wall is one of the easiest ways to enhance the appearance of a home, office, store, or commercial space. However, if a picture is even slightly crooked or positioned at an inappropriate distance from other decorative elements, the final result may not look professional.
This becomes even more important when several pictures are installed next to each other. In such cases, even a small difference in height or angle can affect the overall appearance and alignment of the entire arrangement.
One of the most useful tools for solving this problem is a laser level. By projecting an accurate horizontal or vertical line onto the wall, a laser level makes it easier to determine the correct installation position, mark mounting points, and ensure that the picture is perfectly level.
In this guide, we will explain how to install a picture using a laser level step by step. We will cover how to choose the right installation location, determine the proper height, measure mounting points, mark the wall, drill the holes, and finally check that the picture is perfectly straight and level.
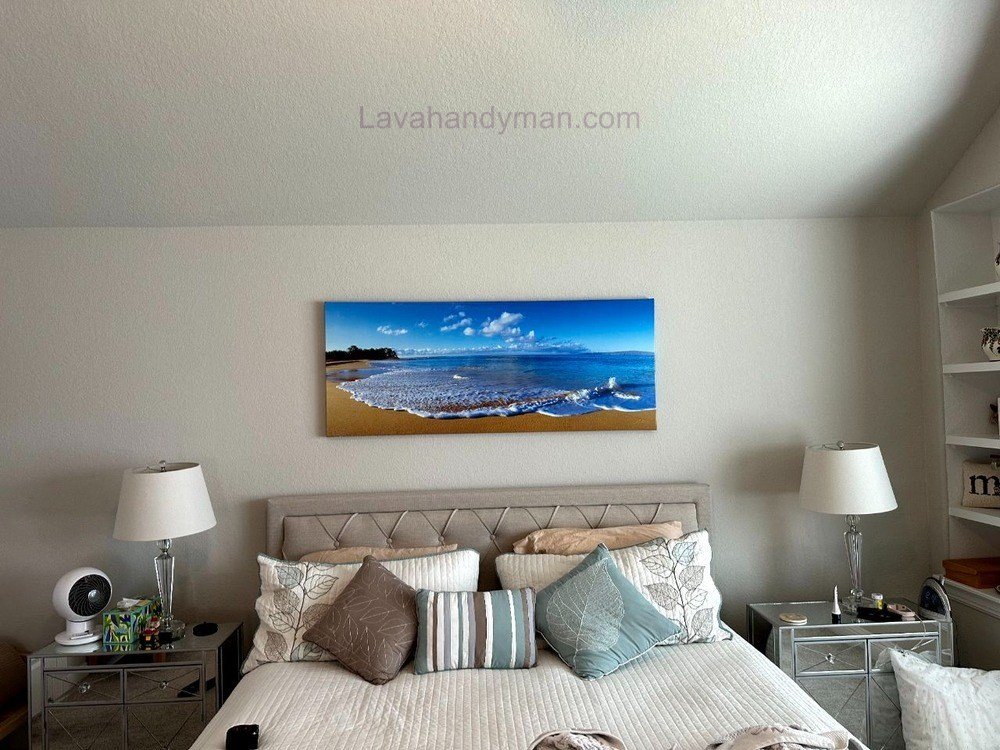
Install a Picture with a Laser Level
What Is a Laser Level?
A laser level is a tool that projects one or more laser lines onto a surface to provide an accurate reference for leveling and alignment.
There are different types of laser levels available. Some models project only a horizontal or vertical line, while others can project both horizontal and vertical lines at the same time.
For wall picture installation, a horizontal laser line is particularly useful because it can be used as a reference for determining the height and checking whether the picture is level.
Laser levels are also widely used for installing cabinets, shelves, frames, decorative elements, and various construction and interior-design applications.
Why Use a Laser Level to Install a Picture?
Install a Picture with a Laser Level
Traditionally, people use a measuring tape and a manual spirit level to install pictures. This method can work well for a simple picture, but a laser level offers several advantages when greater accuracy is required.
1. Greater Installation Accuracy
A laser level creates a precise reference line that allows you to determine different points based on the same horizontal or vertical reference.
2. Installing Multiple Pictures at the Same Height
If several pictures are going to be installed in a row, the laser line can serve as a common reference for all of them.
3. Reduced Measurement Errors
Manual measurements can sometimes result in small differences between various points. A laser level helps reduce these errors by providing a consistent reference.
4. Faster Installation
Install a Picture with a Laser Level
Once the laser level has been properly positioned, the laser line remains visible on the wall, allowing you to mark multiple points without repeatedly checking the level.
5. A More Professional Appearance
Pictures that are perfectly aligned and level create a cleaner, more organized, and more professional appearance.
Tools Needed to Install a Picture Using a Laser Level
Before starting the installation, it is best to prepare all the necessary tools. The exact equipment required depends on the weight of the picture and the type of wall.
Common tools include:
- Laser level
- Measuring tape
- Pencil
- Drill
- Drill bit suitable for the wall material
- Appropriate screws
- Suitable wall anchors
- Picture hooks or mounting brackets
- Screwdriver
- Tripod for the laser level, if needed
- Appropriate safety equipment
One of the most important considerations is choosing the correct screws and wall anchors. The mounting hardware should be suitable for both the wall material and the weight of the picture.
Install a Picture with a Laser Level
What Should You Check Before Installing a Picture?
Before turning on the laser level, it is a good idea to determine several important factors.
Wall Material
First, identify the type of wall. Installing a picture on a concrete, brick, plaster, or drywall surface may require different installation methods.
Picture Weight
The weight of the picture determines the type of mounting system and hardware you need.
Picture Dimensions
Measure the width and height of the picture. If you are installing several pictures, record the dimensions of each one.
Picture Position
Consider the distance between the picture and the floor, ceiling, furniture, tables, televisions, and other decorative elements.
Install a Picture with a Laser Level
Mounting Points on the Back of the Picture
Inspect the back of the picture to determine the exact position of the hooks, brackets, or mounting points.
This step is extremely important because the screw positions on the wall should be determined based on the actual mounting points rather than simply the overall dimensions of the picture.
Step-by-Step Guide to Installing a Picture Using a Laser Level
Now let’s look at the main installation steps.
Install a Picture with a Laser Level
Step 1: Determine the Picture’s Installation Location
First, decide exactly where the picture will be positioned on the wall.
If you are installing one picture, determine its center relative to the desired space.
If you are installing multiple pictures, first decide on the overall layout.
For example, the pictures may be:
- Arranged in a horizontal row
- Installed in multiple rows
- Arranged as a gallery wall
- Installed as a multi-panel picture
Before drilling any holes, the overall arrangement should be determined.
Step 2: Determine the Appropriate Height
Next, determine the desired installation height.
Install a Picture with a Laser Level
The ideal height depends on the environment and should be considered together with the picture size and surrounding furniture.
If the picture is going above a sofa or table, make sure there is an appropriate distance between the picture and the furniture.
Once the desired height has been determined, you can use the laser level to create a reference line.
Step 3: Set Up the Laser Level
Place the laser level on a stable surface or mount it on a tripod if possible.
Position the device so that the laser line is clearly visible within the desired area of the wall.
If the device has a self-leveling function, allow it to complete the leveling process.
Install a Picture with a Laser Level
It is also recommended to follow the manufacturer’s instructions before using the device.
Step 4: Create a Horizontal Laser Line
For most picture installation projects, a horizontal line is particularly useful.
Position the laser line at the desired height and use it as your reference.
Install a Picture with a Laser Level
However, keep in mind that the laser line does not necessarily have to align with the top edge of the picture.
Its actual position should be determined based on the mounting points of the picture.
Step 5: Measure the Hooks or Mounting Brackets on the Back of the Picture
Inspect the back of the picture and identify the exact position of the hooks or mounting brackets.
Measure the distance between the mounting point and the top edge of the picture.
If the picture has two mounting points, measure the distance between them as well.
These measurements should be recorded carefully.
For example, suppose the picture is 100 cm wide, but the distance between its two mounting points is 80 cm. In this case, the screw positions on the wall should be determined based on the 80 cm distance, not the overall width of the picture.
Install a Picture with a Laser Level
Step 6: Transfer the Measurements to the Wall
Now it is time to transfer your measurements to the wall.
Use the laser line as the main reference and mark the mounting points based on the measurements taken from the back of the picture.
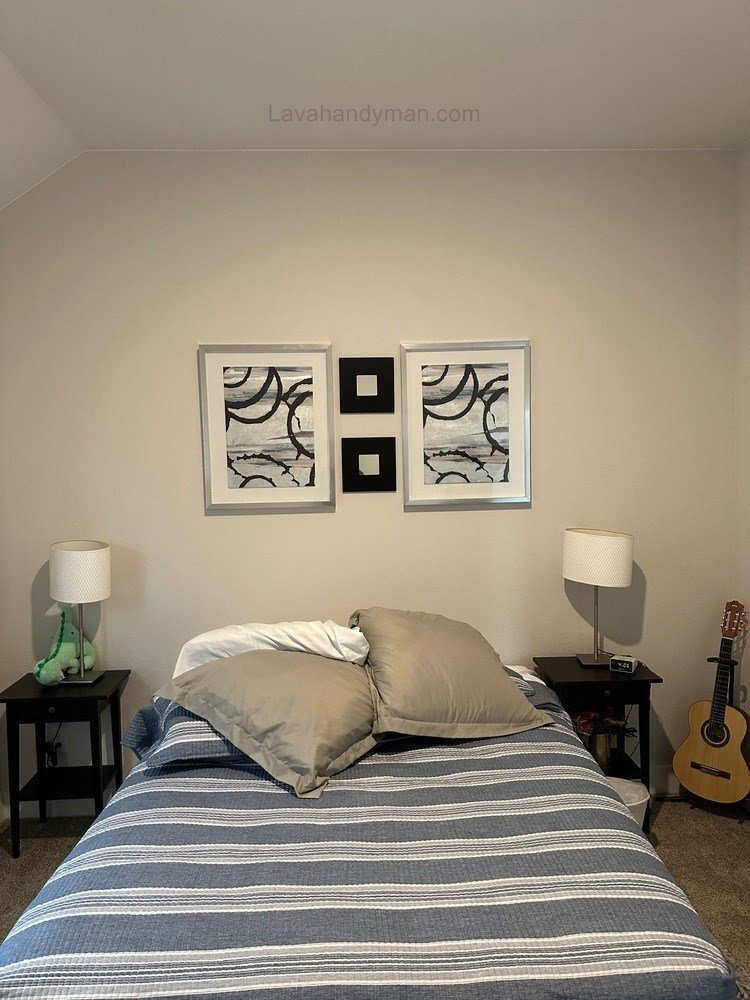
Install a Picture with a Laser Level
Before drilling, check the following:
- Center of the picture
- Installation height
- Distance between mounting points
- Distance from the wall edges
- Distance from furniture
- Distance between multiple pictures
- Position of the laser line
Once everything has been checked, mark the drilling points with a pencil.
Step 7: Drill the Wall
After marking the mounting points, you can begin drilling.
Install a Picture with a Laser Level
Choose a drill bit appropriate for the wall material.
The type of wall anchor and screw should also be suitable for the weight of the picture.
When drilling, make sure the holes are created exactly where they were marked.
For heavy pictures, using the correct mounting hardware is especially important. If you are unsure about the appropriate mounting method, consider getting professional assistance.
Step 8: Install the Screws and Mounting Hardware
After drilling the holes, install the appropriate wall anchors, screws, or mounting brackets.
Make sure the mounting hardware is securely installed and capable of supporting the picture.
The mounting system should be suitable for both the wall material and the weight of the picture.
Install a Picture with a Laser Level
Step 9: Mount the Picture on the Wall
Now place the picture onto the hooks, screws, or mounting brackets.
If the picture is large or heavy, it is recommended to have another person assist with moving and mounting it.
Once the picture is on the wall, the installation process is not quite finished.
The final alignment still needs to be checked.
Step 10: Perform a Final Check Using the Laser Level
Install a Picture with a Laser Level
Check the laser line again.
If the picture is tilted relative to the reference line, the difference should be visible.
If possible, adjust the picture until it is correctly positioned.
This final inspection is one of the most important steps in leveling a picture on a wall.
How to Install Multiple Pictures Using a Laser Level
Installing multiple pictures on one wall requires more precision than installing a single picture.
Install a Picture with a Laser Level
First, determine the overall arrangement.
For example, if four pictures are going to be installed in one row, determine the width of each picture and the desired spacing between them.
Then determine the center of the entire arrangement.
Using the horizontal laser line, you can establish a common height for all the pictures.
After determining the mounting points, mark them on the wall.
This method ensures that all pictures are installed relative to the same horizontal reference line.
Installing Multi-Panel Pictures
Multi-panel pictures require even greater accuracy.
In this type of wall art, a single image is divided into several panels, with each panel mounted separately on the wall.
Install a Picture with a Laser Level
If one panel is slightly higher or lower than the others, the overall image may appear misaligned.
To install a multi-panel picture, first determine the overall dimensions of the arrangement and the spacing between the panels.
Then use the horizontal and vertical laser lines as references to determine the exact installation position of each panel.
Installing a Picture on Drywall Using a Laser Level
Drywall requires special attention when installing a picture.
First, use the laser level to determine the correct installation position.
Then choose a mounting system that is suitable for the wall structure and the weight of the picture.
Heavy pictures should not be mounted using unsuitable hardware simply because the wall surface appears strong enough.
The laser level helps determine the correct position, but selecting the right mounting system is equally important.
Install a Picture with a Laser Level
Installing a Picture on a Plaster Wall
Choosing the appropriate mounting hardware is also important when installing pictures on plaster walls.
Lighter pictures may require simpler mounting methods, while heavier pictures need a more secure mounting system.
In either case, a laser level can be used to determine the exact installation position and ensure that the picture is level.
Common Mistakes When Installing Pictures
Even when using a laser level, several common mistakes can affect the final result.
Not Measuring the Mounting Points
The overall dimensions of the picture are not enough to determine the exact screw positions.
Install a Picture with a Laser Level
Using the Wrong Mounting Hardware
Screws and wall anchors should be selected according to the wall material and picture weight.
Placing the Laser Level on an Unstable Surface
If the laser level moves, the reference line will also change.
Drilling Before Performing a Final Check
Always double-check your measurements before drilling into the wall.
Ignoring the Spacing Between Pictures
When installing multiple pictures, the spacing between them is just as important as keeping them level.
Not Checking the Picture After Installation
After mounting the picture, always check its final position again.
Install a Picture with a Laser Level
What Is the Best Way to Level a Picture on a Wall?
To level a picture on a wall, start by creating an accurate reference line.
A laser level can be used to create this line.
The mounting points of the picture can then be positioned relative to this reference line.
After installation, check the final position of the picture again.
If the picture has two mounting points, the distance between them must be measured accurately so that both points are positioned correctly.
When installing multiple pictures, it is best to determine all mounting points relative to the same reference line.
Install a Picture with a Laser Level
Do You Really Need a Laser Level to Install a Picture?
No.
For a small and lightweight picture, a traditional spirit level can be sufficient.
However, a laser level is particularly useful in the following situations:
- Installing multiple pictures
- Installing large pictures
- Installing multi-panel pictures
- Creating gallery walls
- Installing pictures in offices
- Installing decorative wall art
- Situations where high accuracy is important
Install a Picture with a Laser Level
Benefits of Installing Pictures with a Laser Level
Using a laser level provides several benefits:
High Accuracy
It creates a precise reference line for installation.
Faster Installation
Multiple points can be marked based on the same reference line.
Reduced Human Error
The possibility of differences in height and alignment is reduced.
Ideal for Multiple Pictures
All pictures can be installed relative to the same reference line.
Professional Appearance
Well-aligned pictures create a cleaner and more organized appearance.
Install a Picture with a Laser Level
Important Tips for Professional Picture Installation
For the best possible result, keep the following tips in mind:
Measure before drilling.
Consider the picture’s weight when selecting mounting hardware.
Check the wall material before choosing screws and anchors.
Measure the exact position of the hooks or mounting brackets on the back of the picture.
Determine the spacing between multiple pictures in advance.
Check the picture’s alignment again after installation.
Install a Picture with a Laser Level
Can You Install a Picture Without Drilling?
For some lightweight pictures and under certain conditions, no-drill mounting methods may be suitable.
However, these methods are not appropriate for every picture or every type of wall.
If the picture is heavy or is intended to remain on the wall for a long period of time, an appropriate and secure mounting system should be used.
The installation method should be selected based on the picture’s weight, wall material, and the conditions of the installation area.
Install a Picture with a Laser Level
How to Install a Picture Using a Laser Level: Height, Centering, and Proper Spacing
Installing a picture on a wall requires more than simply attaching it to the surface. The height, position, alignment, and spacing of the picture all affect the final appearance of the room.
A laser level is one of the most useful tools for achieving accurate picture installation. It provides a precise horizontal or vertical reference line, making it easier to position one or multiple pictures correctly.
In this guide, we will explain how to install a picture using a laser level, how to determine the correct height, how to find the center of a wall, how to space multiple pictures, and how to install pictures on different types of walls.
Install a Picture with a Laser Level
What Is the Best Height for Hanging a Picture?
Choosing the right height is one of the most important steps when installing a picture on a wall. Even if a picture is perfectly level, installing it at the wrong height can make the entire room look unbalanced.
The ideal height depends on several factors, including the size of the picture, wall height, room layout, and surrounding furniture.
For example, when installing a picture above a sofa or table, you should also consider the distance between the picture and the furniture underneath it.
Instead of using one fixed height for every situation, consider the overall layout of the room.
Once the desired height has been determined, you can use a laser level to create a precise horizontal reference line.
Install a Picture with a Laser Level
How to Find the Center of a Wall for Picture Installation
Finding the center of the wall is especially important when installing a large picture or several pictures together.
First, measure the width of the available wall space and divide the measurement by two. This gives you the approximate center of the installation area.
Next, determine the center of the picture or the entire picture arrangement and align it with the center of the wall.
Install a Picture with a Laser Level
If your laser level can project a vertical line, you can use that line as a precise center reference.
This method is especially useful for:
- Large pictures
- Multiple pictures
- Gallery walls
- Multi-panel artwork
- Office and commercial interiors
When installing several pictures, it is better to determine the center of the entire arrangement rather than centering each picture individually.
Install a Picture with a Laser Level
What Is the Proper Spacing Between Multiple Pictures?
The spacing between pictures has a major impact on the final appearance of a wall.
Even if every picture is perfectly level, inconsistent spacing can make the arrangement look disorganized.
Before drilling, determine the desired distance between the frames.
For a horizontal arrangement, try to keep the spacing between the pictures consistent. For gallery walls containing pictures of different sizes, the spacing can vary depending on the overall design.
Using a measuring tape to determine the spacing and a laser level to establish a common horizontal reference line is an effective way to install multiple pictures accurately.
Install a Picture with a Laser Level
How to Install a Heavy Picture Using a Laser Level
Installing heavy pictures requires more attention to the mounting system.
A laser level helps you determine the correct installation position, but it does not replace a suitable mounting system.
Before installing a heavy picture, consider:
- The weight of the picture
- The type and structure of the wall
- The location of suitable mounting points
- The number of mounting points
- The appropriate screws and wall anchors
- The type of hooks or brackets
- The load capacity of the mounting system
Install a Picture with a Laser Level
For heavy wall art, all mounting hardware should be selected according to the weight of the picture and the wall structure.
After determining the mounting locations with the laser level, mark the points on the wall and double-check all measurements before drilling.
If the picture is particularly large or heavy, professional installation may be the safest option.
Installing a Picture With a Laser Level on Different Types of Walls
The method used for installing a picture on a wall depends on the wall material. The drill bit, screws, wall anchors, and mounting system should all be appropriate for the surface.
Install a Picture with a Laser Level
Installing a Picture on a Concrete Wall
Concrete walls generally require a suitable masonry drill bit and mounting hardware designed for concrete.
First, use the laser level to determine the installation position. Then mark the mounting points and use suitable hardware for the concrete surface.
Installing a Picture on a Brick Wall
Brick walls may require a masonry drill bit and appropriate wall anchors.
When drilling, consider the structure of the wall and choose a suitable location for the mounting holes.
Install a Picture with a Laser Level
Installing a Picture on a Plaster Wall
Plaster walls require careful selection of the mounting system.
Lightweight pictures may require a relatively simple mounting solution, while heavy pictures need a more secure attachment system.
A laser level is useful for determining the correct height and position of the picture.
Install a Picture with a Laser Level
Installing a Picture on Drywall
When installing a picture on drywall, selecting the correct mounting hardware is particularly important.
The weight of the picture and the internal structure of the wall should be considered before installation.
For heavier pictures, it may be necessary to use specialized drywall anchors or connect the mounting system to a structural part of the wall.
A laser level helps determine the exact installation position, but choosing the correct mounting system is equally important.
Installing a Picture on a Stone Wall
Stone surfaces are generally harder than other wall materials and may require specialized drilling tools.
The type of stone and wall structure should be considered before choosing the installation method.
Install a Picture with a Laser Level
How to Install Multiple Pictures at the Same Height Using a Laser Level
One of the best applications of a laser level for picture installation is creating one horizontal reference line for multiple pictures.
First, determine the desired installation height.
Then position the laser level correctly and project a horizontal line across the wall.
Next, measure the exact location of the hooks or mounting points on the back of each picture.
Transfer these measurements to the wall using the laser line as your reference.
Before drilling, double-check all mounting points.
Install a Picture with a Laser Level
After installing the pictures, use the laser line again to check that the entire arrangement is level.
This method is particularly useful for:
- Installing multiple pictures side by side
- Gallery walls
- Multi-panel artwork
- Decorative wall art
- Office interiors
- Retail stores and commercial spaces
Common Mistakes When Installing a Picture With a Laser Level
Install a Picture with a Laser Level
Using a laser level does not automatically guarantee a perfect installation. Several common mistakes can still affect the final result.
Moving the Laser Level
Once the laser level has been positioned, avoid moving it during the main measurement process. Changing its position can change the reference line.
Placing the Laser Level on an Unstable Surface
The laser level should be placed on a stable surface or mounted on a suitable tripod.
Ignoring the Self-Leveling Status
Install a Picture with a Laser Level
If the device is outside its self-leveling range, the projected laser line may not provide an accurate reference.
Failing to Measure the Mounting Points
Do not measure only the width and height of the picture. The exact position of the hooks and mounting brackets is also important.
Drilling Without a Final Check
Install a Picture with a Laser Level
Before drilling, double-check the height, center position, spacing, and mounting points.
Not Checking the Picture After Installation
Always perform a final alignment check after the picture has been mounted.
Safety Tips When Drilling for Picture Installation
Before drilling into a wall, carefully inspect the installation area.
Where possible, make sure there are no electrical wires, water pipes, or other hidden utilities in the drilling area.
Install a Picture with a Laser Level
Use a drill bit that is appropriate for the wall material and wear suitable protective equipment.
For heavy pictures or walls with an unknown structure, professional assistance may be a safer option.
What Is the Best Laser Level for Picture Installation?
For installing a single standard-size picture, you do not necessarily need an advanced laser level.
A model that provides a clear horizontal laser line may be sufficient for basic installation.
However, if you plan to install multiple pictures, gallery walls, or multi-panel artwork, a laser level that provides both horizontal and vertical lines can be more useful.
When choosing a laser level for picture installation, consider:
Install a Picture with a Laser Level
- Accuracy
- Laser line visibility
- Self-leveling capability
- Working range
- Battery life
- Tripod compatibility
- Ease of use
For picture installation, accuracy and a stable laser line are generally more important than unnecessary advanced features.
Install a Picture with a Laser Level
Picture Installation With a Laser Level Checklist
Before drilling into the wall, check the following:
The picture will be checked for level after installation.
The picture location has been selected.
The appropriate height has been determined.
The center of the wall has been identified.
The picture dimensions have been measured.
The mounting points have been measured.
The spacing between multiple pictures has been determined.
Install a Picture with a Laser Level
The wall material has been identified.
Suitable screws and wall anchors have been selected.
The laser level is positioned on a stable surface.
The horizontal or vertical reference line has been checked.
All drilling points have been double-checked.
Conclusion
Install a Picture with a Laser Level
Installing a picture using a laser level is an effective way to improve accuracy and alignment when mounting wall art. By projecting a horizontal or vertical line, the laser level provides a clear reference that makes it easier to determine the correct installation position.
For a professional installation, first check the wall material, picture weight and dimensions, and the desired installation location. Then position the laser level correctly and create the required reference line.
Install a Picture with a Laser Level
Next, measure the mounting points on the back of the picture and transfer these measurements to the wall. After carefully checking the measurements, drill the holes and install the appropriate mounting hardware.
Finally, mount the picture and use the laser level to check its alignment.
When installing multiple pictures or multi-panel artwork, a laser level becomes even more useful because all the individual pieces can be aligned using the same reference line.
By following proper measurement procedures, choosing suitable mounting hardware, and performing a final alignment check, you can achieve a straight, level, organized, and professional-looking picture installation.
Install a Picture with a Laser Level
Frequently Asked Questions About Installing Pictures with a Laser Level
How do you install a picture using a laser level?
First, determine the desired location and height of the picture. Set up the laser level and create a reference line. Measure the mounting points on the back of the picture, mark the corresponding positions on the wall, install the appropriate hardware, mount the picture, and finally check its alignment.
Can a laser level be used to install multiple pictures?
Yes. One of the most useful applications of a laser level is creating a common reference line for installing multiple pictures at the same height.
How do you install a picture on drywall?
First, determine the wall structure and the weight of the picture. Then select mounting hardware suitable for drywall. A laser level can be used to determine the exact mounting position and ensure the picture is properly aligned.
Is a laser level necessary for installing multi-panel pictures?
It is not strictly necessary, but it can significantly improve installation accuracy, especially when the panels need to have perfectly consistent spacing and height.
Install a Picture with a Laser Level
What is the best way to level a picture on a wall?
Using a horizontal laser line as a reference and accurately measuring the mounting points on the back of the picture is one of the most effective ways to install and level a picture.
Should you check the picture after installation?
Yes. Even if the measurements were accurate, checking the final position with a laser level helps ensure that the picture remains correctly aligned and perfectly level after installation.
📞 Need Help?
Let us take care of the hard work while you sit back and relax.
📍 Serving: Austin, Round Rock, Cedar Park & more
📱 Call or Text: (737) 420-6992
🌐 Visit: https://lavahandyman.com