
Wall Panel Installation Guide: Types, Advantages, and Common Mistakes
Introduction
In today’s world, interior design has become one of the most important factors influencing the quality of human life. The spaces in which people live or work have a direct impact on their mood, concentration, and sense of comfort. For this reason, the use of appropriate decorative elements in interior design has gained special importance. One of the most popular and widely used elements in this field is wall panels. In addition to enhancing the visual appeal of an environment, wall panels play an important role in covering wall imperfections, improving sound insulation, and enhancing the overall appearance of interior spaces.

Wall Panel Installation
What Are Wall Panels?
Wall panels are coverings that are installed on wall surfaces and can serve decorative, protective, or functional purposes. They are considered a suitable alternative to simple paint or wallpaper and, due to their wide variety of designs, colors, and materials, they can easily match different interior design styles. Wall panels can create a modern, classic, or luxurious atmosphere and transform plain and monotonous spaces into visually appealing environments.
History of Using Wall Panels
Wall Panel Installation
The use of wall coverings has a long history in architecture and interior design. In the past, carved wood, decorative fabrics, and natural stones were used to cover walls, especially in palaces and aristocratic homes. With industrial progress and the introduction of new materials, wall panels evolved into their modern forms. Easier installation methods and more affordable prices made wall panels accessible to the general public. Today, wall panels are considered one of the main elements of modern interior design.
Types of Wall Panels Based on Material
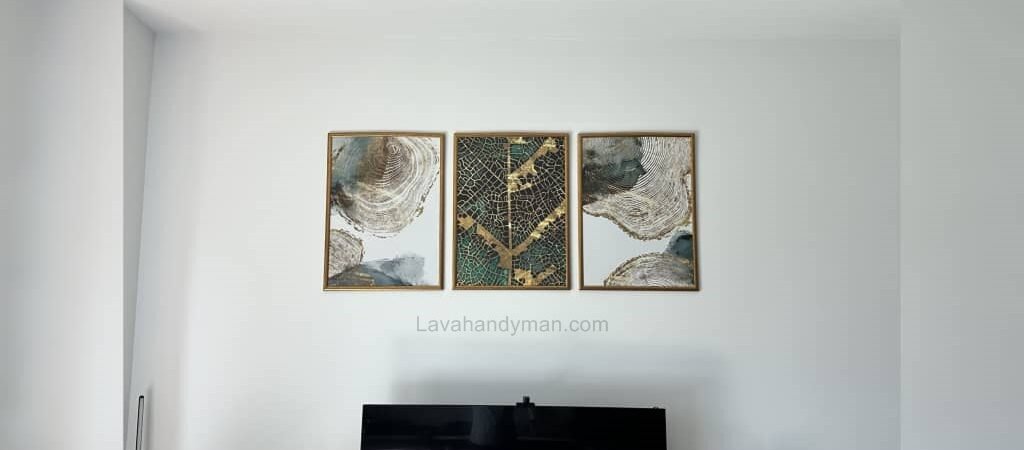
Wall panels can be categorized into several types based on their material. Wooden wall panels, made from natural wood or MDF, create a warm and cozy atmosphere and are commonly used in residential spaces. PVC wall panels are highly resistant to moisture, making them suitable for kitchens and bathrooms. Foam wall panels are lightweight and are often used as sound insulation solutions. Stone or stone-look wall panels create a luxurious appearance and are commonly installed on feature walls, such as behind televisions.
Advantages of Using Wall Panels
Wall panels offer numerous advantages. One of their most important benefits is enhancing the visual appeal of interior spaces. They effectively cover cracks, uneven surfaces, and wall defects, significantly improving the appearance of walls. Some wall panels also provide sound and thermal insulation, contributing to a quieter and more comfortable environment. Other advantages include a wide variety of designs and colors, quick installation, and the possibility of easy replacement when changing interior décor.
Wall Panel Installation
Disadvantages and Limitations
Despite their many benefits, wall panels also have certain limitations. Some types may be more expensive than paint or wallpaper. In addition, improper installation can reduce their durability and cause panels to detach over time. Therefore, following technical guidelines and using appropriate tools are essential for achieving high-quality results.
Tools and Equipment Required for Installing Wall Panels
Wall Panel Installation
Proper installation of wall panels requires tools such as a measuring tape, level, pencil, special wall panel adhesive, screws and wall plugs, a drill, a saw or cutter, and safety equipment. Using the right tools increases accuracy and prevents installation errors.
Preparing the Wall Before Installation
Wall preparation is one of the most important steps in installing wall panels. The wall surface must be completely clean, dry, and smooth. Dust, grease, or moisture can significantly reduce adhesion. Any cracks or holes should be filled and smoothed using putty. Roughening glossy or oil-painted walls can also improve adhesive performance.
Wall Panel Installation
Measurement and Initial Design
Accurate measurement of the wall and proper initial planning play a crucial role in achieving a neat and attractive final result. Determining the exact installation layout and drawing guide lines with a level ensure uniform and precise installation while minimizing material waste.
Methods of Installing Wall Panels
Wall panels can be installed using different methods depending on their type and weight. Adhesive installation is suitable for lightweight panels and allows for quick application. Screw and wall plug installation is recommended for heavier panels and provides greater strength and stability. In some cases, a combined method using both adhesive and screws is applied to ensure maximum durability.
Wall Panel Installation
Safety Considerations During Installation
Observing safety measures during installation is very important. Wearing gloves and safety goggles, using power tools carefully, and ensuring the secure attachment of panels are essential precautions. Heavy wall panels should preferably be installed by skilled professionals.
Wall Panel Installation
Common Mistakes in Wall Panel Installation
Some common mistakes can reduce the quality of installation. These include installing panels on damp walls, using unsuitable adhesives, neglecting proper leveling, and rushing the installation process. Being aware of these mistakes helps achieve better and more durable results.
Maintenance and Cleaning of Wall Panels
Wall Panel Installation
Proper maintenance extends the lifespan of wall panels. Regular cleaning using a soft cloth and mild cleaning agents helps preserve their appearance and quality. Harsh chemicals should be avoided, as they may damage the surface of the panels.
Applications of Wall Panels in Different Spaces
Wall panels are widely used in residential, office, and commercial spaces. When applied correctly, they can significantly enhance both the aesthetic appeal and functionality of an environment.
Wall Panel Installation
Step-by-Step Guide to Installing Wall Panels on Walls
Step 1: Choosing the Right Wall Panel
The first and most important step is selecting a wall panel that suits the space. The material of the panel should match the environmental conditions. For example, PVC wall panels are ideal for humid areas, wooden panels are suitable for dry spaces, and foam panels are commonly used for sound insulation. The weight of the wall panel also plays a key role in determining the installation method.
Wall Panel Installation
Step 2: Preparing Tools and Equipment
Before starting the installation, all required tools should be prepared in advance. These typically include a measuring tape, level, pencil, special wall panel adhesive, screws and wall plugs, a drill, a cutter or saw, and safety equipment. Having all tools ready improves efficiency and accuracy.
Wall Panel Installation
Step 3: Preparing the Wall Surface
The wall surface must be completely clean, dry, and smooth. Dust, grease, or moisture can significantly reduce adhesion. Any cracks or holes should be filled with putty and leveled. For glossy or oil-painted walls, lightly roughening the surface helps improve adhesion.
Step 4: Accurate Wall Measurement
Measuring the wall accurately is essential. Correct measurement ensures precise cutting of wall panels and prevents material waste. Accurate measurements form the foundation of a neat and professional installation.
Step 5: Planning and Marking
At this stage, the exact placement of the wall panels is determined. Using a pencil and a level, guideline marks are drawn on the wall to ensure straight, aligned, and uniform installation. Proper planning directly affects the final appearance.
Wall Panel Installation
Step 6: Cutting the Wall Panels
If required, wall panels should be cut according to the measured dimensions. Using appropriate tools and cutting carefully ensures clean edges and a more professional final look.
Step 7: Selecting the Installation Method
The installation method depends on the type and weight of the wall panel. Lightweight panels are usually installed using special adhesive. Heavier panels require screws and wall plugs for stronger support. In some cases, a combined method using both adhesive and screws is applied for maximum durability.
Wall Panel Installation
Step 8: Installing the Wall Panels
Installation should begin from a corner or the bottom of the wall. For adhesive installation, the adhesive should be applied evenly to the back of the panel, then the panel should be pressed firmly onto the wall. For screw installation, holes are drilled, wall plugs are inserted, and screws are tightened securely. After installing each panel, its level and alignment should be checked.
Step 9: Adjusting Spacing and Continuing Installation
Wall panels should be installed with consistent and uniform spacing. Careful alignment during this step ensures visual order and enhances the overall aesthetic. Avoid rushing and regularly check alignment to maintain quality.
Step 10: Final Inspection and Cleaning
After completing the installation, the entire wall should be inspected to ensure that all panels are securely fixed and properly aligned. Excess adhesive should be cleaned off, and the surface of the panels should be wiped clean. Adequate time must be allowed for the adhesive to fully cure.
Step 11: Post-Installation Maintenance
To extend the lifespan of wall panels, they should be protected from strong impacts, excessive moisture, and harsh cleaning agents. Regular cleaning with a soft cloth and mild detergents helps maintain their appearance over time.
Wall Panel Installation
Methods to Hang Wall Art Without Drilling
1. Using Special Wall Adhesive
Double-sided strong adhesive or special wall adhesive is one of the most common and fastest ways to hang wall art without damaging the wall. These adhesives are suitable for light to medium-weight frames. Make sure the wall surface is clean and dry for maximum adhesion.
Advantages: Quick and easy installation, no drilling required
Limitations: Not suitable for heavy frames
2. Command Strips
Command strips are ideal for rental homes or delicate walls. These strips leave no marks on the wall after removal, and their weight capacity varies depending on the model.
Advantages: Easy removal without wall damage
Best for: Rental homes and painted walls
Wall Panel Installation
3. Adhesive Wall Hooks
Adhesive hooks are simple and economical, perfect for light frames. They come in various sizes and weight capacities.
Important Tip: Always check the hook’s weight limit before use.
4. Velcro Strips (Hook and Loop)
Velcro strips allow for removable and reusable mounting. One part is attached to the wall and the other to the back of the frame, making them ideal for frames that need occasional repositioning.
Advantages: Reusable and removable without wall damage
Best for: Light to medium-weight frames
Wall Panel Installation
5. Using Desktop or Floor Stands
For larger frames or spaces where you don’t want to attach anything to the wall, use special wall art stands. These stands rest on the floor or a table without causing any damage to the wall.
6. Leaning the Frame Against the Wall
A modern and simple method is to lean the frame on a shelf, console, or the floor. This approach requires no drilling and creates a stylish, artistic look.
Wall Panel Installation
7. Using Rails or Hanging Strips
Special rails installed on the wall or ceiling allow frames to hang from hooks or wires. Only the rail is mounted, and frames can be swapped easily without making additional holes.
8. Using Sticky Putty
Sticky putty is ideal for very light frames or posters. This method is temporary and best suited for lightweight decorations.
Important Tips for Hanging Frames Without Drilling
Wall Panel Installation
Use strong adhesive or hooks for heavy frames only.
Check the weight of the frame before choosing a method.
Ensure the wall surface is clean, dry, and smooth.
For plaster, painted, or wallpapered walls, use removable methods.
Conclusion
Installing wall panels on walls is one of the most effective methods for improving interior decoration. By selecting the appropriate type of wall panel, preparing the wall properly, and following correct installation techniques, it is possible to create a beautiful, modern, and long-lasting interior space.
📞 Need Help?
Let us take care of the hard work while you sit back and relax.
📍 Serving: Austin, Round Rock, Cedar Park & more
📱 Call or Text: (737) 420-6992
🌐 Visit: https://lavahandyman.com
