Best Method to Install Six-Piece Wall Art Without Damaging the Wall
Introduction
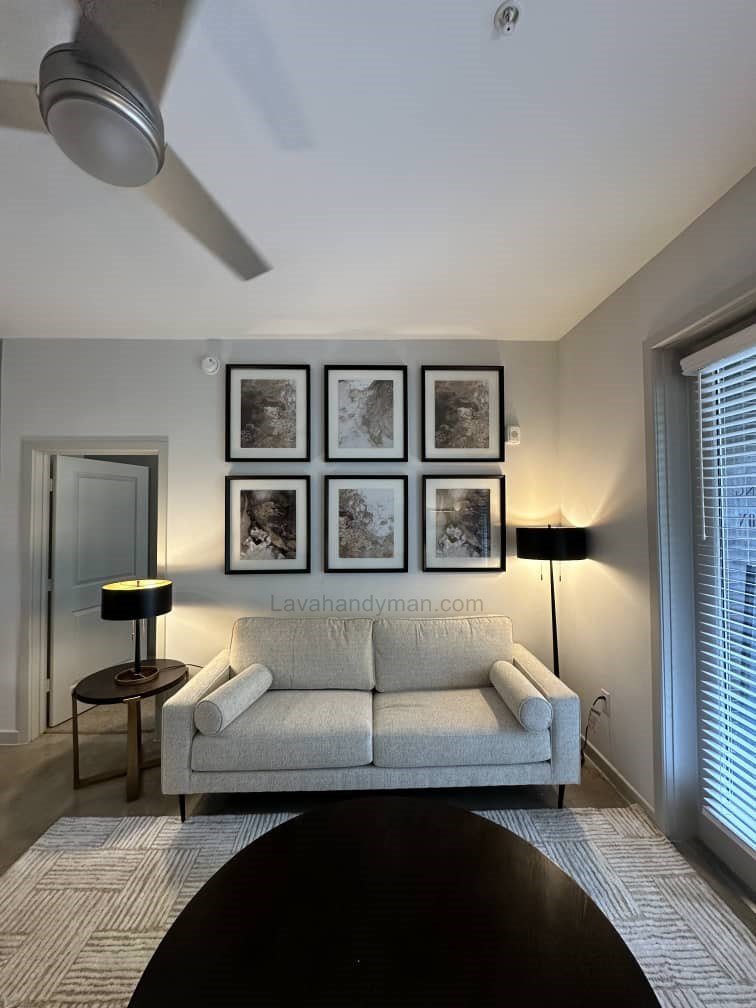
Installing six-piece wall art sets has become one of the most popular interior design trends in recent years. This type of wall décor creates depth, balance, and visual appeal, transforming any living or working space. If you want to know how to install six-piece wall art, the correct spacing and height, or the best placement for multi-panel paintings, this guide provides a complete, step-by-step explanation.
Why Six-Piece Wall Art Is a Great Choice
1. Strong Visual Impact
Install Six-Piece Wall Art
Six-piece painting sets create a cohesive and dynamic composition. The eye naturally moves between panels, which increases energy and visual flow within the room.
2. Perfect for Large Walls
If you have a large blank wall and don’t know how to fill the space, a six-panel painting set is ideal. It provides balance without the need for an oversized single artwork.
3. Works with Every Interior Style
Six-piece wall art is compatible with a wide range of décor styles:
- Minimalist
- Modern
- Classic
- Boho
- Industrial
Install Six-Piece Wall Art
How to Choose the Best Wall for a Six-Piece Painting Set
1. Behind a Sofa or TV
Design principles recommend placing multi-panel art above furniture pieces such as sofas or TV units, because they naturally draw attention.
2. Above the Bed
The wall behind the bed is one of the most attractive places to install six-piece wall art, helping to visually anchor the room.
3. Hallways and Transitional Spaces
Long hallways benefit greatly from multi-panel art, preventing the area from looking empty or monotonous.
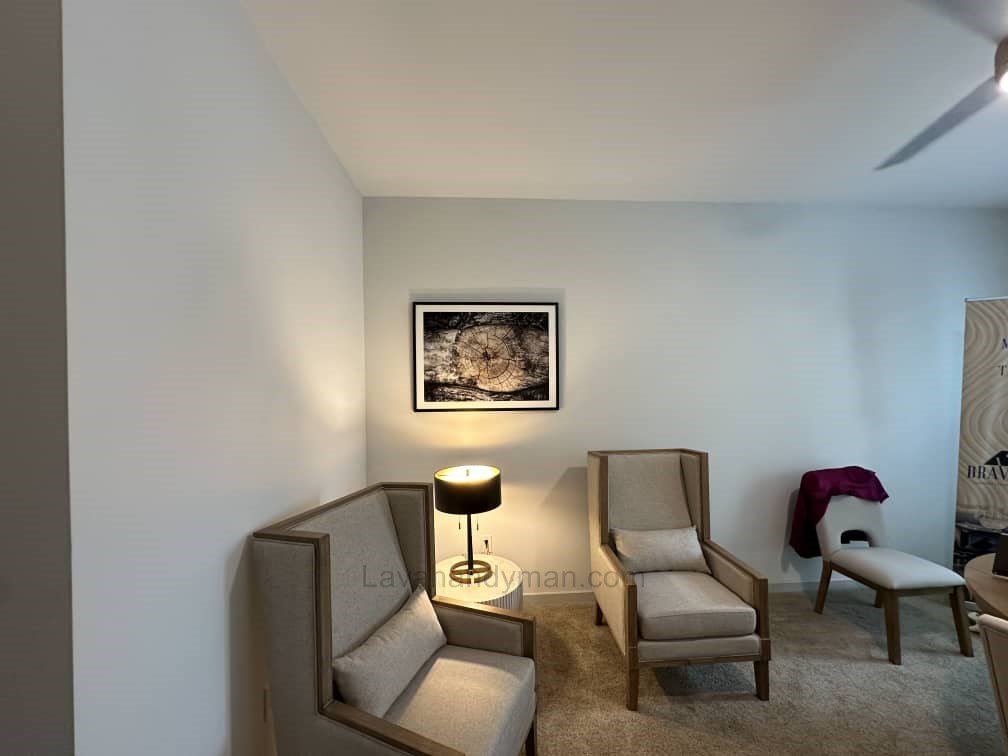
4. Consider the Lighting
Avoid strong direct sunlight, which may fade colors. Use artificial lighting such as wall-mounted spotlights, rail lights, or warm ambient lights to enhance the artwork.
Install Six-Piece Wall Art
How to Choose the Right Dimensions for Six-Piece Wall Art
1. Width Ratio to the Wall
As a general rule, the total width of the art should be 60% to 75% of the wall or the furniture beneath it.
Example:
If your sofa is 240 cm wide, the artwork should span 145–180 cm across.
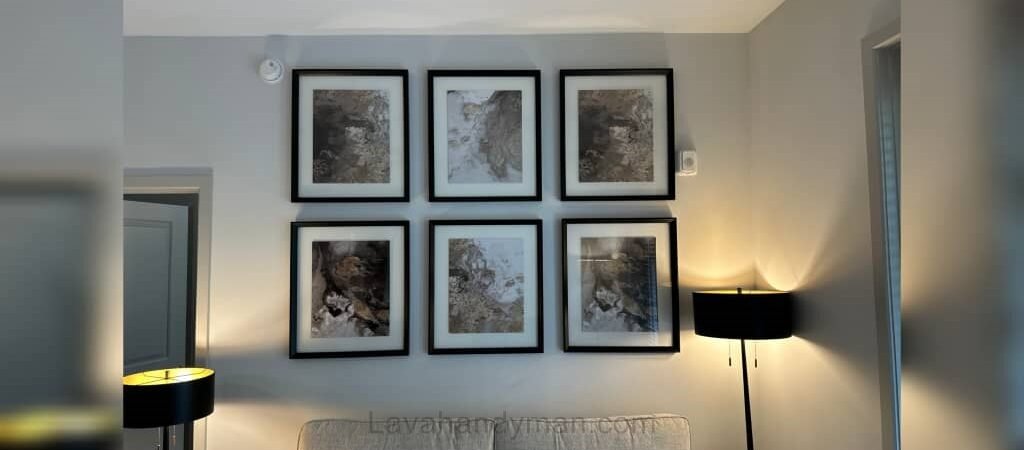
2. Standard Spacing Between Panels
The ideal spacing between the six panels is:
Install Six-Piece Wall Art
2 to 5 cm
3. Correct Height for Hanging Art
The center of the artwork should be at 160–170 cm above the floor.
This aligns with the natural eye level and provides optimal viewing comfort.
Tools You Need for Installing Multi-Panel Wall Art
- Measuring tape
- Pencil
- Laser level or manual level
- Hammer
- Drill (for hard walls)
- Screws and wall plugs
- Heavy-duty double-sided tape (for lighter frames)
- Masking tape
- Paper templates (shablon)
Ensuring the artwork is level is one of the most important steps.
Install Six-Piece Wall Art
Step-by-Step Guide to Installing a Six-Piece Painting Set
1. Lay Out the Artwork on the Floor
Before drilling any holes:
- Arrange all six panels on the floor
- Adjust spacing
- Decide which panel will be the central point
2. Mark the Center of the Wall
Find the center point of the wall and mark it. This helps ensure symmetrical installation.
3. Use Paper Templates (Professional Technique)
Install Six-Piece Wall Art
Cut paper templates the size of each panel and tape them to the wall:
- Adjust spacing easily
- Confirm the composition
- Mark the exact positions for nails or screws
This greatly reduces installation mistakes.
4. Install Nails or Screws
Depending on the weight:
- Light panels → Nails
- Heavy panels → Screws and wall plugs
Use special anchors for drywall or hollow walls.
5. Mount the Art and Final Adjustments
Hang each panel and use the level to ensure perfect alignment.
Check the spacing one more time.
Install Six-Piece Wall Art
Popular Layout Styles for Six-Piece Wall Art
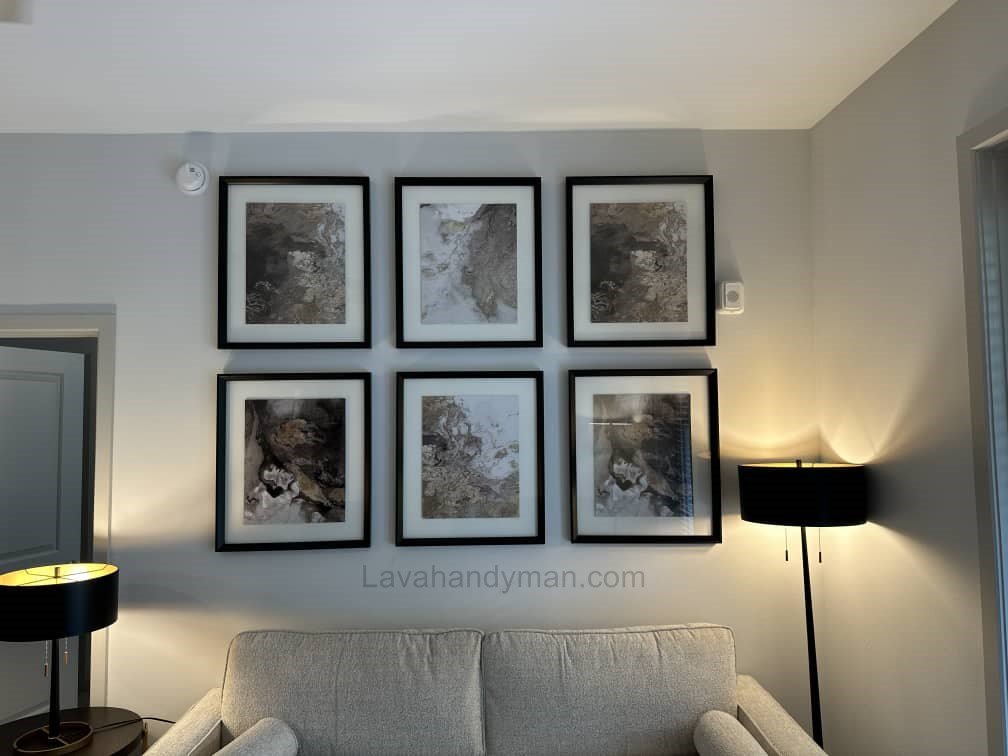
1. Classic Rectangular Layout
All panels aligned in a clean rectangular shape—ideal for formal or traditional spaces.
2. Stair-Step Layout
Panels are arranged higher and lower in a stepped pattern—great for modern homes.
3. Wide-Spacing Minimal Layout
Used for very large walls and minimalist décor styles.
4. Wave Layout
The panels rise and fall like a wave, creating movement and visual energy.
Install Six-Piece Wall Art
Important Interior Design Tips
1. Color Harmony
- Light walls → Colorful, bold artwork
- Dark walls → Light or contrasting artwork
2. Match the Artwork to the Décor Style
- Modern décor → Abstract, geometric, minimalist designs
- Classic décor → Landscape, portrait, and traditional art
- Boho décor → Warm colors, handmade-style art
3. Use the Right Lighting
Proper lighting increases visibility and enhances the artistic impact.
Install Six-Piece Wall Art
Common Mistakes When Installing Six-Piece Wall Art
- Hanging the artwork too high
- Not using a level
- Incorrect spacing between panels
- Choosing art too small for a large wall
- Exposure to direct sunlight
- Drilling without marking carefully
Cleaning and Maintaining Wall Art
- Use a dry, soft, lint-free cloth
- Avoid cleaning sprays or strong chemicals
- Keep the artwork away from moisture
- Do not expose it to direct sunlight
Step-by-Step Guide to Hanging Wall Art
Install Six-Piece Wall Art
1. Essential Tools for Hanging Wall Art
To ensure accurate and mistake-free installation, make sure you have the following tools:
- Measuring tape
- Pencil and eraser
- Hand level or laser level
- Drill + proper drill bit
- Screws and wall plugs (anchors)
- Hammer
- Strong double-sided tape (for lightweight art)
- Painter’s tape
- Paper templates for layout
- Safety gloves and protective glasses
These tools help you install wall art cleanly and securely.
Install Six-Piece Wall Art
2. Choosing the Best Spot for Hanging Wall Art
Before drilling, you must select the ideal spot on the wall.
Key guidelines:
- The center of the artwork should be 160–170 cm (63–67 inches) above the floor—this is standard eye-level height.
- When hanging art above a sofa, the artwork width should be 60%–75% of the sofa’s width.
- Keep 15–20 cm (6–8 inches) of vertical space between the art and the furniture.
Following these standards ensures maximum visual impact.
Install Six-Piece Wall Art
3. Initial Layout on the Floor (Important for Six-Piece Art)
For multi-panel art like 6-piece wall sets:
- Place all pieces on the floor.
- Set the spacing between panels to 2–5 cm (the standard range).
- Create a paper template for each piece.
This lets you preview the final layout before committing to any holes in the wall.
4. Applying Templates to the Wall and Marking Precise Points
For accurate wall art installation, attach your paper templates to the wall using painter’s tape.
- Use a level to make sure lines and edges are straight.
- Measure the position of each artwork’s hanging hook and mark it on the template.
- Align the center of the artwork with the center of the wall or furniture.
This step prevents drilling mistakes and ensures perfect alignment.
Install Six-Piece Wall Art
5. Choosing the Right Screws, Anchors & Hooks Based on Wall Type
Drywall / Plasterboard
- Lightweight art: drywall hooks
- Heavy art: toggle bolts or Molly bolts
Concrete or Brick
- Drill using a masonry bit
- Install wall plugs and screws designed for concrete
Wooden Walls
- Use screws directly without anchors
Using the correct hardware guarantees long-term stability.
Install Six-Piece Wall Art
6. Drilling and Installing the Hooks
Once your points are marked:
- Drill holes according to the wall type.
- Insert the wall plugs (anchors).
- Install your screws or hooks.
- Double-check alignment using the level.
7. Hanging the Art and Final Adjustments
Now it’s time to mount the artwork:
- Start with the central or lower panels.
- Add the side panels one by one.
- Re-check alignment with the level.
- Make sure the spacing between all panels is consistent.
For multi-panel sets, this step is crucial for a clean, professional look.
8. Safety Tips and Stabilizing the Artwork
To prevent slipping or accidental falls:
- Apply anti-slip pads or stabilizing adhesive behind the frames.
- Use security hangers if you have kids or pets.
This ensures your artwork stays firmly in place.
9. How to Hang Wall Art Without Drilling
If you prefer not to drill:
- Use heavy-duty double-sided wall art tape (for lightweight pieces only).
- Install a picture rail system.
- Consider gallery wire hanging systems for a professional, adjustable setup.
10. Common Mistakes When Hanging Wall Art (and How to Fix Them)
Direct sunlight exposure: Move the art to prevent fading.
Crooked artwork: Re-adjust using a level.
Wrong drilling points: Always use paper templates before drilling.
Loose or unstable art: Recheck if you used the correct anchor.
Guide to Choosing the Best Bracket for Six-Piece Wall Art
1. French Cleat
- One of the strongest and most reliable methods for large or heavy artwork.
- Consists of two parts: one mounted on the wall, the other on the back of the frame. When combined, the weight is evenly distributed.
- Material: Wood or metal
- Advantages: Excellent for heavy or multi-panel art, very stable, minimal wobble
- Disadvantages: Requires precise installation and slightly more effort
2. Hook & Wire System
- Uses two D-rings or loops on the back of the frame with a strong wire stretched between them.
- Suitable for medium to heavy artwork, transferring weight to the frame rather than the top edge.
- Advantages: Easy installation, adjustable height by repositioning the wire
- Disadvantages: For very heavy six-piece sets, a thicker wire may be needed
3. Sawtooth Hanger
- Ideal for lightweight panels
- A small metal strip with teeth, mounted on the back of the frame, hangs on a nail or screw
- Limitations: Low weight capacity; not recommended for heavy or multi-panel sets
4. Security Hanger
- Best for homes with children, pets, or valuable artwork
- Designed to prevent accidental dislodging
- Advantages: High safety, keeps art securely in place even with bumps
- Disadvantages: Slightly more expensive than regular hooks
5. Rail & Cleat System
- A rail is mounted on the wall, and panels are hung using hooks or wires attached to it
- Highly flexible, allows repositioning without additional drilling
- Suitable for large panels and multi-piece sets
- Advantages: Adjustable positioning, supports heavy weight
- Disadvantages: Higher cost and initial rail installation required
Key Tips for Choosing the Right Bracket for Six-Piece Wall Art
Multi-panel alignment: Each panel must be securely mounted for a uniform display.
Total weight: Use cleats or heavy-duty hooks for heavy pieces.
Wall type: Ensure proper anchors for drywall, brick, or concrete.
Safety: For homes with children or pets, use security hangers or cleats.
Appearance: Hidden brackets like French cleats provide a clean, professional look.
Conclusion
Knowing how to install six-piece wall art correctly helps you transform your living room, bedroom, or workspace into a stylish and visually appealing environment. The most important factors include proper spacing, wall selection, lighting, and accurate alignment.
📞 Need Help?
Let us take care of the hard work while you sit back and relax.
📍 Serving: Austin, Round Rock, Cedar Park & more
📱 Call or Text: (737) 420-6992
🌐 Visit: https://lavahandyman.com