Simple and Fast Dresser Assembly Guide (Perfect for Beginners)
Introduction: Why You Should Learn to Assemble Furniture Yourself
In today’s world of flat-packed furniture and online shopping, knowing how to assemble a bedside table or dresser is a useful and money-saving skill.
Most modern furniture pieces, especially MDF or wooden ones, come in boxes with various screws, panels, and fittings.
Learning DIY furniture assembly not only saves you the cost of hiring a professional installer but also gives you the satisfaction of creating something functional and stylish on your own.
Bedside tables and dressers are essential pieces in every bedroom — the bedside table provides space for lamps, books, and personal items, while the dresser offers organized storage for clothes and accessories.
In this complete guide, you’ll learn:
- How to assemble a bedside table step by step
- How to properly install drawers and rails
- Useful tips for maintaining and caring for your furniture
Simple and Fast Dresser Assembly Guide
Tools and Materials Needed for Assembly
Before starting, make sure you have all necessary tools and components ready.
Having the right tools makes the process faster and cleaner.
Essential Tools:
- Phillips and flat-head screwdriver (electric is better)
- Rubber mallet or small hammer
- Measuring tape and metal ruler
- Drill with small bits (for pilot holes)
- Carpenter’s glue (optional, for stronger joints)
- Level or digital spirit level
- Soft cloth for cleaning surfaces
Furniture Components:
- MDF or wooden panels (top, bottom, sides, back)
- Screws and fittings (cam locks or dowels)
- Drawer rails or sliders
- Legs or base frame
- Handles and knobs
- Assembly instruction manual
Simple and Fast Dresser Assembly Guide
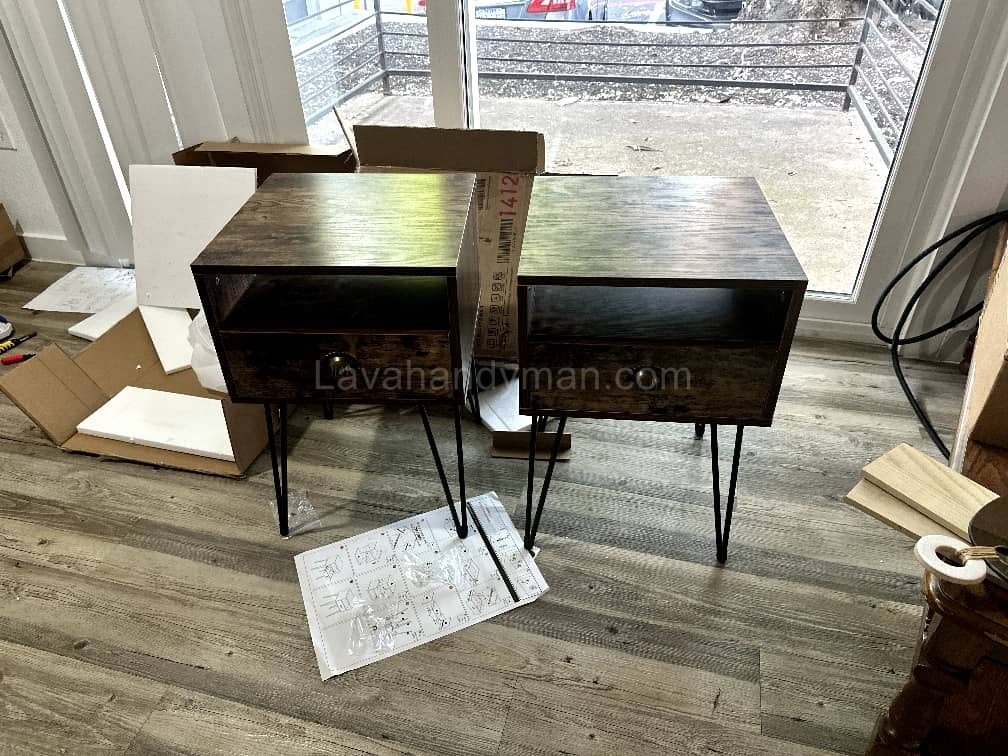
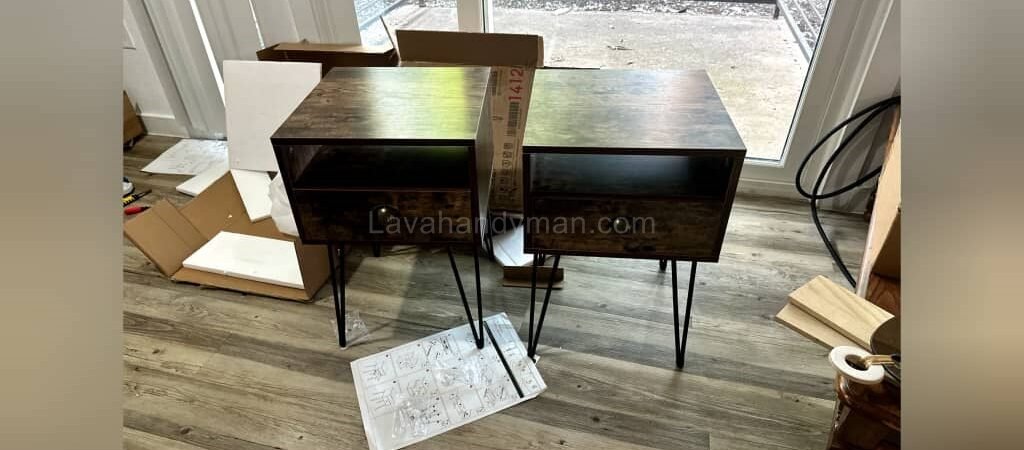
Step-by-Step Guide to Assembling a Bedside Table
Simple and Fast Dresser Assembly Guide
1. Check and Identify All Parts
Lay out all panels on a flat surface (preferably on a rug or carpet to avoid scratches).
Use the instruction manual to identify each piece and ensure nothing is missing or damaged.
2. Assemble the Main Frame
Start by connecting the two side panels to the bottom panel using MDF screws or cam locks.
Use a level to check alignment after tightening each connection.
3. Install the Top Panel
Simple and Fast Dresser Assembly Guide
Place the top panel onto the structure and fix it with screws.
Make sure all surfaces are flush and even.
4. Build and Attach the Drawer (if included)
If your bedside table has a drawer:
- Connect the front, back, and side panels of the drawer.
- Slide the drawer base into the bottom groove.
- Mount drawer rails inside the bedside frame and on the drawer sides.
- Insert the drawer and check for smooth movement.
5. Attach Legs or Bottom Base
If your model has legs, screw them into the pre-drilled holes under the bottom panel.
Check the balance with a level.
6. Final Check and Cleaning
Tighten all screws once more and wipe the surfaces with a soft cloth.
Your bedside table is now assembled and ready to use.
Simple and Fast Dresser Assembly Guide
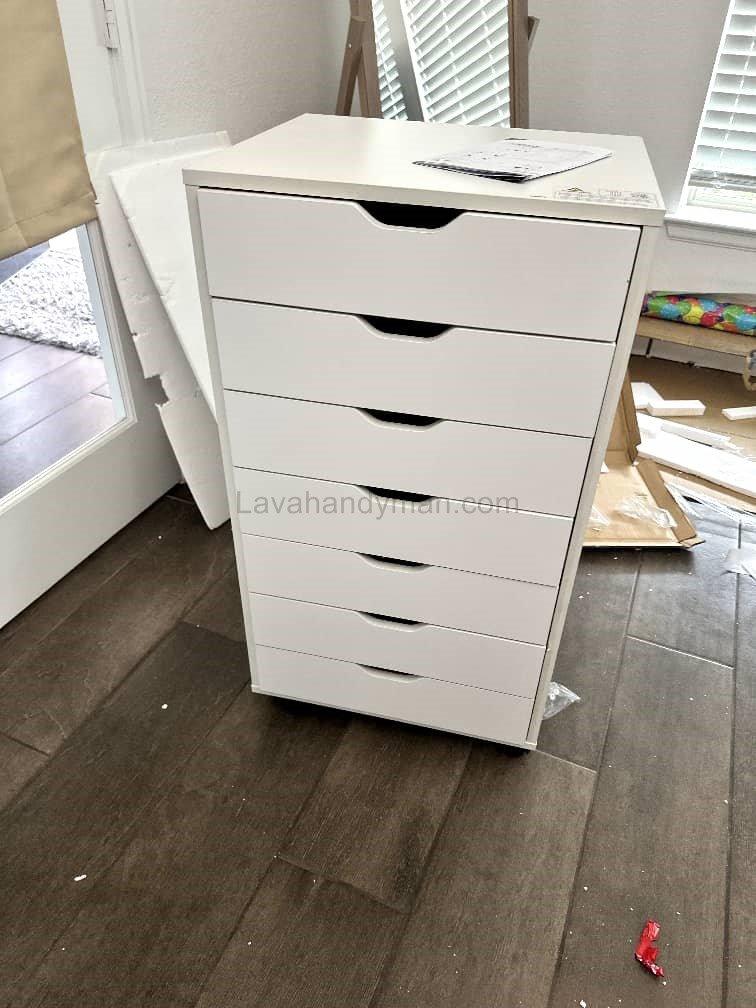
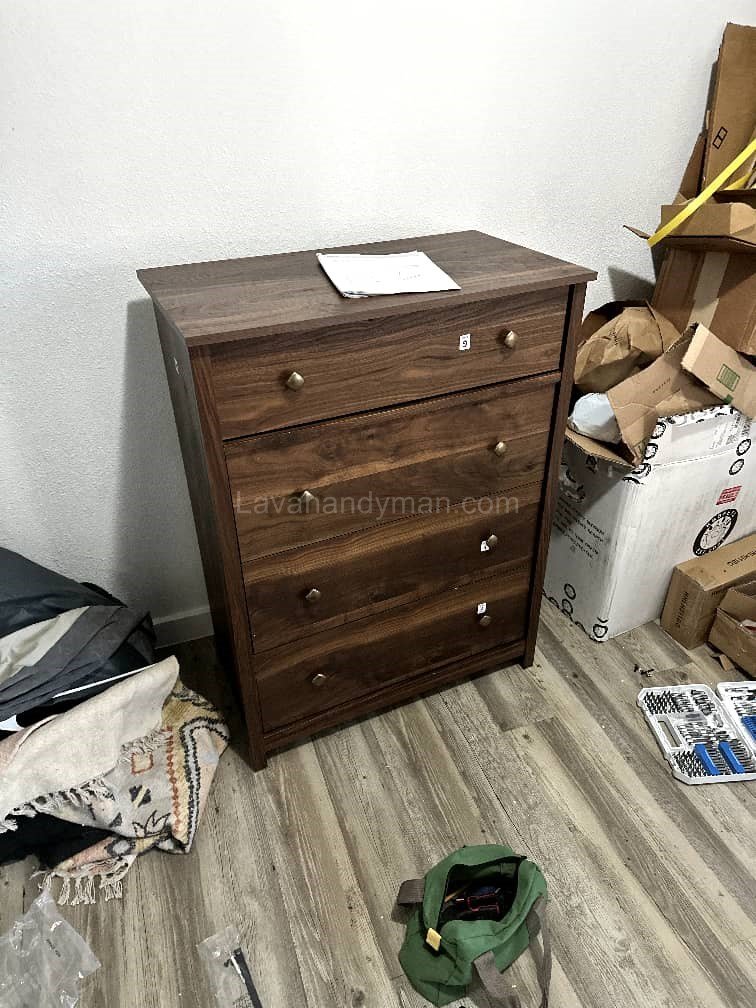
How to Assemble a Dresser (Multi-Drawer Cabinet)
Dressers are slightly more complex than bedside tables, mainly due to multiple drawers and rail alignments. Follow these steps carefully for a clean, sturdy build.
1. Organize and Identify Parts
Lay out all dresser panels: sides, top, bottom, back, and drawer pieces.
Sort them according to their numbers or stickers as indicated in the manual.
2. Assemble the Dresser Body
Join the side panels with the bottom panel first, then attach the top panel.
Use wood glue and MDF screws for better strength.
Finally, fix the back panel (fiberboard or HDF) with nails or a staple gun to stabilize the structure.
3. Install Drawer Rails
This is a critical step for smooth drawer function:
Simple and Fast Dresser Assembly Guide
- Measure and mark where each rail should go.
- Attach the fixed rail to the inside of the dresser body.
- Attach the moving rail to both sides of each drawer.
- Make sure all rails are perfectly level and aligned.
4. Assemble the Drawers
Each drawer usually consists of five parts: front, back, two sides, and the bottom panel.
After assembling, slide each drawer into its rails to test movement.
5. Add Handles and Test Everything
Screw the handles or knobs onto the drawer fronts.
Insert all drawers and ensure they open and close easily.
🎯 Pro Tip: Don’t overtighten screws — MDF can crack easily under excess pressure.
Simple and Fast Dresser Assembly Guide
Common Mistakes During Furniture Assembly
Even experienced people make small mistakes while assembling furniture.
Here’s a list of common issues and how to avoid them:
| Mistake | Result | Solution |
|---|---|---|
| Installing rails unevenly | Drawers jam or tilt | Always use a level to align rails |
| Over-tightening screws | Cracked MDF panels | Tighten gently, not forcefully |
| Working on uneven surfaces | Wobbly structure | Always assemble on a flat area |
| Ignoring the manual | Wrong assembly order | Read the manual before starting |
| Missing small fittings | Loose joints later | Count and check all screws beforehand |
Simple and Fast Dresser Assembly Guide
Maintenance and Cleaning Tips for MDF Furniture
Proper care extends the life of your furniture and keeps it looking new.
- Avoid direct contact with water or strong cleaning chemicals.
- Tighten all screws every few months.
- Wipe with a slightly damp cloth, then dry with a soft towel.
- Use furniture polish or wood wax for extra shine.
- Don’t overload drawers — it strains the rails.
🪚 Step-by-Step Guide: How to Assemble an MDF Desk and Dresser:
Have you ever bought a flat-pack desk or dresser and felt lost staring at a pile of boards, screws, and a confusing manual?
In this detailed guide, we’ll walk you through every step of assembling a desk and dresser — using simple, practical instructions that anyone can follow at home without professional help.
Simple and Fast Dresser Assembly Guide
🔧 Tools and Materials You’ll Need
Before you begin, make sure you have all the tools ready. Missing even one small item can delay the process or damage the MDF panels.
Required tools:
- Phillips and flathead screwdrivers (electric screwdriver recommended)
- Allen key or small wrench
- Drill with a small bit (for pilot holes)
- Rubber or plastic mallet
- Tape measure, pencil, and bubble level
- Wood glue (optional for extra strength)
- Work gloves and safety glasses
💡 Pro Tip: Always read the instruction manual once before starting to identify all the pieces and hardware correctly.
Simple and Fast Dresser Assembly Guide
🪑 How to Assemble an MDF Desk (Work Desk or Study Table)
Step 1 — Identify and Organize Desk Parts
Lay out all components — tabletop, legs, frame pieces, and screws — and match them with the manual.
Keep similar pieces together to avoid confusion during assembly.
Step 2 — Build the Frame and Legs
- Assemble the lower frame according to the guide.
- Use brackets or fittings to attach the legs — tighten screws halfway first for easier adjustment.
- Install the crossbar or stabilizer to strengthen the base.
Simple and Fast Dresser Assembly Guide
Step 3 — Attach the Tabletop
- Turn the desk upside down on a soft surface (like carpet or cardboard).
- Position the top panel on the frame and align the holes.
- Insert and tighten screws gradually and evenly to avoid warping.
Step 4 — Add Drawers or Side Components
If your desk includes drawers or side boxes, assemble them following the dresser drawer assembly steps below.
Then attach handles, decorative trims, or cable holders.
Step 5 — Check the Level and Stability
- Flip the desk upright and check with a level tool.
- Adjust the leg screws (if adjustable) to make the desk perfectly balanced.
Simple and Fast Dresser Assembly Guide
🗄️ How to Assemble a Dresser (Chest of Drawers)
Step 1 — Organize All Parts
Separate side panels, top, bottom, backboard, and drawer pieces.
Identify the drawer slides (ball-bearing or two-piece type) and set them aside.
Step 2 — Build the Dresser Frame
- Connect the two side panels with the bottom panel.
- Attach the top panel and tighten all screws gradually.
- Nail or staple the backboard in place — this keeps the dresser square and sturdy.
Step 3 — Install the Drawer Slides
- Mark the exact height for each pair of slides with a pencil.
- Mount the fixed part of the slide on the dresser sides and the movable part on the drawers.
- Use a level to ensure both slides are perfectly aligned.
- Slide drawers in and test smooth movement before final tightening.
Simple and Fast Dresser Assembly Guide
Step 4 — Assemble the Drawers
- Connect the drawer’s front, back, and side panels together.
- Insert the drawer bottom into the slot or screw it in place.
- Attach the movable slides to the drawer sides.
- Slide each drawer into the dresser and test its movement.
Step 5 — Install Handles and Make Final Adjustments
- Attach drawer handles using the provided screws.
- Adjust spacing between drawers for even alignment.
- If your dresser is tall, use anti-tip wall brackets for safety.
⚙️ Key Tips for Successful Furniture Assembly
- Always tighten screws halfway first, then fully after alignment.
- Pre-drill pilot holes before screwing directly into MDF to prevent cracking.
- Apply a small amount of wood glue to hidden joints for extra stability.
- Use a level tool to ensure slides and panels are even.
- Work on a soft surface to avoid scratching the furniture’s finish.
Simple and Fast Dresser Assembly Guide
⚠️ Important Safety Guidelines
- Always anchor tall dressers to the wall to prevent tipping.
- Avoid lifting heavy parts alone — ask for help.
- Wear gloves and safety glasses when drilling or hammering.
- Do not overtighten screws — MDF is prone to cracking under pressure.
- Keep screws and small hardware away from children and pets.
🧰 Common Problems and Easy Fixes
| Problem | Likely Cause | Solution |
|---|---|---|
| Drawer doesn’t slide smoothly | Misaligned rails | Recheck alignment and retighten screws |
| Desk wobbles | Uneven legs or floor | Adjust leg height or add a furniture pad |
| Drawer feels loose | Screws or bottom panel are loose | Tighten screws and check drawer base |
| Scratches on surface | Contact with rough surfaces | Use MDF repair wax or touch-up marker |
Simple and Fast Dresser Assembly Guide
🛠️ Types of Brackets for Assembling MDF Desks and Dressers
1. L-Brackets
- Shape: Resembles the letter L
- Use: Connecting legs and reinforcing corners of desks and dressers
- Advantages: Simple installation, strong, and cost-effective
- Note: Suitable for light to medium furniture; for heavy loads, use thick steel brackets.
2. Corner Brackets
- Feature: Multiple screw holes for added strength
- Use: Reinforcing corners of desks, drawers, and cabinets
- Advantages: Better load distribution and prevents MDF from warping
Simple and Fast Dresser Assembly Guide
3. T-Brackets
- Shape: Resembles the letter T
- Use: Connecting horizontal panels to vertical panels, such as shelves or drawer supports
- Advantages: High stability, ideal for drawers and heavy shelves
Simple and Fast Dresser Assembly Guide
4. Adjustable Angle Brackets
- Feature: Angle can be adjusted
- Use: When precise panel angles are needed (e.g., corner desks or angled drawers)
- Advantages: Flexible installation without cutting or reshaping panels
Simple and Fast Dresser Assembly Guide
5. Drawer Slide Brackets
- Use: Installing drawer slides on both the drawer and the furniture frame
- Feature: Allows smooth sliding movement
- Advantages: Prevents drawer jamming and extends the lifespan of slides
6. Flat Plate Brackets (MDF Plate Connectors)
- Use: Connecting two panels without creating a specific angle, such as shelves or drawer backs
- Advantages: Clean, hidden appearance, perfect for MDF furniture
- Note: Usually used with short screws or MDF fittings
Simple and Fast Dresser Assembly Guide
7. Wall Anchor Brackets
Note: Essential for tall or heavy dressers
Use: Preventing tall dressers or shelves from tipping over
Feature: Anchors the furniture to the wall for extra stability
Advantages: Enhanced safety, especially in homes with children
Simple and Fast Dresser Assembly Guide
Conclusion
Assembling MDF furniture like a bedside table or dresser may seem challenging at first, but with patience and the right tools, anyone can do it.
By following these simple steps, you’ll save money, learn a valuable skill, and enjoy a solid piece of furniture built by your own hands.
If you’re looking to buy quality flat-pack furniture, visit [Your Brand Name]’s online store and explore our wide range of modern bedside tables and dressers — designed for easy assembly and long-lasting beauty.
📞 Need Help?
Let us take care of the hard work while you sit back and relax.
📍 Serving: Austin, Round Rock, Cedar Park & more
📱 Call or Text: (737) 420-6992
🌐 Visit: https://lavahandyman.com