
How to Hang Paintings on the Wall | Professional Wall Art Installation Guide
Introduction
Hanging paintings may seem like a simple task, but doing it professionally can dramatically enhance the look and feel of a space. Proper wall art installation ensures balance, safety, and artistic appeal.
In this guide, you will learn all essential tips for hanging paintings at home or in commercial spaces, including selecting the right wall, choosing the painting, necessary tools, installation methods, and maintenance after hanging.
How to Hang Paintings on the Wall
Section 1 — Pre-Installation Preparation
Understanding the Space and Purpose
- Installation area: Living room, bedroom, office, or gallery
- Room activity: High-traffic areas require stronger installation
- Interior style: Painting should match the room’s colors and furniture
Choosing the Height and Location
- Center height: Usually 150–165 cm (59–65 in) from the floor
- Alignment with furniture: Bottom of the painting should be 15–25 cm (6–10 in) above sofas or consoles
- Proportional size: Painting width should cover 40–60% of the wall or furniture in front
Wall Type and Limitations
- Drywall or plasterboard: Requires special anchors
- Brick or concrete: Use masonry drill bits and heavy-duty plugs
- Fragile or glass walls: Use strong adhesives or rail systems without drilling
How to Hang Paintings on the Wall
Section 2 — Tools and Equipment for Hanging Paintings
Basic Tools
- Measuring tape and spirit or laser level
- Pencil or chalk for marking
- Hammer and nails for light paintings
- Screwdriver or electric drill
- Appropriate wall plugs and screws
- Metal hooks, D-rings, or sawtooth hangers
Professional Tools
- Picture hanging rail systems (for galleries or adjustable setups)
- Safety cables for heavy paintings
- Industrial double-sided tape for delicate walls
- Gloves and safety glasses
- Assistant or lifting aid for large frames
How to Hang Paintings on the Wall
Section 3 — Painting Hanging Methods
Method 1: Nails or Simple Hooks
Advantages: Quick, low-cost, suitable for light paintings
Steps: Mark, level, insert nail, hang painting
Method 2: Screws and Wall Plugs
How to Hang Paintings on the Wall
Advantages: Strong, suitable for heavy paintings
Steps: Drill hole, insert plug, tighten screw, hang painting, level
Method 3: Adhesives or Double-Sided Industrial Tape
Advantages: No drilling, fast, suitable for lightweight paintings
Steps: Clean wall and frame, apply tape/adhesive, press and secure
Method 4: Professional Rail System
Advantages: Adjustable, ideal for galleries or frequent rearrangements
Steps: Install rail, attach hanging wire, adjust height, level
Section 4 — Step-by-Step Practical Installation Example
Example: Hanging an 80×60 cm (31×24 in) painting above a sofa
- Measure the sofa width (painting should cover 60–70% of sofa width)
- Determine center height (e.g., 155 cm / 61 in from floor, 20 cm above sofa back)
- Mark screw positions based on D-ring placement
- Check wall type and select proper anchors
- Drill and insert wall plugs
- Screw hooks/fixtures and hang painting
- Check level and adjust
- Install safety cable if necessary
How to Hang Paintings on the Wall
Section 5 — Safety and Maintenance Tips
- Use high-quality tools and plugs
- Get help for heavy or large paintings
- Reinforce weak walls before hanging
- Install safety cables for heavy frames
- Avoid direct sunlight to prevent color fading
- For valuable paintings, consider hiring a professional installer
Section 6 — Professional Techniques for Display
- Lighting: Adjustable spotlights or LED with appropriate color temperature (3000–4000K)
- Frame and matting: Enhances focus on the artwork
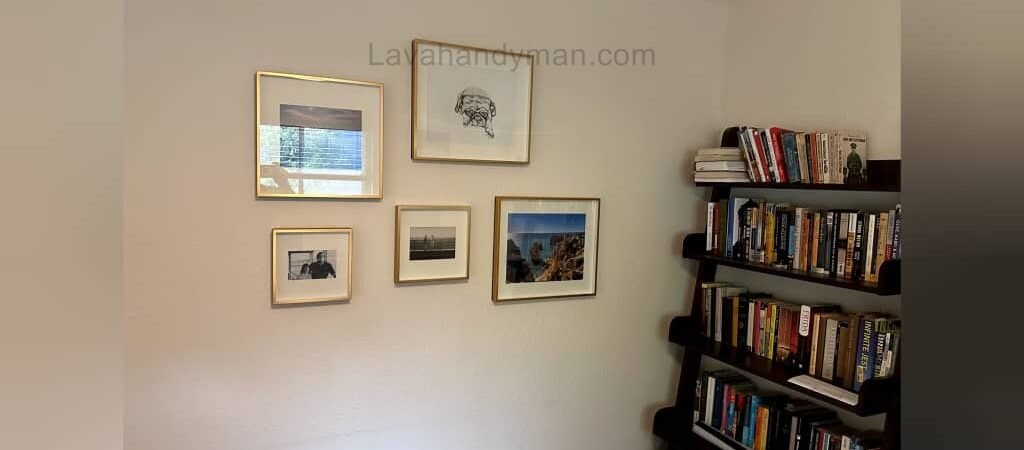
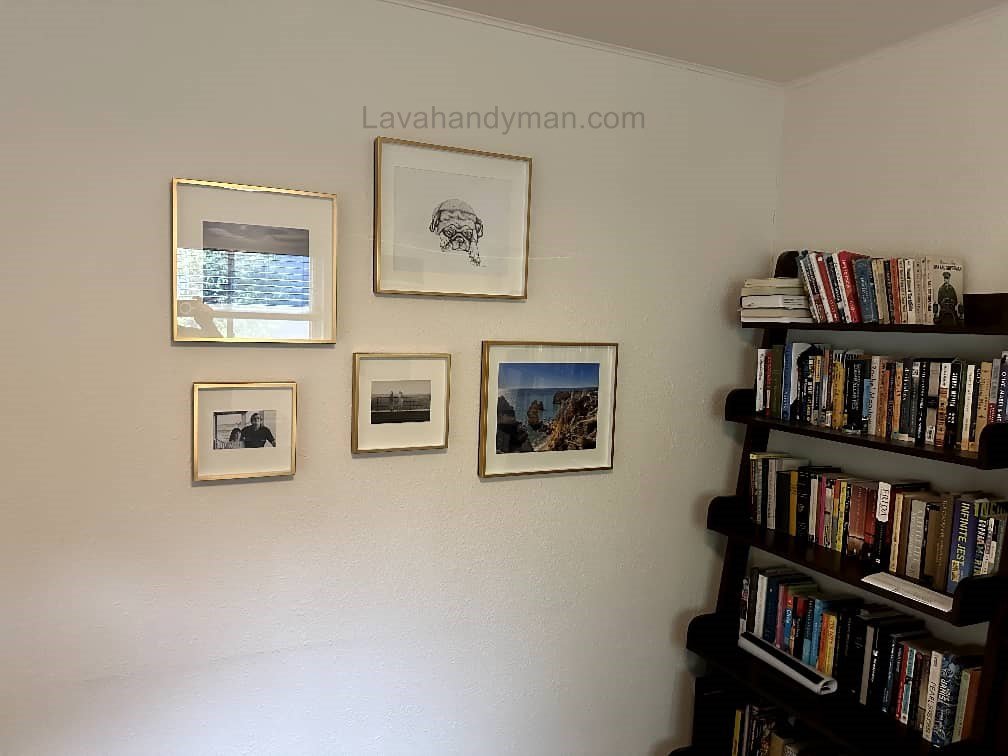
- Gallery wall arrangement: Use grids or clusters, keeping centers aligned
- Focal point creation: Keep surrounding area simple to emphasize painting
- Color coordination: Match painting colors with furniture or decor accents
Section 7 — Pre- and Post-Installation Checklist
Before Hanging:
- Select wall and height
- Gather appropriate tools
- Check painting weight
- Prepare a second person for assistance
After Hanging:
- Check level and alignment
- Ensure proper distance from furniture and walls
- Install safety cable if needed
- Take photos for portfolio or documentation
How to Hang Paintings on the Wall
Step-by-Step Guide to Hanging Paintings on the Wall | Professional Guide
Step 1: Choose the Right Location
- Check the wall: Make sure the wall is flat, clean, and free of moisture or cracks.
- Standard height: The center of the painting is usually installed 150–165 cm (59–65 in) from the floor.
- Painting-to-wall proportion: The painting should not be too small for a large wall or too large for a small wall.
- Lighting and visibility: The chosen wall should have adequate light so the painting is clearly visible.
How to Hang Paintings on the Wall
Step 2: Prepare Tools and the Painting
Essential tools for professional installation:
- Measuring tape and spirit or laser level
- Pencil or chalk for marking
- Nails, screws, wall plugs, or double-sided adhesive (depending on the painting type)
- Screwdriver, drill, and gloves
- Hooks, brackets, or hangers for heavy paintings
Check the back of the painting: Make sure D-rings or hooks are ready for hanging.
How to Hang Paintings on the Wall
Step 3: Mark the Wall
- Measure the correct height for the painting’s center.
- Use a level and plumb line to mark the exact positions for nails or screws.
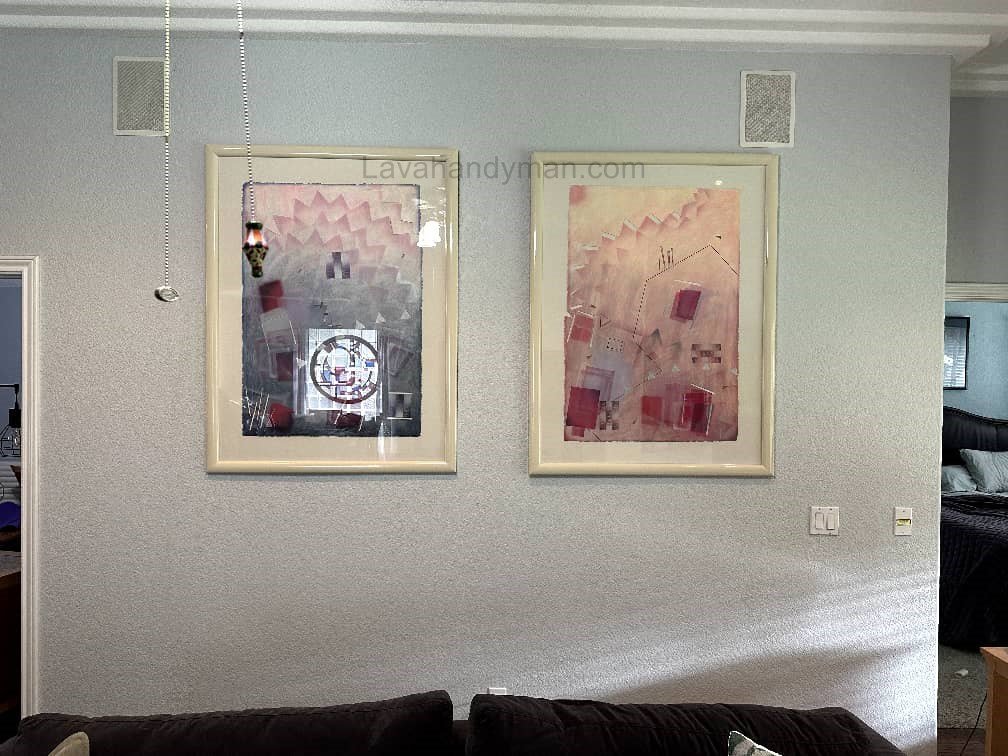
- If hanging multiple paintings, keep 5–10 cm (2–4 in) between each painting and align their centers.
Step 4: Prepare the Wall
- Drywall or concrete walls: Drill the appropriate holes and insert wall plugs.
- Fragile or glass walls: Use strong adhesive or a rail system without drilling.
- Clean the area: Remove dust or grease to ensure proper adhesion.
How to Hang Paintings on the Wall
Step 5: Install Hanging Hardware
- Light paintings: Simple nails or hooks are sufficient.
- Heavy paintings: Install screws with wall plugs or metal brackets.
- Ensure all hardware is secure and can support the painting’s weight.
Step 6: Hang the Painting
- Carefully place the painting on the nails, screws, or hooks.
- Check that the painting is level using a manual or laser level.
- Adjust screws or nails slightly if needed to ensure the painting is perfectly straight.
How to Hang Paintings on the Wall
Step 7: Final Safety Check
- Ensure the painting is firmly secured to the wall.
- For heavy paintings, use a safety cable or lock at the back to prevent falling.
- Keep the painting away from direct sunlight to prevent color fading.
How to Hang Paintings on the Wall
Step 8: Tips for Better Display
Coordinate the painting’s colors with your room decor.
Make the painting a focal point of the room.
For multiple paintings, use a guide or plumb line to keep them level.
Use LED or indirect lighting to enhance the painting’s visual appeal.
Types of Brackets for Hanging Paintings on the Wall | Professional Guide
How to Hang Paintings on the Wall
1. Simple Picture Hooks
- Features: Small, lightweight, U-shaped or hook-shaped
- Use: Suitable for light paintings and small frames
- Advantages: Quick and easy to install, inexpensive, requires minimal tools
- Disadvantages: Limited weight capacity, not suitable for heavy paintings
Example: Light paintings up to 3–5 kg (6–11 lbs)
2. D-Ring Hangers
- Features: D-shaped metal ring screwed to the back of the frame
- Use: Medium to heavy paintings, especially large frames
- Advantages: Better weight distribution, allows use of wire or cable for hanging
- Disadvantages: Requires precise installation on both the frame and the wall
Example: Paintings 5–15 kg (11–33 lbs) or gallery frames
How to Hang Paintings on the Wall
3. Sawtooth Hangers
- Features: Serrated metal strip attached to the back of the frame
- Use: Light to medium paintings
- Advantages: Easy and quick to install, easy to level
- Disadvantages: Limited weight capacity, not suitable for heavy paintings
Example: Small wall paintings or lightweight photo frames
4. Heavy-Duty Brackets
- Features: Large metal brackets designed for heavy paintings or large frames
- Use: Paintings heavier than 15 kg (33 lbs)
- Advantages: High weight capacity, very secure
- Disadvantages: Requires tools and skill for installation, creates holes in the wall
Example: Large gallery paintings or heavy artwork
How to Hang Paintings on the Wall
5. Rail or Picture Hanging System Brackets
- Features: Connected to a rail or hanging wire, allows easy adjustment
- Use: Galleries, offices, or multiple paintings on a single wall
- Advantages: No repeated drilling, adjustable height, suitable for heavy or multiple paintings
- Disadvantages: Higher cost, requires initial rail installation
Example: Professional gallery setups or multiple painting arrangements
Which Bracket Should You Use for Hanging Paintings?
- Light paintings (up to 5 kg / 11 lbs): Simple nails or Sawtooth Hangers
- Medium paintings (5–15 kg / 11–33 lbs): D-Ring Hangers with hanging wire
- Heavy paintings (over 15 kg / 33 lbs): Heavy-Duty Brackets or Rail System
- Multiple paintings on one wall or professional installations: Rail Brackets
💡 Pro Tip: Always choose a bracket that can safely support the weight of your painting. For large or valuable artworks, it’s recommended to hire a professional installer to ensure safety and a perfect display.
The Importance of Hanging Paintings on the Wall | Professional and Aesthetic Reasons
1. Enhance Beauty and Coordinate with Interior Design
- Paintings play a crucial role in beautifying and harmonizing the space.
- Properly hanging paintings makes the room’s focal point clear.
- Professionally installed paintings with appropriate height and spacing from furniture create better visual appeal.
Example: Hanging a painting above a sofa or dining table establishes a focal point and enhances the room’s aesthetic.
2. Increase Safety and Prevent Accidents
- Improperly installed paintings can fall and damage the artwork, wall, or people.
- Using appropriate brackets, wall plugs, or rail systems secures the painting and reduces the risk of falling.
- For heavy paintings, safety cables or sturdy screws are essential.
3. Protect the Painting and Extend Its Lifespan
- Proper installation ensures even weight distribution, preventing pressure on the frame or glass.
- Professionally hung paintings are less exposed to impacts, vibrations, or environmental damage.
- Keeping the painting away from direct sunlight and moisture preserves its color and quality.
4. Achieve Professional Layout and Organization
- Accurate hanging allows for neat and visually appealing arrangements.
- For multiple paintings (Gallery Wall), using a level or rail system ensures alignment and consistency.
- Proper layout ensures each painting is displayed optimally, giving the space a professional look.
5. Increase Artistic and Emotional Value
In homes, offices, or galleries, properly installed paintings provide a better visual experience for viewers.
Professionally hung paintings bring a sense of art and beauty to the space.
The placement of a painting can enhance mood and positive energy in a room.
Conclusion
Professional painting installation combines skill, precision, and interior design knowledge. Following proper methods, selecting the right wall, using the correct tools, and considering safety ensures paintings look stunning and remain secure.
For heavy or valuable paintings, hiring a professional painting installer is the safest option to prevent damage or accidents.
📞 Need Help?
Let us take care of the hard work while you sit back and relax.
📍 Serving: Austin, Round Rock, Cedar Park & more
📱 Call or Text: (737) 420-6992
🌐 Visit: https://lavahandyman.com
