Wooden Lounge Chair Assembly Made Easy | Step-by-Step Instructions
🔹 Introduction: Why Build Your Own Wooden Lounge Chair?
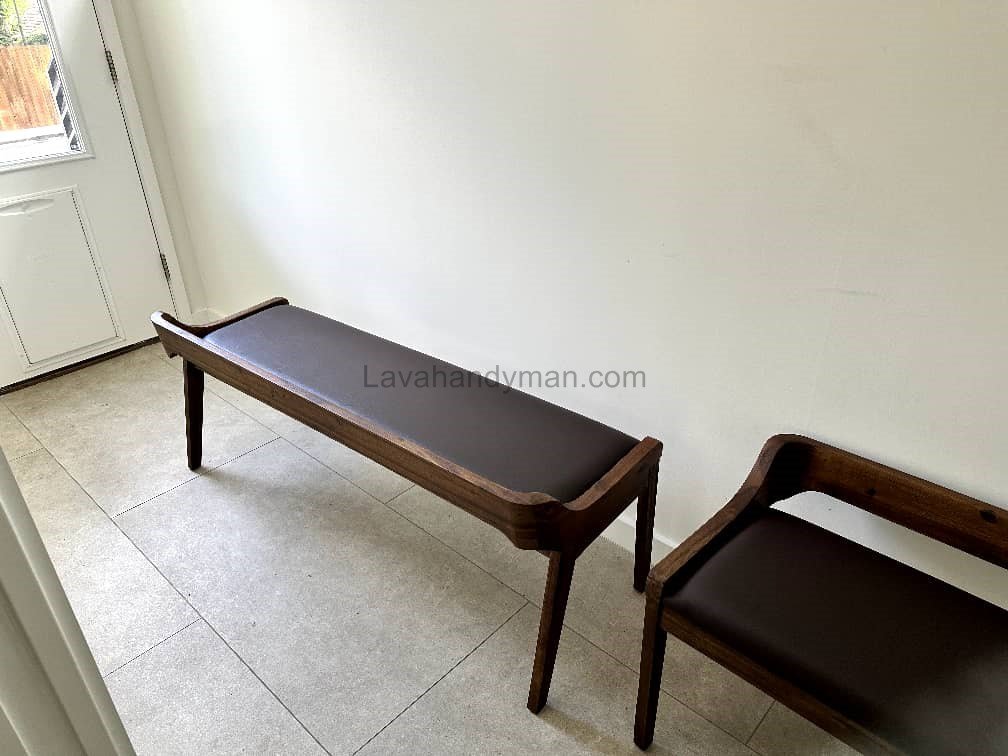
If you love natural materials and outdoor comfort, assembling your own wooden lounge chair is one of the most rewarding DIY woodworking projects you can try.
With a few tools, some patience, and the right materials, you can build a durable, elegant chair that enhances your patio, balcony, or garden space for years to come.
🔹 Understanding Outdoor Wooden Lounge Chairs
Outdoor wooden chairs are designed to withstand humidity, sunlight, and temperature changes. Unlike indoor chairs, they must be weather-resistant and stable over time.
Key Features of a Good Outdoor Wooden Chair:
- Made from weather-resistant wood like teak, oak, cedar, or eucalyptus
- Uses stainless steel or galvanized fasteners to prevent rust
- Ergonomic design for maximum comfort
- Finished with UV-resistant oil or outdoor varnish

Wooden Lounge Chair Assembly Made Easy
🔹 Tools and Materials Needed for Chair Assembly
Before starting, make sure you have all the tools and materials ready for a smooth assembly process.
🧰 Tools:
- Electric or cordless drill
- Screwdriver (flat and Phillips)
- Square and measuring tape
- Rubber mallet
- Clamps
- Sandpaper (grits 120, 240, 320)
- Brush or cloth for oil application
- Hand saw or miter saw (if cutting required)
🪵 Materials:
- Pre-cut wooden parts (seat, backrest, legs, arms, rails)
- Stainless steel screws and bolts
- Waterproof wood glue (D3 or D4 grade)
- Outdoor wood oil or varnish
- Washers to protect the wood surface
Wooden Lounge Chair Assembly Made Easy
🔹 Preparing the Wood Before Assembly
Proper wood preparation ensures your outdoor wooden lounge chair lasts for years.
Steps to Prepare:
- Check moisture content – ideally between 8% and 12%.
- Sand the wood thoroughly to remove splinters and roughness.
- Apply a light coat of oil or sealer to inner joints to protect against moisture.
🔹 Step-by-Step Assembly of the Wooden Lounge Chair
Let’s move on to the main part — assembling the chair.
Step 1: Assemble the Legs and Base
- Place the front and back legs on a flat surface.
- Align them using a square and attach them with waterproof glue and stainless screws.
- Use clamps to hold them while the glue dries.
Step 2: Install the Seat Slats
- Lay seat slats across the frame, leaving a 5 mm gap between each for drainage.
- Fix them with screws and wood glue.
- Keep the seat surface smooth and even.
Step 3: Attach the Backrest
- Position the backrest at about a 110° angle for ergonomic comfort.
- Align the vertical supports and fasten them securely.
- Screw the slats from the back to keep the front surface clean.
Step 4: Add the Armrests
- Attach the armrests to the front and back legs using screws and glue.
- Smooth and round the edges for comfort and style.
Step 5: Final Adjustments
- Check all angles and tighten every screw.
- Test balance by placing the chair on a flat floor.
Wooden Lounge Chair Assembly Made Easy
🔹 Finishing and Waterproof Coating
To make your chair weather-resistant, apply a protective finish.
Recommended Finishes:
- Teak oil: preserves natural wood texture
- Outdoor polyurethane: strong UV and rain resistance
- Semi-transparent outdoor stain: for color and protection
Apply each coat evenly, allowing 12–24 hours between layers.
🔹 Safety Tips During Chair Assembly
- Always wear safety glasses and gloves when using power tools.
- Use glue and finishes in well-ventilated areas.
- Assemble on a flat, stable surface to prevent imbalance.
Wooden Lounge Chair Assembly Made Easy
🔹 Maintenance and Care for Outdoor Wooden Chairs
To keep your chair in excellent condition:
- Reapply protective oil every 6–12 months.
- Use waterproof covers during rainy seasons.
- Avoid washing with high-pressure hoses.
- Sand and recoat if the finish starts to peel.
🔹 Common Issues and Fixes
| Issue | Cause | Solution |
|---|---|---|
| Wood warping | Excess moisture | Store in a dry, ventilated area and reapply oil |
| Loose joints | Wood expansion | Check and tighten screws seasonally |
| Discoloration | Sunlight exposure | Use UV-protective coatings |
| Creaking sounds | Friction between joints | Add wax or a light coat of oil |
Wooden Lounge Chair Assembly Made Easy
🔹 Design and Customization Ideas
- Combine wood with metal for an industrial look.
- Add waterproof cushions for extra comfort.
- Use thermowood for superior weather resistance.
- Choose natural tones like walnut, oak, or white-wash finishes.
🪑 Step-by-Step Guide to Assembling a Wooden Outdoor Lounge Chair (Complete DIY Tutorial)
🔧 Tools and Safety Equipment
Before starting the assembly, prepare the following tools:
- Electric drill and screwdrivers
- Square, measuring tape, and clamps
- Sandpaper (grit 120–320)
- Waterproof wood glue (D3 or D4 grade)
- Stainless steel screws
- Rubber mallet, drill bits for pilot holes
- Dust mask, safety glasses, and gloves
💡 Tip: Using the right tools improves both the quality of assembly and safety.
Wooden Lounge Chair Assembly Made Easy
🪵 Materials and Suitable Wood
For outdoor lounge chairs, choose wood resistant to moisture and sunlight:
- Teak, cedar, eucalyptus, or thermowood
- Stainless steel screws (304 or 316 for coastal areas)
- UV-resistant outdoor oil or varnish
⚙️ Preparation Before Assembly
- Check wood moisture: Ensure the wood is dry and ready.
- Cut and mark pieces: Use a pencil and measuring tape to mark orientation.
- Initial sanding: Smooth surfaces for better adhesion of glue and finish.
- Seal end grains: Apply oil or sealer to all cut edges to prevent water absorption.
Wooden Lounge Chair Assembly Made Easy
🧩 Step-by-Step Assembly of Wooden Lounge Chair
1. Assemble the Legs and Main Frame
- Align front and rear legs using a square.
- Attach horizontal rails (front and back) using wood glue and stainless steel screws.
- Drill pilot holes to avoid splitting the wood.
- Use clamps to hold pieces while glue sets.
🔹 Pro Tip: Mortise-and-tenon or pocket-hole joints increase strength and create a clean finish.
2. Install Seat Slats
- Position seat slats with a 3–6 mm gap for water drainage.
- Secure each slat with screws and wood glue.
- For a smooth surface, attach screws from underneath.
Wooden Lounge Chair Assembly Made Easy
3. Install Backrest
- Set the backrest angle between 100–110 degrees relative to the seat.
- Attach vertical supports and backrest slats from bottom to top.
- Use clamps to maintain angle while glue dries.
💡 For extra comfort, slightly curve the back slats.
4. Install Armrests
- Align armrests with front and back legs.
- Smooth and round edges if curved.
- Attach using glue and stainless steel screws.
5. Add Reinforcements and Check Level
- Add cross braces or corner brackets under the seat for stability.
- Place the chair on a flat surface to check balance.
- Tighten screws evenly, avoiding over-tightening.
Wooden Lounge Chair Assembly Made Easy
🎨 Finishing and Waterproofing
- Fill gaps and screw holes with outdoor wood filler.
- Final sanding (grit 240–320) for smooth finish.
- Apply oil or outdoor varnish to protect against moisture and sunlight.
- Apply multiple coats, allowing drying time between each layer.
🔸 Tip: Place chair legs on rubber pads to reduce moisture contact with the ground.
🛠️ Maintenance Tips
- Reapply protective oil or varnish every 6–12 months.
- Check screws periodically for looseness.
- Cover chair in winter or during heavy rain for extra durability.
- Use waterproof cushions and UV-resistant fabric for comfort.
⚠️ Safety Tips During Assembly
- Always wear glasses and gloves.
- Secure pieces with clamps while drilling or screwing.
- Never insert screws without pilot holes.
- Work in a dry, ventilated environment.
Wooden Lounge Chair Assembly Made Easy
🧰 Common Issues and Solutions
| Problem | Cause | Quick Fix |
|---|---|---|
| Loose screws | Wood expansion or oversized hole | Fill with wood dowel + new screw |
| Warped wood | Assembly in humid conditions | Dry wood, adjust joints |
| Squeaking | Dry or loose joints | Apply wax/oil, check screws |
| Peeling finish | Inappropriate outdoor coating | Sand and recoat with UV-resistant varnish |
🪑 Types of Brackets for Assembling a Wooden Lounge Chair | Complete Guide
Using the right brackets in assembling a wooden lounge chair is crucial for stability, strength, and durability. Here’s a detailed guide to the common types of brackets, their applications, and benefits.
1️⃣ L-Bracket
Features:
- The simplest and most commonly used bracket in woodworking
- Shaped like an L, connects two pieces of wood at a 90-degree angle
Applications:
- Attaching legs to the chair’s frame
- Reinforcing corners and under-seat supports
- Connecting the backrest to the legs
Benefits:
- Easy to install with short or medium screws
- Strengthens corners and prevents wobbling
- Affordable and widely available
2️⃣ T-Bracket
Features:
- Shaped like a T
- Connects a vertical piece to a horizontal piece
Applications:
- Attaching rear legs to seat slats
- Securing the backrest to the main frame
Benefits:
- Better weight distribution at the joint
- Increased vertical strength
- Ideal for chairs with tall backrests
Wooden Lounge Chair Assembly Made Easy
3️⃣ U-Bracket / Corner Bracket
Features:
- U-shaped or angled bracket for connecting three points or reinforcing frames
Applications:
- Reinforcing leg-to-horizontal rail joints
- Supporting seat boards to prevent warping
Benefits:
- Creates a strong, stable frame
- Prevents lateral movement and squeaks
4️⃣ Cross Brace / X-Bracket
Features:
- Shaped like an X or two crossed braces
- Made from metal or strong wood
Applications:
- Reinforcing the chair frame to prevent bending or wobbling
- Suitable for large chairs or heavy outdoor furniture
Benefits:
- Provides stability in all directions
- Supports high weight loads
5️⃣ Pocket Hole / Hidden Bracket
Features:
- Installed inside pre-drilled pocket holes
- Keeps screws hidden for a clean, professional look
Applications:
- Connecting backrest and armrest to legs
- Creates 90-degree joints with a minimalist finish
Benefits:
- Clean and professional appearance
- Adequate strength for medium-weight chairs
6️⃣ Heavy-Duty L-Bracket
Features:
- Thickened, reinforced L-Bracket
- Designed for large or outdoor lounge chairs
Applications:
- Reinforcing legs and backrest-to-seat joints
- Withstands heavy weight and prevents wood deformation
Benefits:
- More durable than standard L-Brackets
- Longer lifespan, ideal for outdoor use
🔹 Key Tips for Using Brackets in Wooden Chair Assembly
Combine brackets with wood glue: increases stability and prevents wobbling
Choose the right bracket: light brackets for small chairs, heavy-duty for large outdoor chairs
Use appropriate screws and washers: stainless steel screws are essential for outdoor chairs
Pre-drill holes: prevents wood splitting during bracket installation
Bracket placement: focus on corners, legs, and under-seat areas
🔹 Conclusion: Combine Art, Comfort, and Durability
Assembling a wooden outdoor lounge chair is more than a simple woodworking project — it’s a creative process that brings beauty and function to your outdoor space.
With the right materials, precise assembly, and proper maintenance, your chair will remain sturdy and stylish for many years.
So grab your tools, follow these steps, and enjoy the satisfaction of sitting in a chair you built with your own hands.
📞 Need Help?
Let us take care of the hard work while you sit back and relax.
📍 Serving: Austin, Round Rock, Cedar Park & more
📱 Call or Text: (737) 420-6992
🌐 Visit: https://lavahandyman.com