Guide to Assembling an Eight-Seater Dining Table
Introduction
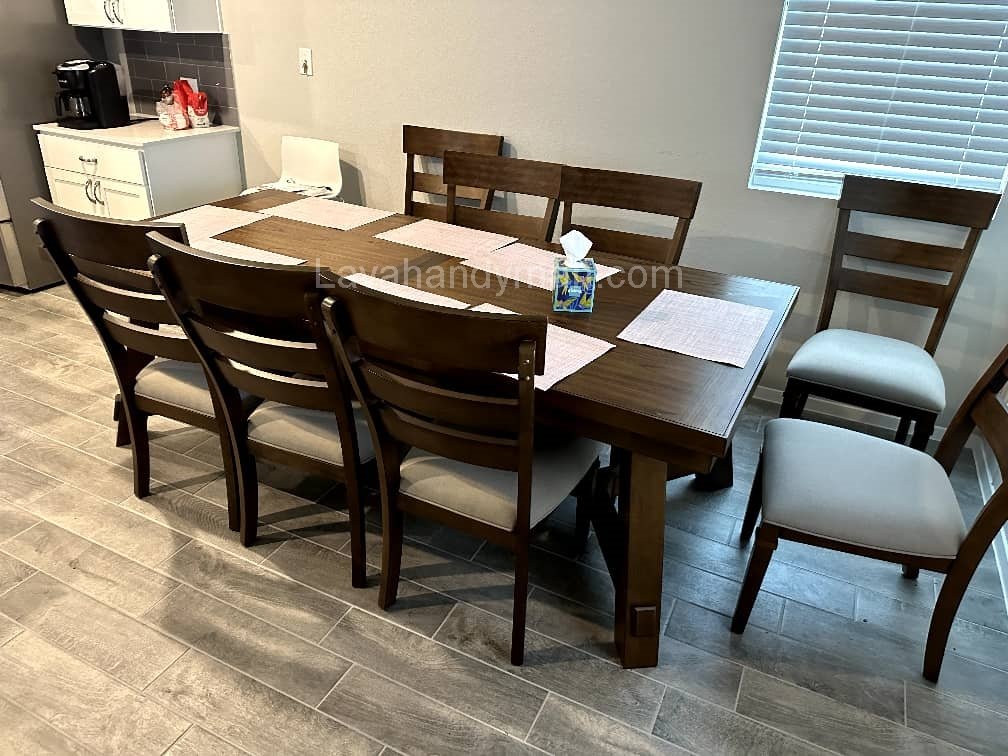
With the growing popularity of modular and flat-pack furniture, many household items — including dining tables — are now shipped as disassembled units. This not only makes transportation easier but also reduces the risk of damage during moving. One of the most commonly used pieces of such furniture is the eight-seater dining table, which due to its size, requires accurate and careful assembly to ensure stability, safety, and aesthetic appeal.
This article offers a complete, step-by-step guide for assembling such a table. Even if you have no prior experience with furniture assembly, by following this manual you can confidently and successfully assemble your table and enjoy using it for years to come.

Guide to Assembling an Eight-Seater Dining Table
Chapter 1: Preparation Before Assembly
Check All Components
Before you begin, make sure the package is complete. A typical eight-seater dining table set includes:
- Main tabletop (one or two pieces)
- Four or more legs
- Supporting beams or frames for underside reinforcement
- Screws, bolts, washers
- Simple tools like Allen wrenches (included in some models)
- Instruction manual
Spread the components out on a flat, soft surface (like a carpet or blanket) and compare them with the parts list in the manual. If any part is missing or damaged, contact the seller before proceeding.
Choose a Suitable Assembly Location
Ensure the workspace has:
- Ample room to move around
- Good lighting
- A flat, level floor
- No fragile objects nearby
It’s best to assemble the table in the room where it will be used, to avoid the need for moving it later.
Guide to Assembling an Eight-Seater Dining Table
Chapter 2: Required Tools
Even though some tables come with basic tools, it’s better to use high-quality personal tools. Recommended tools:
- Phillips and flathead screwdrivers
- Allen key and adjustable wrench
- Rubber mallet (if needed)
- Measuring tape or level
- Work gloves for hand protection
Using proper tools ensures faster and safer assembly and helps prevent damage to components.
Guide to Assembling an Eight-Seater Dining Table
Chapter 3: Assembly Steps
Step 1: Install Underside Frame or Beams
Some models include a frame or support beams that must be attached beneath the tabletop before the legs are installed. This structure provides additional strength and balance.
- Carefully flip the tabletop upside down onto the soft surface.
- Position the beams according to the manual.
- Attach the beams using the provided screws or bolts.
- Initially tighten the screws by hand only, to allow for adjustments.
Step 2: Attach the Legs
- Position each leg in its designated location on the frame or tabletop.
- Use the supplied hardware (screws, washers) to secure the legs.
- Begin tightening all screws by hand first.
- Once all legs are aligned, fully tighten the screws using tools.
If your table features angled or cross-support legs, follow the specific order and positioning as outlined in the instructions.
Step 3: Final Checks and Flipping the Table
Once all legs are attached:
- With a second person, carefully flip the table upright.
- Use a level to ensure the table is even.
- If the table is wobbly, check and re-tighten the necessary screws.
- If included, install plastic or rubber screw caps for a clean finish.
Guide to Assembling an Eight-Seater Dining Table
Chapter 4: Safety and Practical Tips
Assembly Safety Tips
- Wear gloves to avoid cuts or scrapes.
- Handle sharp or electric tools with care.
- Keep children away from the workspace.
- Avoid placing heavy items on the table immediately after assembly.
Technical Notes
- Only use wood glue if explicitly instructed in the manual.
- Do not overtighten screws to avoid stripping the threads.
- Some tables have adjustable feet; use these to level the table on uneven floors.
Guide to Assembling an Eight-Seater Dining Table
Chapter 5: Maintenance and Table Care
How to Keep Your Table in Great Condition
- Clean the surface with a soft, damp cloth. Avoid harsh chemicals.
- Refrain from dragging sharp or heavy items across the table.
- Periodically check and retighten screws.
- Use protective covers if the table is in a humid or outdoor area.
Tips to Extend Lifespan
- Use placemats, runners, or tablecloths to preserve the finish.
- Apply furniture wax or wood oil once a year for wooden parts.
- Cover the table after each use if it’s placed outdoors.
Guide to Assembling an Eight-Seater Dining Table
Conclusion
Assembling an eight-seater dining table may seem overwhelming at first glance, but with proper preparation, the right tools, and by following the outlined steps, the process becomes simple and rewarding.
By paying attention to safety, assembly precision, and ongoing maintenance, you can ensure your table stays beautiful and functional for many years — becoming a central place for shared meals and memories with family and friends.
Appendix: Quick Assembly Checklist
| Step | Action | Key Tip |
|---|---|---|
| Check Components | Count and inspect all parts | Don’t proceed if anything is missing or broken |
| Attach Support Beams | Fix to the underside of the tabletop | Hand-tighten first, adjust, then fully tighten |
| Install Legs | Attach with screws and washers | Align and level all legs before tightening |
| Final Tightening | Secure all bolts | Avoid overtightening to protect threads |
| Leveling Table | Use a level or adjust feet | Prevent wobbling or uneven surfaces |
| Cleaning & Care | Use soft cloth, protect surface | Enhances longevity and appearance |
Guide to Assembling an Eight-Seater Dining Table
🛠 Tools Required for Assembling an Eight-Seater Dining Table
Proper assembly of a large dining table requires both precision and the right tools. While many parts come pre-drilled and ready for installation, using appropriate tools will make the process faster, safer, and more accurate.
Below is a guide to the essential tools you’ll need for assembling an eight-seater dining table:
1. Allen Key (Hex Key)
- The most commonly used tool in furniture assembly.
- Used to tighten hex socket screws, which are common in dining table frames.
- Often included in the table’s packaging, though having a quality set is highly recommended.
2. Flathead & Phillips Screwdriver
- Used for standard flat or cross-head screws.
- May be required for attaching frames, brackets, or decorative elements.
- A long screwdriver can be helpful in hard-to-reach spots.
Guide to Assembling an Eight-Seater Dining Table
3. Adjustable Wrench or Spanner
- Ideal for tightening nuts, bolts, or larger screws.
- Especially useful for tables with metal frames or leg brackets.
4. Rubber Mallet
- Helps gently tap pieces into place without damaging the wood or finish.
- A safer alternative to metal hammers during assembly.
Guide to Assembling an Eight-Seater Dining Table
5. Level
- Ensures the tabletop is completely even after assembly.
- Prevents wobbling or misaligned legs.
6. Measuring Tape or Ruler
- Helps accurately measure distances between legs or supports.
- Useful for aligning components before tightening.
7. Work Gloves
- Protect your hands from scratches, splinters, or sharp metal edges.
- Especially useful when handling raw wood or tight screws.
Guide to Assembling an Eight-Seater Dining Table
8. Cordless Drill with Bit Set (Optional)
- Speeds up the process when many screws are involved.
- Should be used carefully to avoid stripping threads or cracking wood.
- Recommended for users with prior experience.
Tools Often Included in the Packaging:
✅ Allen key
✅ Screws and nuts
✅ Washers and plastic caps
✅ Illustrated instruction manual
Guide to Assembling an Eight-Seater Dining Table
Important Tips:
Tool quality directly affects the final result.
Prepare all tools before beginning the assembly.
Avoid using power tools if you lack experience.
⏱ Estimated Time Required to Assemble an Eight-Seater Dining Table
The time needed to assemble a dining table for eight people varies depending on several factors. However, on average, the following estimates apply:
Guide to Assembling an Eight-Seater Dining Table
⏳ Average Assembly Time:
| Conditions | Estimated Time |
|---|---|
| Experienced user, tools ready, clear instructions | 30–45 minutes |
| Semi-skilled user, basic tools, decent manual | 45–90 minutes |
| Beginner, limited tools, missing/unclear manual | 1.5–2.5 hours |
📌 Factors That Affect Assembly Time:
1. User Experience
- Skilled individuals with prior furniture assembly experience work faster and more efficiently.
2. Table Design
- Tables with a simple design (flat top and four legs) are quicker to assemble.
- Designs with cross-legs, drawers, support frames, or extension mechanisms take more time.
3. Quality of the Instruction Manual
- Clear, illustrated manuals (in the user’s language) can significantly speed up the process.
- Poor or missing instructions cause delays and confusion.
4. Number of People Assembling
- Two-person assembly is faster, safer, and more efficient—especially when flipping the table upright.
5. Tool Availability
- Having the right tools ready (Allen key, screwdriver, level, etc.) helps reduce time and effort.
✅ Tips to Reduce Assembly Time:
Assemble the table in its final location to avoid unnecessary moving.
Lay out all parts and tools before starting.
Read the instruction manual completely before beginning.
Work with a second person when possible.
✅ Pro Tip for Better Dining Table Assembly:
Before fully tightening all the screws, loosely attach all the parts first to allow for proper alignment and leveling.
🔧 Why is this important?
If you tighten all screws from the start, and one of the legs is slightly misaligned, it can:
- Cause the legs to wobble
- Make the table unstable
- Damage screw threads or warp the parts
- Result in an uneven tabletop
✅ By loosely attaching everything first, you give yourself flexibility to align all components properly. Once the table is fully aligned and leveled, go back and tighten all screws evenly and securely.
📞 Need Help?
Let us take care of the hard work while you sit back and relax.
📍 Serving: Austin, Round Rock, Cedar Park & more
📱 Call or Text: (737) 420-6992
🌐 Visit: https://lavahandyman.com