Complete Guide to Installing RGB Lighting Under Your Bed
1. Introduction
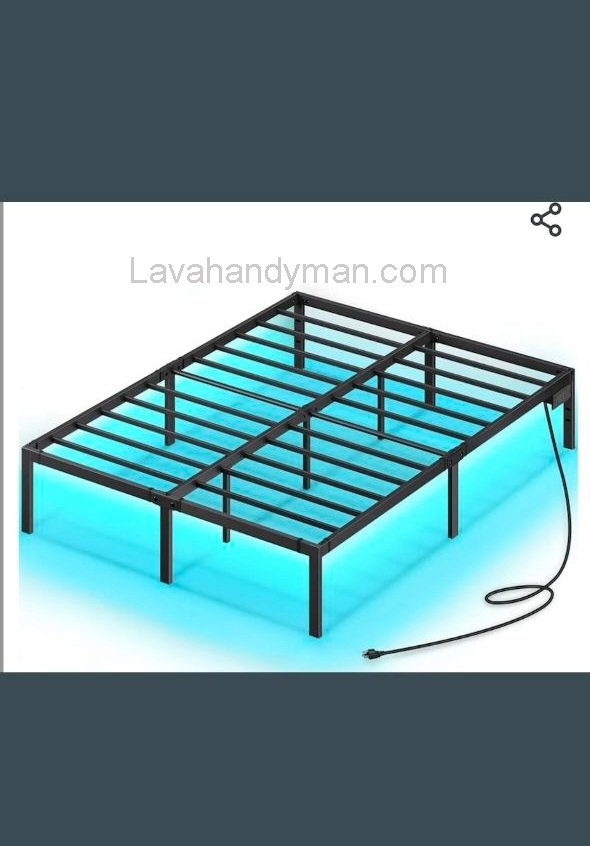
Lighting plays a vital role in interior design. RGB LED lights have gained massive popularity in recent years, especially for bedroom aesthetics. Installing RGB strip lights under your bed is a creative and effective way to add a modern, calming atmosphere to your space. It’s stylish, relaxing, and easy to install.
2. Why Use RGB Lighting Under the Bed?
Here are the main benefits:
- Visual Appeal: A modern and eye-catching look with dynamic colors.
- Calming Atmosphere: Soft lighting creates a relaxing space, perfect for winding down.
- Functional Night Light: A great alternative to traditional bedside lamps.
- Energy Efficiency: LED RGB strips consume very little electricity.
- Nighttime Visibility: Helps you move around safely without harsh lighting.
Complete Guide to Installing RGB Lighting Under Your Bed

3. Types of RGB Lights Suitable for Under-Bed Use
| Type | Features | Best For |
|---|---|---|
| Standard LED Strip | Affordable, easy to install | Most users |
| Smart RGB Strip | Wi-Fi/Bluetooth, app or voice-controlled | Tech lovers |
| Remote-Controlled | Operated with a handheld remote | Simplicity |
| Music-Sync Strip | Lights change with music beats | Teens, gamers |
4. Tools and Equipment You’ll Need
Essentials:
- RGB LED Strip (3–5 meters depending on your bed size)
- 12V Power Adapter
- RGB Controller (basic or smart)
- Remote or mobile app (depending on the model)
- Mounting clips, adhesive tape, or brackets
Optional:
- Motion Sensor
- Cable management channels or sleeves
- Plug-in timer
- Strong double-sided tape
Complete Guide to Installing RGB Lighting Under Your Bed
5. Step-by-Step Installation Guide
1. Measure Your Bed
Measure the length and width of your bed frame to determine how much strip lighting you’ll need.
2. Clean the Surface
Wipe down and dry the area under the bed for better adhesion.
3. Cut the Strip (if needed)
Only cut along the marked lines (usually scissor icons) to avoid damaging the strip.
4. Connect Components
Attach the LED strip to the RGB controller, then connect it to the power adapter. Make sure the positive and negative terminals align.
5. Test the System
Before mounting, plug everything in and test to ensure all parts are working.
6. Mount the Strip
Adhere the strip along the inner or outer edge of the bed frame. Use clips or additional tape if needed.
7. Hide the Wires
Use cable channels or clips to keep wires neat and out of sight.
Complete Guide to Installing RGB Lighting Under Your Bed
6. Color Settings & Light Control
A) Using a Remote:
- Quick color changes
- Brightness control
- Preset modes (Fade, Flash, Smooth)
B) Using Mobile App or Voice Assistant:
- Remote control via smartphone
- Timers and scheduling
- Sync with music
- Integration with Google Assistant or Alexa
Popular Lighting Modes:
- Static Colors: For soft, steady light while sleeping
- Fade: Gradual color transitions
- Flash: Quick color jumps
- Sound Sync: Colors move with the beat of your music
Complete Guide to Installing RGB Lighting Under Your Bed
7. Safety and Maintenance Tips
- Use waterproof strips if moisture is a concern.
- Keep the power adapter in a ventilated, dry area.
- Always unplug the lights before cleaning or adjusting.
- Do not bend the strips too tightly.
- Disconnect the power when moving or lifting the bed.
8. Creative Lighting Ideas
- Use different colors on each side of the bed
- Sync under-bed lights with music for a party vibe
- Add a motion sensor for automatic nighttime lighting
- Combine with other RGB setups (closet, TV, or ceiling)
- Use a timer to auto-turn off the lights after you fall asleep
9. Common Problems & Solutions
| Problem | Likely Cause | Solution |
|---|---|---|
| Lights won’t turn on | Loose wires or faulty adapter | Recheck connections and replace adapter if needed |
| Only one color works | Disconnected RGB pin or cut wire | Check for damage or re-solder |
| Remote not working | Weak battery or blocked signal | Replace batteries, move closer |
| Dim lighting | Inadequate power supply | Use a higher-wattage adapter |
| Strip won’t stick | Dusty or oily surface | Use stronger tape or mounting clips |
Complete Guide to Installing RGB Lighting Under Your Bed
🧰 Tools & Materials Needed for Installing RGB Lights Under the Bed
✅ Essential Tools:
| Tool | Purpose |
|---|---|
| RGB LED Strip | Main light source to be installed under the bed |
| Power Adapter (12V or 24V) | Provides electricity to the LED strip |
| RGB Controller | Manages colors, brightness, and light modes |
| Remote Control or Mobile App | To control the lights remotely (depending on the model) |
| Strong Double-Sided Tape or Hot Glue | For attaching the strip to the bed frame |
| Cable Ties (Zip Ties) | For better cable management and secure installation |
| Extension Cable | To reach the power outlet if it’s far from the bed |
| Scissors or Cutter | To cut the strip at designated cut points (usually marked with scissors icon) |
| Multimeter (optional) | For checking electrical connections (mostly for professionals) |
Complete Guide to Installing RGB Lighting Under Your Bed
✅ Optional Tools for a More Professional Setup:
| Tool | Purpose |
|---|---|
| Cable Ducts or Plastic Channels | To hide and organize wires for safety and cleaner look |
| Motion Sensor | Automatically turns lights on when someone approaches at night |
| Plug-In Timer | Automatically turns lights on/off at specific times |
| Hot Glue Gun | For a stronger, more permanent attachment of strips or holders |
| Screwdriver or Hand Drill | If you want to mount brackets or the controller securely to the wall or bed frame |
Complete Guide to Installing RGB Lighting Under Your Bed
🎯 Pro Tips:
For a more permanent and clean result, using cable ducts and motion sensors is highly recommended.
If your bed is made of metal or wood, the type of adhesive may affect how well the strip sticks.
Look for LED strips with authentic 3M adhesive backing for easier installation.
Complete Guide to Installing RGB Lighting Under Your Bed
🔍 Comparison of RGB Under-Bed Lighting Methods & Tools
| Feature | ✅ Basic Strip with Remote | 🧭 With Motion Sensor | 📱 Smart (Wi-Fi/Bluetooth) | 🎶 Music-Reactive |
|---|---|---|---|---|
| Ease of Installation | Very easy | Easy | Moderately complex | Easy |
| Approximate Cost | 💰 Low | 💰💰 Medium | 💰💰💰 High | 💰💰 Medium |
| Control Method | Manual remote | Sensor + remote | App + voice assistant | Remote + music sync |
| Required Skill Level | Beginner | Beginner | Intermediate | Beginner to intermediate |
| Lighting Effects Variety | Limited | Moderate | Very high | High and dynamic |
| Best For | General use | Nighttime auto-lighting | Smart homes & tech users | Gamers, teens, music lovers |
| Power Consumption | Low | Low | Moderate | Moderate |
Complete Guide to Installing RGB Lighting Under Your Bed
✅ Quick Summary:
- 🔹 Basic with Remote: Ideal for general users and low budgets.
- 🔹 With Motion Sensor: Great for automatic lighting at night.
- 🔹 Smart Model: Perfect for tech enthusiasts and smart home setups.
- 🔹 Music-Reactive: Best for energetic spaces and syncing with audio.
🌈 Importance & Key Features of Under-Bed RGB Lighting
📌 Importance:
- Enhances Room Aesthetics: Adds a modern, stylish, and vibrant vibe to any bedroom.
- Creates a Relaxing Mood: Soft ambient light improves comfort and sleep quality.
- Smart Night Light Alternative: Indirect lighting is gentle on the eyes at night.
- Improved Safety: Prevents tripping or bumping into furniture in the dark.
- Mood Customization: Choose colors based on emotion, activity, or ambiance.
Complete Guide to Installing RGB Lighting Under Your Bed
⭐ Features:
Optional timer and motion-sensor features on advanced models
Support for millions of colors
Multiple light modes: static, flashing, breathing, music-sync
Controlled via remote, smartphone app, or voice assistant
Ultra-low power consumption
Easy to install and reposition
Compatible with other LED setups (TV, ceiling, desk)
Complete Guide to Installing RGB Lighting Under Your Bed
🛠️ Simple and Professional Steps to Install RGB Lighting Under Your Bed
1. Choose the Right LED Strip
- Select a standard or smart RGB strip based on your bed size and needs.
- Usually, 2 to 5 meters is sufficient.
2. Prepare Tools and Test the Strip
- Gather the LED strip, power adapter, controller, remote/app, double-sided tape, and scissors.
- Before installation, connect the strip to power and test it.
3. Clean the Installation Surface
- Wipe the underside of the bed to remove dust and grease.
- This ensures better adhesion of the strip’s tape.
Complete Guide to Installing RGB Lighting Under Your Bed
4. Cut the Strip if Needed
- Cut only at marked points (scissors icons).
- Use connectors or soldering if you need to reconnect.
5. Attach the Strip to the Bed
- Carefully unroll and stick the strip along the edge or underside of the bed.
- If the tape isn’t strong enough, use strong double-sided tape or hot glue.
6. Connect and Final Test
- Connect the strip to the controller, then to the power adapter.
- Plug in and test colors and modes via remote or app.
- Make sure polarity is correct to avoid damage.
7. Manage the Cables
- Organize cables with ties or ducts and keep them safe.
- Prevent tangling or damage.
8. Smart Settings (Optional)
- If you have a smart strip, install and set up the related app.
- Enable timers or motion sensors for added convenience.
Complete Guide to Installing RGB Lighting Under Your Bed
✅ Final Tip:
Following these steps will let you quickly and easily install beautiful, functional RGB lighting under your bed and transform your room’s ambiance.
Types of Brackets for Installing RGB Lighting Under the Bed
1. Plastic Clip-On Brackets
- Easy installation without complicated tools
- Designed to hold the LED strip securely and prevent it from falling
- Usually attached to the bed with screws or double-sided tape
Complete Guide to Installing RGB Lighting Under Your Bed
2. Aluminum Channels
- For professional and neat installation
- Helps dissipate heat from the LED strip, increasing its lifespan
- Provides a clean look and even light diffusion through frosted or clear covers
- Installed with screws or double-sided tape
3. Magnetic Brackets
- Used with LED strips that have magnetic backs
- Easy installation and quick removal
- Suitable for metal beds or metal frames
4. Adhesive or Sticker Brackets
- Strong double-sided tape applied directly to the bed
- Ideal for quick and temporary installation
- Adhesion may weaken on dirty or uneven surfaces
Complete Guide to Installing RGB Lighting Under Your Bed
Important Notes:
Always measure your LED strip size and installation area before buying.
For permanent and sturdy installation, aluminum channels are the best choice.
For quick setups without drilling, clip-on or adhesive brackets work better.
Complete Guide to Installing RGB Lighting Under Your Bed
Conclusion
Installing RGB lights under your bed is a simple yet powerful way to enhance your room’s mood and aesthetic. Whether you’re going for a calming, futuristic, or fun vibe, RGB strips provide flexibility and visual flair. With just a few tools and minimal effort, you can transform your space into something unique and personal.
📞 Need Help?
Let us take care of the hard work while you sit back and relax.
📍 Serving: Austin, Round Rock, Cedar Park & more
📱 Call or Text: (737) 420-6992
🌐 Visit: https://lavahandyman.com