Installing Decorative Wall Art in the Living Room: A Complete & Practical Guide
1. Introduction
The living room is the heart of a home—where guests are welcomed and first impressions are made. Decorative art plays a vital role in shaping this space’s atmosphere. When carefully chosen and correctly installed, such pieces add both aesthetic appeal and emotional warmth.
2. How Decorative Art Impacts the Living Room
Decorative art enhances your living room by:
- Boosting Visual Appeal
It breaks up bland walls and creates convincing focal points. - Expressing Personality
Artwork communicates your tastes, interests, and individuality. - Balancing Aesthetics
Proper placement alongside furniture and lighting makes the space feel harmonious.
Installing Decorative Wall Art in the Living Room: A Complete & Practical Guide

3. Types of Artworks Ideal for Living Areas
- Traditional & Modern Paintings
Oil, watercolor, or ink on canvas—perfect for classic or neo-classic decor. - Digital Prints
Affordable, versatile prints on canvas or MDF, ideal for contemporary spaces. - 3D & Textured Art
Pieces made from wood, metal, or resin add depth and visual interest—great for industrial or modern themes. - Mirrored & Mixed-Media Art
Combine mirror elements with wood or metal frames to reflect light and make rooms feel larger.
4. Principles for Choosing Art to Match Your Decor
- Match Your Room’s Style
Classic decor calls for ornate frames; modern decor favors clean lines. - Coordinate Colors
Choose complementary or analogous hues to match furniture and rugs. - Proportion Matters
Select artwork sized appropriately for your walls—large enough to stand out, but not overwhelming.
5. Finding the Perfect Spot in the Living Room
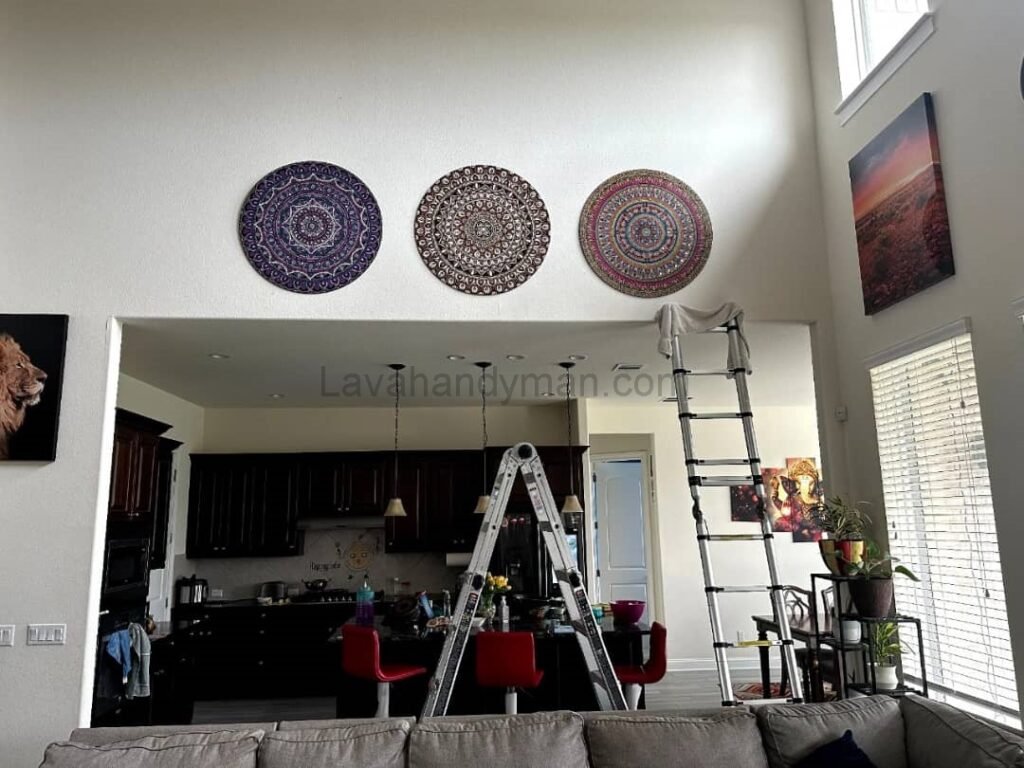
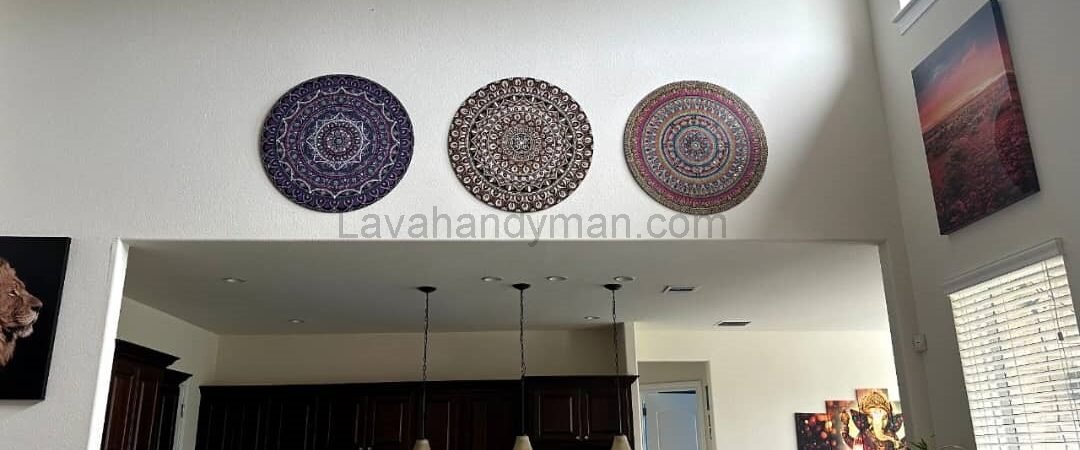
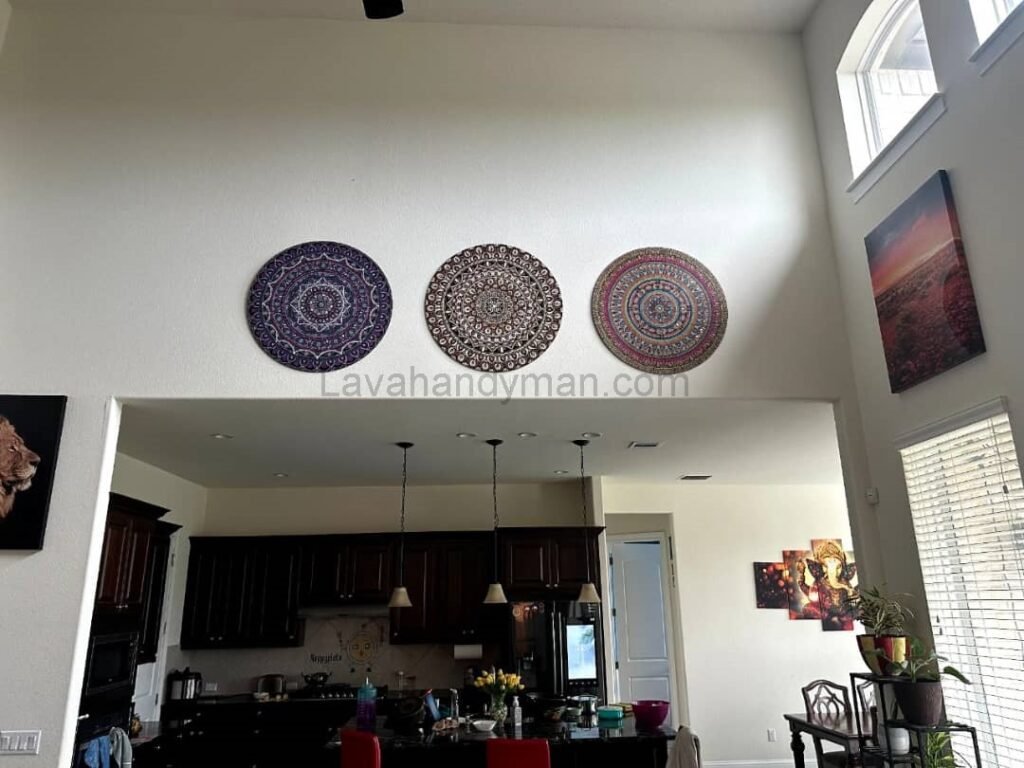
- Behind the Sofa – the classic and most impactful location.
- Next to the Entrance – welcomes guests visually.
- Above a Console or Sideboard – just ensure proper spacing.
- Between Windows or Doors – if space allows, creates visual balance.
Golden Tip: Hang art so its center is around 145–150 cm (57–59 inches) from the floor—at natural eye level.
Installing Decorative Wall Art in the Living Room: A Complete & Practical Guide
6. Tools & Materials Needed
| Tool | Purpose |
|---|---|
| Tape measure & level | Precisely locate and align wall art |
| Drill & wall plugs | Secure mounting for heavier pieces on solid walls |
| Adhesive hooks | Hang lightweight art without drilling |
| Hammer & nails | For simple installations on wooden surfaces |
| Pencil/marker | Sketch mounting points before installation |
7. Step-by-Step Installation Guide
- Measure Target Area
Determine the center and dimensions of the art placement. - Mark Drill or Hook Locations
Use your tools to make accurate markings. - Install Appropriate Hardware
Choose wall plugs for weighty pieces and adhesive hooks for lighter ones. - Hang & Level Your Art
Hang securely and double-check alignment with the level.
Installing Decorative Wall Art in the Living Room: A Complete & Practical Guide
8. Arranging Multiple Pieces as a Gallery Wall
To create a gallery arrangement:
- Spacing: Keep about 5–10 cm (2–4 inches) between frames.
- Layout Patterns: You can go for symmetry, a grid design, or a more artistic irregular layout.
- Trial Run: Arrange frames on the floor first and photograph the setup before hanging.
9. Lighting Tips for Wall Art
- Use Accent Lighting
Directional spotlights or wall-mounted fixtures emphasize artwork. - Choose Light Temperature Wisely
Warm lights (~3000 K) suit traditional pieces; cooler whites (~4000 K) work better with modern art. - Avoid Glare & Fading
Stay away from harsh direct light and harsh sun exposure. - Layer With Dimmers
Use dimmers to adjust ambiance depending on time and mood.
Installing Decorative Wall Art in the Living Room: A Complete & Practical Guide
10. Maintenance & Care
| Artwork Type | Care Instructions |
|---|---|
| Canvas Paintings | Dust with a soft brush; avoid direct sunlight |
| Digital Prints | Wipe gently with a dry or lightly damp cloth; skip chemicals |
| Mirror or Glass Art | Use a lint-free cloth and mild glass-cleaner |
| Wood/Metal Accents | Apply appropriate oil or wax annually |
11. Costs & Budgeting
| Item | Estimated Cost (USD) |
|---|---|
| Small printed artwork | $10–25 |
| Handmade canvas painting | $75+ |
| Installation hardware | $2–8 |
| Wall-mounted lighting | $15–40 each |
| Professional installation | $10–25 per piece |
For a living room with two mid-sized pieces, a reasonable budget is around $100–175 including hardware and lighting.
Installing Decorative Wall Art in the Living Room: A Complete & Practical Guide
Comprehensive Guide to Lighting Decorative Wall Art in the Living Room:
Proper lighting can dramatically enhance your wall art, making details sharper and the living room more inviting. Poor lighting, on the other hand, can wash out colors or cause distracting glare.
Goals of Lighting Wall Art:
- Highlight the artwork as a focal point
- Enhance color vibrancy and texture
- Create visual depth and dimension
- Coordinate with overall room lighting
Suitable Types of Lighting for Wall Art:
- Spotlights: Focused and directional, perfect for special pieces
- Track Lights: Adjustable and movable, ideal for multiple artworks
- Wall Washers: Soft, even light, great for large pieces
- Hidden Strip Lights: Installed behind or around the artwork for a modern effect
- LED Lights Inside Frames: Best for modern or digital prints
Installing Decorative Wall Art in the Living Room: A Complete & Practical Guide
Technical Lighting Specifications:
| Feature | Recommended Value | Brief Explanation |
|---|---|---|
| Color Temperature (CCT) | 2700K to 4000K | Warm light for classic art, natural light for modern pieces |
| Brightness (Lumens) | 150 to 300 lumens | Depends on artwork size and distance |
| Color Rendering Index (CRI) | Above 90 | For accurate and vivid color display |
| Beam Angle | 15° to 45° | Focused light without glare |
Angle and Placement of Lights:
- Ideal lighting angle is between 30° and 45° to ensure even illumination without reflections.
- Lights should be installed approximately 25 to 40 cm above the artwork to avoid shadows.
Installing Decorative Wall Art in the Living Room: A Complete & Practical Guide
Matching Light with Artwork Style:
| Artwork Style | Suitable Light Temperature | Recommended Light Type |
|---|---|---|
| Classic (Oil Paint) | Warm light (2700–3000K) | Wall-mounted or spotlights with bronze frames |
| Modern (Digital Prints) | Neutral white (3500–4000K) | Track or hidden strip lighting |
| 3D and Textured Art | Moderate intensity side lighting | Hidden back lighting or spotlights |
| Photos and Portraits | Neutral white (3000–3500K) | Surface-mounted or track lights with soft angles |
Important Lighting Tips:
- Avoid direct sunlight to prevent fading and damage.
- Use dimmers to adjust light intensity for different moods and times.
- Avoid cold blue light (6000K+) which distorts colors and creates a cold atmosphere.
- For multiple artworks, assign individual appropriate lighting to each piece.
Installing Decorative Wall Art in the Living Room: A Complete & Practical Guide
Lighting Multiple Artworks (Gallery Wall):
- Track lighting with adjustable heads is ideal.
- Maintain 50 to 70 cm spacing between lights.
- Use uniform brightness but vary the angles for balanced effect.
Recommended Equipment:
| Equipment Type | Feature | Approximate Price (USD) |
|---|---|---|
| Clip-on LED Light | Easy to mount on frame | $8 – $15 |
| COB Track Light | Even, adjustable lighting | $5 – $20 |
| Wall-mounted LED Light | Soft and uniform illumination | $10 – $25 |
| Touch or Dial Dimmer | Easy brightness control | $4 – $10 |
Essential Tools for Installing and Lighting Decorative Wall Art in the Living Room
Using the right tools is crucial for properly installing and professionally lighting your wall art. These tools help ensure a precise, safe, and attractive setup, while achieving the best lighting results.
Installing Decorative Wall Art in the Living Room: A Complete & Practical Guide
1. Measuring and Marking Tools
- Measuring Tape: For accurate measurement of installation points
- Level: To make sure the artwork is hung straight without tilting
- Pencil or Marker: For marking installation spots without damaging the wall
2. Installation Tools
- Drill and Drill Bits: For making precise holes in hard walls
- Wall Plugs (Anchors): To secure screws firmly in the wall
- Screws and Nails: For fixing the artwork onto the wall
- Hammer: To drive nails or help insert wall plugs
Installing Decorative Wall Art in the Living Room: A Complete & Practical Guide
3. Lighting Tools
- Artwork Lights (Spotlights, Track Lights): Adjustable, focused lighting
- Track System: To hold and reposition lights easily
- Dimmer Switch: To control light intensity and create the right ambiance
- Cables and Electrical Connectors: For proper wiring of the lighting setup
4. Auxiliary Tools
- Step Ladder or Stool: For safe access to higher wall areas
- Painter’s Tape: For temporary holding or marking without wall damage
- Safety Gloves: To protect hands when using power or sharp tools
Important Tips
Using high-quality tools ensures more precise installation and longer-lasting results.
Measure and mark installation points carefully before drilling.
Use wall plugs suited for your wall type (drywall, concrete, wood).
Follow electrical safety guidelines when installing lights or consult a professional.
Installing Decorative Wall Art in the Living Room: A Complete & Practical Guide
Step-by-Step Guide to Installing Decorative Wall Art in the Living Room:
Step 1: Choose the Right Location
- Select a visible wall with sufficient natural or artificial light.
- Hang the artwork so its center is at eye level (about 150 to 170 cm from the floor).
Step 2: Measure and Mark
- Use a tape measure to mark the exact installation spot.
- Mark the spot lightly with a pencil.
- Use a level to ensure the mark is straight.
Step 3: Prepare the Wall
- For hard walls, drill holes at the marked points.
- Insert appropriate wall plugs (anchors) into the holes.
Step 4: Install Screws or Nails
- Screw screws into the wall plugs or hammer nails into softer walls.
- Leave the screws or nails protruding enough (5–10 mm) to hold the artwork securely.
Step 5: Hang the Artwork
- Carefully hang the artwork on the screws or nails.
- Secure the hanging wire or hooks on the back of the artwork onto the screws.
Step 6: Final Adjustment
- Use a level to check the artwork is straight.
- Adjust the position slightly if needed.
Step 7: Install Lighting (Optional)
- Mount artwork lights in the proper position.
- Ensure the light is even and free of glare on the artwork.
- Adjust dimmers and light intensity as needed.
Important Tips
Follow safety guidelines when using tools and electrical equipment.
Double-check all measurements before drilling.
Use stronger wall plugs and screws for heavier artwork.
Conclusion
Hanging decorative art is much more than mounting objects—it’s a process that blends artistic sensibility and practical precision. From choosing the right frame and achieving the correct layout to lighting and maintenance, each step contributes to creating a cohesive, welcoming space. With a thoughtful approach, your living room will be transformed into a visually stunning and expressive environment.
At LavaHandyman.com, we don’t just help you understand TV tech — we also offer expert TV installation services, making sure your home entertainment setup looks and performs at its best.
📞 Need Help?
Let us take care of the hard work while you sit back and relax.
📍 Serving: Austin, Round Rock, Cedar Park & more
📱 Call or Text: (737) 420-6992
🌐 Visit: https://lavahandyman.com