Installing a Whiteboard in the Bedroom | Full Guide
Introduction
If you’re looking to organize your daily routine, boost focus, or improve learning, installing a whiteboard in your bedroom can be a simple yet highly effective solution. A whiteboard isn’t just an educational tool—it can also contribute to your bedroom’s interior design. In this comprehensive article, we’ll cover the benefits, types of whiteboards, where and how to install them, and professional tips for daily use.
Why Install a Whiteboard in Your Bedroom?
- Daily planning at home
- Increased focus in a personal space
- Enhancing memory by writing down key notes
- An alternative to cluttered note-taking apps
Installing a Whiteboard in the Bedroom | Full Guide

Types of Whiteboards for Home Use
| Type | Features | Best For |
|---|---|---|
| Glass | Durable, sleek, modern look | Contemporary bedrooms |
| Melamine | Magnetic, cost-effective | Everyday home use |
| Basic/Chalk | Affordable, traditional style | Quick personal notes |
Best Places to Install a Whiteboard in the Bedroom
To maximize space and functionality, consider installing the whiteboard in one of the following areas:
- Above your desk or study table
- Next to your bed for morning goals or notes
- Behind the door, ideal for smaller bedrooms
Installing a Whiteboard in the Bedroom | Full Guide
How to Properly Install a Whiteboard on the Wall
Tools Needed:
- Drill
- Screws & wall plugs
- Level
- Measuring tape
- Whiteboard markers
- Mounting brackets (if needed)
Installation Steps:
- Mark the precise spot on the wall.
- Use a pencil to mark where the screws will go.
- Drill the holes into the wall.
- Insert wall plugs and screws.
- Mount the whiteboard and ensure it’s level and secure.
Installing a Whiteboard in the Bedroom | Full Guide
Maintenance & Smart Use of a Whiteboard
- Use dry-erase markers with a medium tip for clarity.
- Clean the board regularly with microfiber cloth or special spray to prevent ghosting.
- Divide the board into sections for: to-do lists, weekly goals, reminders, and more.
Pros and Cons of Having a Whiteboard in the Bedroom
Pros:
- Personal organization and goal tracking
- Supports better learning and memory retention
- Adds a creative and stylish touch to the room
Cons:
- Needs regular cleaning
- Takes up some wall space
- Can be a distraction for some people
Installing a Whiteboard in the Bedroom | Full Guide
Alternatives and Complementary Tools
If you’re short on wall space or prefer a different method, try:
- Daily planner notebooks
- Digital apps like Trello or Google Keep
- Corkboards or pinboards for reminders and visuals
🧰 Tools and Equipment for Installing a Whiteboard on the Wall
🔩 1. Essential Basic Tools
| Tool | Purpose |
|---|---|
| Drill (corded or cordless) | To make holes in the wall for screws |
| Appropriate drill bits | Choose based on wall type (wood, drywall, masonry) |
| Wall plugs (anchors) | To hold screws securely in drywall, brick, or concrete |
| Screws (usually 3–4 cm) | To attach the board or brackets to the wall |
| Screwdriver (manual or electric) | For fastening screws into wall plugs |
| Level (bubble or laser) | Ensures the whiteboard is mounted straight |
| Measuring tape or metal ruler | Accurate measurement of placement and screw spacing |
| Pencil or marker | For marking drill points on the wall |
🧲 2. Optional or Advanced Tools
| Tool | Purpose |
|---|---|
| Mounting brackets or rails | Recommended for large or glass whiteboards for added stability |
| Heavy-duty double-sided tape (e.g. 3M VHB) | For lightweight or temporary installations without drilling |
| Wall hooks or clips | For specific board designs meant to be hung |
| Laser distance measurer | For higher precision in large spaces |
| Work gloves | Safety when using tools like drills |
| Safety goggles | Eye protection during drilling or cutting |
Installing a Whiteboard in the Bedroom | Full Guide
🛠️ 3. Tools for Specific Wall Types
For drywall or plasterboard:
- Toggle or butterfly anchors
- Drywall-compatible drill bit
- Lightweight mounting brackets
For concrete or brick walls:
- Heavy-duty wall plugs
- Masonry or hammer drill bits
- Hammer drill (percussion drill)
Installing a Whiteboard in the Bedroom | Full Guide
✅ Important Tips Before Installation
For magnetic whiteboards, avoid placing them near strong magnetic fields like large speakers or heavy-duty power outlets.
Check the weight and type of your whiteboard: Glass or oversized boards require stronger anchors and careful drilling.
Know your wall material: Each type requires specific tools and installation methods.
Plan placement carefully: Install the board at a comfortable height, away from moisture and near good lighting.
🎯 Why Install a Whiteboard in the Bedroom?
Adding a whiteboard to your bedroom can:
- Help you stay focused and organized
- Make your daily goals and reminders visible
- Create an inspiring workspace for study or personal projects
🧰 Tools You’ll Need for Installing a Wall-Mounted Whiteboard
- Electric or cordless drill
- Drill bits (for concrete, drywall, or wood)
- Wall plugs (standard or butterfly anchors)
- Screws and screwdriver
- Level (bubble or laser)
- Measuring tape, pencil or marker
- Mounting brackets (for heavy or framed boards)
- Strong double-sided tape (for lightweight boards)
🛠️ Step-by-Step Instructions to Install a Whiteboard on a Bedroom Wall
1. Identify the Type of Wall
Before drilling, determine the wall material:
- Drywall or plasterboard → use butterfly anchors
- Brick or concrete wall → use heavy-duty plugs and masonry bit
- Wooden wall → screws can be driven directly
2. Choose the Right Spot for Your Whiteboard
Key points when choosing the location:
- Mount it near your desk or workspace
- Ensure it’s exposed to soft, even lighting (avoid direct sunlight)
- Keep it away from moisture or heat sources
📌 SEO Tip: Installing a whiteboard at the right ergonomic height improves focus and daily productivity.
3. Mark the Drilling Points Accurately
- Use a measuring tape and level to determine exact placement
- Mark screw hole positions with a pencil
- Ensure spacing matches the board’s pre-drilled holes or brackets
4. Drill the Holes and Insert Anchors
- Drill 4–6 cm deep holes using an appropriate drill bit
- Push wall plugs securely into the holes
- Double-check that holes are aligned with the level
5. Mount the Brackets or Screws
For framed or glass whiteboards:
- Use mounting brackets and attach them to the wall
For frameless boards: - Screw directly into the board through the marked points
- Add plastic washers if needed to protect the surface
6. Hang and Adjust the Whiteboard
- Carefully lift and place the whiteboard on brackets or screws
- Tighten any visible front screws
- Use a level again to confirm it’s perfectly straight
- Optional: Use non-slip pads between board and wall to prevent movement
7. Final Testing and Cleanup
- Write with a dry-erase marker and test for easy erasing
- Ensure the board is firmly attached and doesn’t shake
- Clean the surface with microfiber cloth or whiteboard spray
⚠️ Safety and Pro Tips During Installation
For heavy whiteboards, ask someone to assist during installation
Wear gloves and safety goggles
Use a wire/cable detector to check for hidden electrical lines before drilling
📏 What Is the Ideal Height to Install a Whiteboard on a Wall?
Choosing the right height for installing a whiteboard plays a crucial role in comfort, usability, and visibility. Below is a professional breakdown of recommended heights and key considerations based on various use cases.
✅ General Standard for Whiteboard Installation:
- The center of the whiteboard should be 140–150 cm (55–59 inches) from the floor, which aligns with the average adult eye level while standing.
🎯 Recommended Height Table by Usage Type:
| Usage Type | Suggested Height (Center of Board from Floor) | Notes |
|---|---|---|
| Personal use (standing) | 140–150 cm (55–59 in) | Ideal for daily planning |
| Desk-side use (seated) | 110–120 cm (43–47 in) | Best for seated writing |
| Children (under 10 years old) | 90–110 cm (35–43 in) | Adjust based on child’s height |
| Large boards | Bottom edge: 85–100 cm Top edge: max 200 cm | Ensures full reachability |
🛠️ Important Tips When Choosing Whiteboard Height:
Environment Consideration: If mounted above a desk, leave at least 20–30 cm (8–12 in) between the bottom of the board and the desktop.
Viewing Angle: Users should be able to look straight at the center of the board without tilting their head too far up or down.
Accessibility: All parts of the board—from top to bottom—should be reachable without a step stool or excessive stretching.
Type of Usage: For task planning, drawing, or note-taking, the whiteboard’s center should align with natural eye level.
🔍 Types of Whiteboard Materials Suitable for a Bedroom
1. Melamine Whiteboard
- Features:
- Affordable and budget-friendly
- Made from fiberboard coated with melamine
- Suitable for light to moderate use
- Advantages:
- Lightweight
- Easy to install
- Disadvantages:
- Less resistant to scratches
- Can stain over time and becomes harder to clean
- Best for:
- Home use with occasional writing and short-term planning
Installing a Whiteboard in the Bedroom | Full Guide
2. Magnetic Whiteboard
- Features:
- Contains a metal (usually steel) backing
- Allows use of magnets to attach notes and papers
- Available in white or colored surfaces
- Advantages:
- Multi-functional and practical
- Can hold notes with magnets
- More durable and scratch-resistant than melamine
- Disadvantages:
- Higher price compared to melamine boards
- Best for:
- Bedrooms of students, home offices, and multitasking spaces
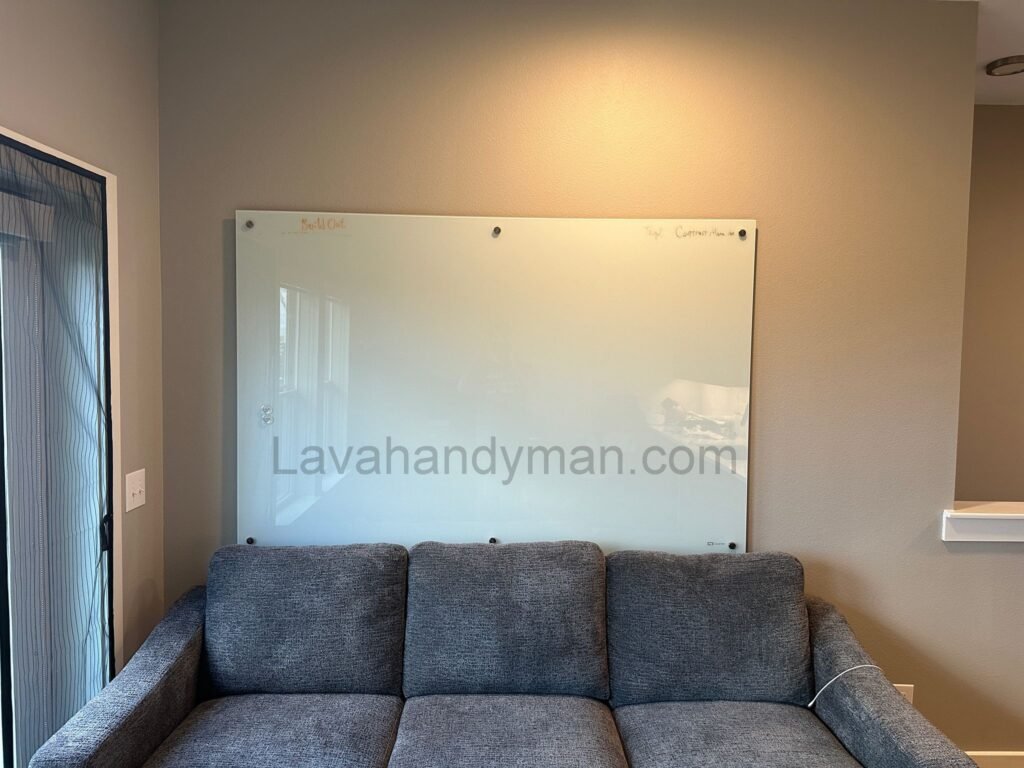
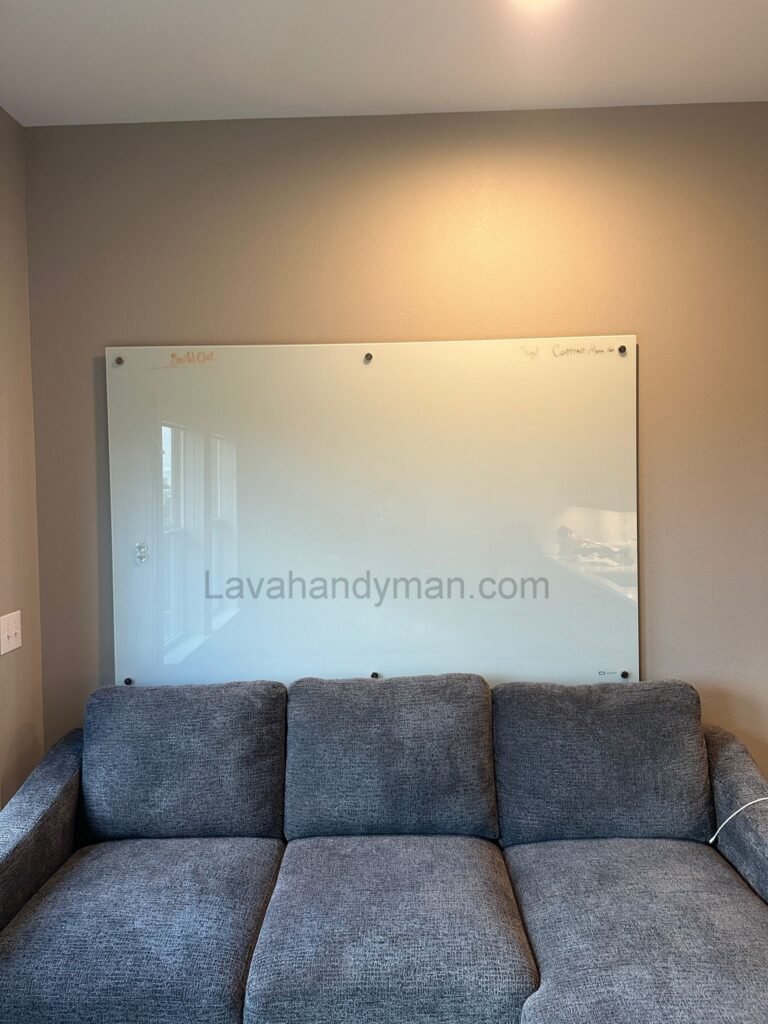
3. Glass Whiteboard
- Features:
- Made from tempered or laminated glass
- Very durable and visually appealing
- Smooth surface that resists scratches
- Advantages:
- Stylish and modern look
- Easy to clean without staining
- Long-lasting and antibacterial surface
- Disadvantages:
- Heavier and more expensive
- Requires professional installation
- Best for:
- Modern bedrooms, home offices, and those who value aesthetics
Installing a Whiteboard in the Bedroom | Full Guide
4. Steel Whiteboard
- Features:
- Steel surface with an enamel coating
- Usually magnetic
- Advantages:
- Very durable and long-lasting
- Excellent scratch resistance
- Disadvantages:
- Heavy
- Relatively expensive
- Best for:
- Long-term use and high-traffic environments
📌 Key Tips for Choosing the Right Whiteboard Material for Your Bedroom
Installation: Glass and steel boards require secure and precise mounting.
Budget: Melamine is cost-effective but less durable.
Usage: For frequent or heavy use, glass or magnetic boards are better choices.
Room size: Lightweight melamine boards suit smaller or minimalist spaces.
Decoration style: Glass boards fit well in modern, luxurious interiors.
Conclusion + Call to Action
By installing a wall-mounted whiteboard in your bedroom, you’ll create a more organized mind, more productive days, and a personalized space for planning and reflection. If you haven’t yet, now is the perfect time to choose the right board and start building your vision—right on your bedroom wall!
At LavaHandyman.com, we don’t just help you understand TV tech — we also offer expert TV installation services, making sure your home entertainment setup looks and performs at its best.
📞 Need Help?
Let us take care of the hard work while you sit back and relax.
📍 Serving: Austin, Round Rock, Cedar Park & more
📱 Call or Text: (737) 420-6992
🌐 Visit: https://lavahandyman.com